


Thursday 28 October 2010
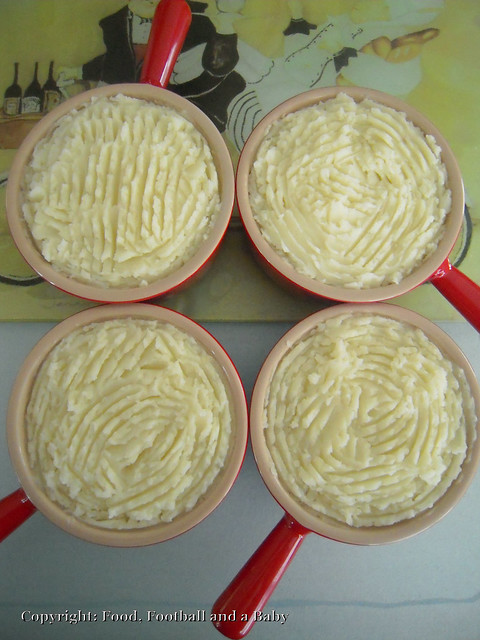
A lovely creamy fish pie is the perfect winter fare. Succulent pieces of lightly cooked moist fish, the smokiness of the peppered mackerel, the bite of the prawns, soft creaminess of the mashed potato, all add up to a delicious mouthful of perfect, warm and comforting food.
For me, this is what food is all about. I made this pie yesterday and we all sat around the wood stove in the basement, listening to music and eating like it was going out of fashion. I served the pie with a simple side of steamed asparagus with butter, and you can serve it just on its own or with any vegetables you have handy.
I know this will seem like a long and messy recipe, but trust me, once you've made and tasted this pie, it will be your favourite food forever. Bought fish pies will be a distant memory, and you will laugh with disdain when you pass them in the frozen aisle of the supermarket!
The best thing about this dish is that, if you're going to make it anyway, you can double the recipe, then freeze your own batch in a foil container, so all you have to do for an easy meal, is to turn on the oven and defrost the pie :-)

Recipe:
(Printable Recipe)
2 fillets of any white fish or salmon
2 fillets of smoked fish (I used smoked mackerel)
Around 20 fresh prawns or a couple big handfuls cooked small shrimp
Around 15 mushrooms, sliced (optional)
2 hard boiled eggs, chopped (optional)
Around 500 ml milk (add an extra 100 ml cream, for a richer sauce)
2 big bay leaves
Pinch nutmeg
½ tsp dried thyme (or 4 sprigs fresh thyme)
1 tsp dried oregano (or 2/3 sprigs fresh)
8 peppercorns, lightly crushed or fresh ground pepper to taste
½ roughly chopped onion
4 or 5 large floury potatoes
Handful fresh parsley, chopped fine
3 tbsp (or thereabouts) corn flour
Butter (enough to sauté the flour and mushrooms in and mash potatoes)
Plain milk for mashing the potatoes in
1. Boil and mash potatoes with butter and milk till slightly stiff, but still creamy. Keep aside to cool.
2. Meanwhile, put the white fish into a pot. Add the bay leaves, nutmeg, thyme, oregano, peppercorns or pepper and onion to the pot and pour in milk until it just covers the fish. Poach on a gentle heat until fish is just cooked. Gently lift only the fish out. Leave the remaining ingredients in the milk for as long as possible (it infuses in the flavours) and add the prawns (leave out this step if using cooked prawns).
3. Once the prawns are cooked, strain the milk into a pan, pick out prawns and discard the rest of the herbs. Reserve the strained milk for the sauce.
4. In another pan, melt the butter and add the corn flour. Sauté on a low flame for 3 minutes or so and then add the milk, whisking until you have a smooth, thick sauce. Taste and season, then take off the heat. Stir in chopped parsley.
5. Fry the mushrooms in a little butter until tender and keep aside.
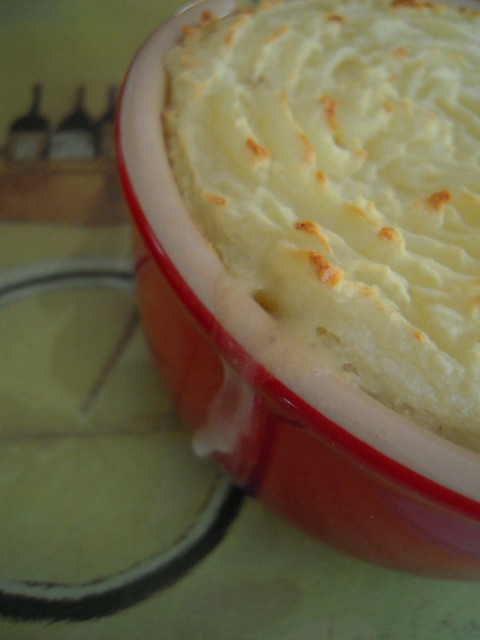
6. To assemble the pie, flake the white and smoked fish into a bowl. Add the prawns, mushrooms and chopped eggs. Pour over the sauce and mix gently. Pop the mixture into a baking dish and top with mashed potato, roughing up the potato on top (You can freeze the pie at this stage, but if freezing, make sure that the filling, sauce and potatoes are cold before assembling) Or you could do as I did, and assemble into individual soup bowls or ramekins.
7. Bake until the top is lightly browned and the fish mixture underneath is bubbling.
Tuesday 19 October 2010
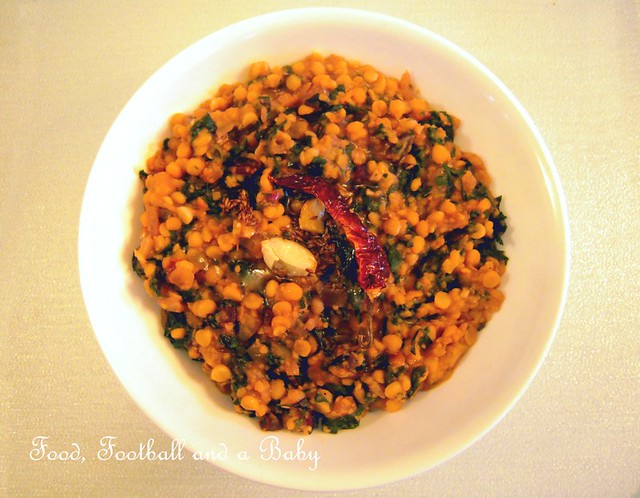
This recipe is based on one from my Aunt Edna. Its usually made using palak, or a version of spinach. However, I had a fresh bunch of Swiss chard in the fridge, given to us by the friend who runs the guerilla garden (yup, will tell you all about that soon!). I decided to see if Swiss chard would work instead of spinach in this dish, and it did. Worked a treat actually, since its cooked down with some delicious spices and really adds its unique taste to the finished dal.
We all know the difficulties of getting greens into little ones. Mine used to be an angel with food, she would just shovel down anything I put in front of her. However, for the last few weeks, she's become a little monster when it comes to food and trying new things. I've always been conscious of the fact that she doesn't eat meat, and recently has also started to refuse fish and seafood, so I need to constantly be on watch that she gets her protein and iron through diet. This easy dish ticks both the nutritional boxes, plus I serve it with rice, so she gets some carbs too. She actually tried this dal, for which I was grateful :-)
You can use palak or spinach in this dish instead of the chard, if you wish. Its easy to make, apart from the cooking time for the chana dal (split peas). It gets even easier if you have a pressure cooker (oh, how I miss mine) You can also make a big batch and freeze some of the dish. Just reheat and serve with rice and Indian pickle! It also works well as a side dish for a more elaborate meal. Just increase the quantities to feed more people!
Recipe:
(Printable recipe)
1 1/2 cup chana dal (yellow split peas), picked over and rinsed (325ml)
1 medium onion, diced
1 medium tomato, diced
2 flakes garlic, chopped fine +
1 inch piece of ginger, chopped fine
1 green chilly (add more for increased spiciness, but 1 works well)
1/2 tsp chilli powder
1/2 tsp ground turmeric
1/2 tsp ground black pepper
Around 8 cups loosely packed Swiss chard leaves, shredded into thin strips
Salt to taste (or 1 tsp)
1 tbsp oil
For the tadka (tempering):
1 tbsp oil
1/2 tsp cumin seeds
1 dried long mild red chilli
1 flake of garlic, smashed, but left fairly whole
Method:
In a pot, cover the split peas with water, and boil till the lentils are cooked and soft (around 45 minutes). Drain and rinse the cooked lentils. Return to the pot and crush roughly. Season with the salt.
In a shallow pan, heat the oil. Add the onions and fry for about 5 minutes, till just starting to brown around the edges. Add the ginger, garlic and green chilli to the pan. Fry for another minute. Add the diced tomato, and the chill powder, turmeric and pepper and cook for a further 5 minutes, until the tomato is soft. Throw in the shredded Swiss chard, and cook until the chard is wilted completely, another 5 - 7 minutes.
Combine the onion and spice mixture with the cooked lentils, adding a little hot water (around 1/4 cup) so the dish isn't too dry. Mix well.
For the tempering, heat the oil in a small pan. When the oil is hot, add the cumin seeds, red chilly and smashed garlic. Fry for 30 seconds, then pour the whole lot into the lentil mixture, covering immediately to keep in the aromas. Give the dish a good stir before serving.

Hope you guys like it!
Also, I had a few questions about how the baby was doing. Here's a recent picture of her in Olds, Alberta, posing by an old barn on the college campus :-)

Sunday 17 October 2010
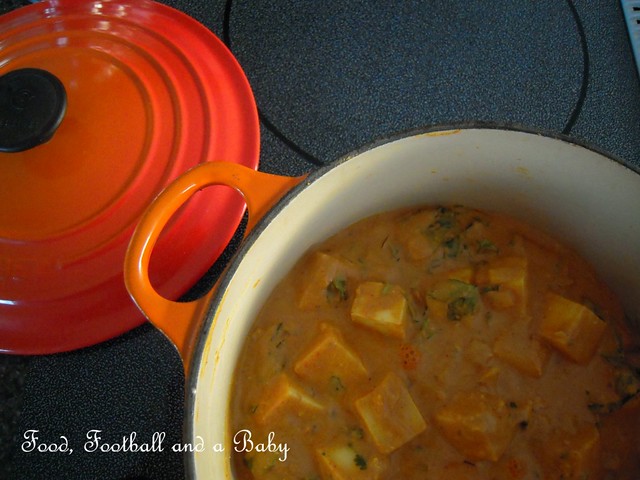
I actually feel a bit funny when I use the word 'balti' to describe food. Because, in India, balti means bucket and no cook would ever serve anything in a bucket :-) However, so-called 'balti cooking' is famous in the UK, where balti is taken to refer to a 'karahi' or 'kadai' a wok like serving dish, in which the food is actually cooked.
Leaving aside the bucket debates and Birmingham's decision to patent the 'balti', I first tasted this style of cooking in Southall in London. I loved its unique flavours, as its a cross between tangy and spicy, creamy yet light! Balti dishes are also surprisingly quick to cook. For example, this dish took me all of 20 minutes, from start to finish, which makes it ideal for a weekday supper. Mine is not a fully authentic recipe, but still tastes fresh and lovely.
Paneer is full of protein, which is an added bonus. And you can toss in vegetables like green peppers or peas to make this dish more substantial, if you wish. Its versatile in that you can replace paneer with cooked chicken or prawns for a non-vegetarian dinner party or everyday dish. This dish freezes well, just defrost then microwave for a quick lunch or supper. Its best served with rice, rotis or chapathis.
Recipe:
(Printable recipe)
1/2 cup (250 ml) plain yoghurt
1 and half tbsp tomato paste
1/2 tsp chilli powder (increase for added spiciness)
2 garlic flakes, crushed
1/2 inch ginger, grated to a paste
1 tbsp ground coriander
2 tsp garam masala
2 tsp amchur (dried mango powder)
1/2 tsp ground turmeric
1 and half tsp salt or to taste
1 small onion, diced fine
1 tbsp vegetable oil plus a little more to fry the paneer in (use ghee if you're not counting calories)
1 tsp cumin seeds
Around 400g paneer, cubed
Around 1/4 cup single cream or half and half (125 ml)
Handful chopped fresh coriander
In a bowl, whisk together the yoghurt, tomato paste, ginger and garlic paste, chilli powder, garam masala, ground coriander, amchur and 1 tsp of the salt. Taste, and add more salt if you think it needs it. Or reserve the salt till the dish is cooked.
In a pan, heat the oil, then toss in the cumin seeds. Fry for 10 seconds, then add the onion and fry till onion turns light brown, around 5 - 6 minutes. Add the yoghurt mixture to the pan, and cook, stirring for rougly 3 - 4 minutes.
In a frying pan, add a little more oil and shallow fry the paneer until the cubes are golden (you can skip this step, if you wish, but if you're making the dish to freeze or a special ocasion, then its advisable to fry the paneer first).
Add the paneer to the sauce, and stir very gently until the cubes are coated with the sauce. Drizzle in the cream, gently stirring it in. Taste and adjust seasoning to your taste. Heat until the sauce is just beginning to bubble, then take off the heat and garnish with the fresh coriander.
Saturday 16 October 2010
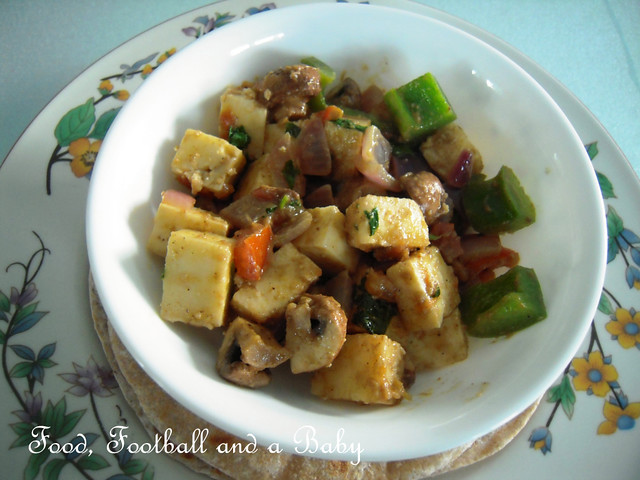
This is one of those recipes that isn't really a recipe. It just came together when I needed something quick to eat, but at the same time had to be fairly nutritious and full of flavour. When I need flavour, I always turn to my trusted chaat masalas (I use Everest Chaat Masala), a couple tablespoons of which can turn the most blah of ingredients into a tangy and spicy taste sensation. Chaat is normally used for street foods, but I think its a shame we don't use this versatile mix for everyday dinners as well. The spices are not overly spicy, and the amchur (dried mango powder) adds an unusual, but refreshing tang to the mix of spices.
I always have paneer in the fridge that I bulk buy from the Ezee Mart in Garneau. If I am feeling particularly chef-like I even make my own. But nothing beats the convenience of slabs of paneer that can be marinated, grilled, stir fried, barbequed, curried and pretty much made into anything you fancy, really.
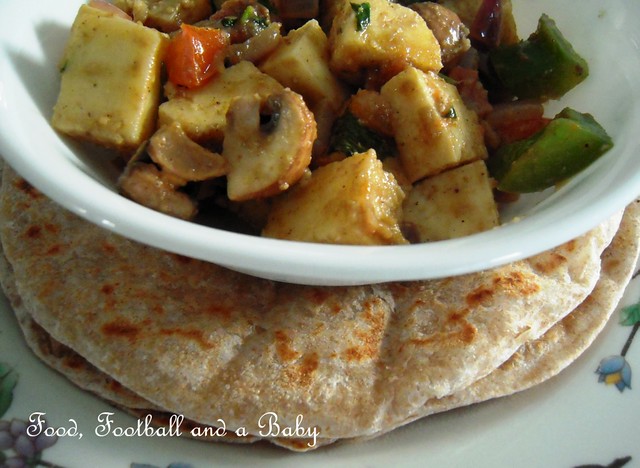
Other vegetables for this stir-fry are flexible, just use whatever needs using up. Serve with chapatis or pita or rice for a easy one-pot meal that makes life that little bit easier. A sprinkle of fresh coriander finishes the dish off nicely. And if you're in the mood I was when I made this dish, a nice glass of white wine works well on the side too :-)
Recipe:
A pack of paneer (abour 400g), cut into cubes
1 medium onion, diced fine
1/2 inch piece of ginger, grated
2 flakes garlic, grated
1 large, squishy tomato, chopped
Around 3 tablespoons of chaat masala plus a tbsp more for sprinkling
1/2 tsp mild chilli powder
Around 10 - 15 mushrooms, wiped and quartered
1 green or yellow pepper, chopped into squares
Salt, if you really need it (most chaat masalas almost always have salt in them)
A couple tbsp vegetable or olive oil
Handful chopped fresh coriander
In a saute pan, heat the oil, and toss in the onions. Cook for about 5 minutes, until softened, then stir in the ginger and garlic. Fry 1 minute, then add the tomatoes, chilli powder and the chaat masala. Fry for about 4 minutes or until toamtoes are soft.
Add mushrooms and peppers, and fry for 2 minutes. Add the paneer and stir and fry for another 5 minutes. Taste and adjust seasoning, adding more salt if you think you need it.
Sprinkle over a tbsp or so of chaat masala, and the fresh coriander, stir once, then serve.
Thursday 14 October 2010

I loved its combination of rich creamy ice cream, with a deep vein of delicious salted caramel, and the delicate crunch of sugared pecan praline. So I decided I would take on the challenge and see if I could replicate the exact flavours at home. I had already sort of succeeded in remaking Heinz baked beans so I upped the ante with this one. The other half sadly shook his head, and decided I had gone nuts (he meant pecans, maybe), I mean, I was trying to replicate the flavours of Haagen Dazs, for heaven's sake!! What was wrong with me? The child is too young for Haagen Dazs [that's what I tell her anyway :-)], so couldn't care less. So this one was all about me and my need for praline and cream ice cream.
I adapted a few different recipes from various sources to make this ice cream. The actual ice cream recipe is adapted from an old edition of 'The Joy of Cooking' that my in-laws owned. The salted caramel is from David Lebovitz's 'The Perfect Scoop'. The pralined pecans are from a 'hit or miss' recipe for nut praline that I used to make when I was a very young kid.
I went into this with an open mind, prepared to eat the results even if they didn't taste like the original (like I was going to toss ice cream away!!) But, to my utter surprise, the finished ice cream actually did taste like the original. It didn't look completely identical, but that may be because I used dark brown sugar instead of light brown or white (like I should have, but didn't have enough of either), but oh my, did it ever taste good. I think I have now officially died and gone to ice cream heaven!
Recipe:
For the butter ice cream:
11/2 cups whole or 2% milk (375 ml)
2 cups whipping or heavy cream (500 ml)
Around 20g unsalted butter
3/4 cup dark brown soft sugar (you can use light or white, if you wish)
5 egg yolks
Pinch of salt
1 tsp pure vanilla extract
For the salted caramel sauce:
45g butter, salted
75g sugar (measured to around 90ml in a cup)
1/2 cup half and half
1/2 tsp coarse salt (add another half tsp to taste, if you wish)
For the pecan praline:
1 cup pecans
1/2 tsp salt
1/4 cup water
1/2 cup, plus a little more sugar
To make the ice cream, gently heat the butter in a deep saucepan until it melts, then continue to cook until it turns a light brown colour. Do not let it burn, or it will taste bitter.
Add the milk to the butter and whisk in well. Heat just until the milk starts steaming, do not allow to burn.
In a deep bowl, mix the sugar and egg yolks together. Gently whisk in the warm butter and milk mixture, little by little, until its all incorporated. It is important to do this step slowly, as you don't want to cook the egg yolks. Now return the mixture to the pan, and over a low heat, cook, stirring constantly, until the mixture thickens into a smooth custard and coats the back of a spoon. Do not allow the mixture to boil as the custard will curdle and go grainy.
Once the custard is cooked, strain it into the 2 cups of cold whipping cream and add the vanilla and salt. Stir well and refrigerate until the ice cream mix is completely cold, overnight, if possible.
To make the salted caramel sauce, heat the butter in another deep pan until melted, whisk in the sugar and cook till the mixture is golden brown, not too dark. Take the pan off the heat, and whisk in 1/4 cup of the half and half. When adding the cream, the butter and sugar mixture will hiss and spit, and bubble up, so be careful. Whisk in the rest of the cream and return to a low heat until the sauce is silky smooth. Add the salt, and stir, taste and add more salt if you think you need it. Pour the caramel sauce a bowl, cover and refrigerate until ready to use. You will have to microwave on a low setting for 30 seconds to melt the sauce, and then cool it a little before layering.
To make the pecan praline, toast the pecans with the salt in a hot and heavy pan, for around 1 minute or so. In another pan, heat the water and sugar together, till the sugar melts. Add the pecans and cook, until the mixture turns sandy. Then, over a medium low heat wait until the sugar starts melting, and keep stirring until the pecans all are nicely coated with the sticky sugar mixture. Turn out onto some aluminium foil, and do resist popping a few into your mouth at this point [they can be burning hot, as I found out :-)] Let cool completely, then chop roughly using a big knife. They can be stored for upto a week in a airtight tin.
To assemble, churn the ice cream in an ice cream maker, until nice and creamy. In the last minute of churning, add most of the pecan praline, reserving some pieces for the garnish. Then, take out around a quarter of the icecream, and pop it into a freezer safe container. Pour some salted caramel sauce over the top. Add another layer of icecream, then more sauce. Finish with a layer of ice cream. Reserve a little sauce for serving over the icecream.
Freeze for at least 4 hours, till firm. This ice cream does tend to stay creamier than usual. Serve with warmed sauce and some of the reserved praline.
Do try not to get too addicted to the taste of this gorgeous ice cream :-)
Tuesday 5 October 2010
My all time favourite biriyani dish. I made it in the Masterchef kitchen, and even if it sounds like am bragging, I got the best comments I ever got on the show for that dish. Its relatively easy to put together, once you make the biriyani spice mix that goes with it. Its doesn't really need many accompaniments, just a simple side of yoghurt raita.
I don't claim that this recipe is completely authentic, but it has been a very much tried and tested family favourite, and fairly quick in terms of prep and cooking. You can also substitute prawns with meat or vegetables (don't marinate veggies, for the freshest flavour). I normally wouldn't post the recipe (its my secret dinner party weapon), but I've just filled up on the biriyani and it was my birthday dish, so I am feeling very generous and content :-)
I know the recipe appears long and complicated, but honestly, once you've made it one time, you'll be much much quicker the second time.
If you do try it out, please drop me a note to let me know how it went!!
Recipe:(Printable Recipe)
Prawns and Marinade:
Around 20 - 30 raw big prawns, fresh or frozen, shelled (you can leave the tails on if you wish, add more prawns if they are smaller)
3 tbsp biriyani spice from the whole amount
3 tbsp plain yoghurt
1 tbsp vegetable oil
1 tsp salt (or to taste)
The Sauce:
2 tbsp oil or ghee
2 medium onions or 1 big onion (chopped roughly)
20g almonds, blanched and peeled
1 - 2 green chillies, roughly chopped
4 cloves of garlic, peel and chop roughly
1 inch piece of ginger, peel and chop roughly
Big handful of fresh coriander (for grinding)
Big handful of fresh mint (same as above)
250 ml fresh set Greek yoghurt
4 large fresh tomatoes (chopped)
The remaining biriyani spice mix
Salt and Pepper (to taste, or 3 - 4 tsp salt, 1/2 tsp pepper)
Handful fresh coriander, chopped (for the end)
Handful fresh mint, chopped (same)
Rice
3 - 4 tbsp ghee, substitute vegetable oil if you wish
4 cups basmati rice
6 cups boiling water
3 generous pinches of saffron, or use turmeric, if you're feeling frugal
1 bay leaf
1 stick cinnamon
6 cloves
6 cardamom pods, crushed slightly
6 black peppercorns
1 tsp salt
Garnish
½ onion sliced thinly
Sprinkle of brown sugar
Big handful unsalted cashew nuts
Big handful raisins
Rose water
More fresh coriander and mint
Method:
- In a big bowl, marinate the prawns in the yoghurt, spices, salt and oil, for at least 1 hour.
- In a wide pan, on a medium flame, add a little oil or ghee and fry the chopped onion first, until the raw smell disappears, about 5 minutes. Then add the almonds, chillies, garlic, ginger, a handful each of of fresh coriander and fresh mint. Fry together for 4 minutes. Add the remaining biriyani spice mix, and fry together for another 3 – 4 minutes.
- Grind this fried mixture to a very smooth paste in a fairly powerful blender.
- Heat the oil in a heavy pot. Tip the ground paste into it and fry, gently stirring, for 5 minutes. Add the yoghurt. Simmer in the pot for about 25 – 30 minutes until all the raw smell has disappeared, and the spices don't hit the back of your throat while tasting. Simmer for a few minutes more, if its still raw. Add the chopped tomatoes and cook for another 10 - 15 minutes. Then add salt to taste.
- This sauce needs to be quite thick. Don’t add the prawns until the sauce is fairly thick. If the sauce is not thickening, do the following: In a small pan, heat 3 tsp ghee or oil, and then add 3 tsp of cornflour. Whisk together and fry for 2 minutes. Then add this to your sauce mixture, stirring vigorously until the sauce thickens.
- In a shallow pan, fry the prawns till they are just cooked through. Do not overcook them. You can also barbeque them, if you wish. Keep aside.
- When the sauce is fully cooked and thick, and there is no trace of raw spice in it, tip the cooked prawns, and chopped fresh coriander and mint. Stir together, and keep aside. Make sure you add the prawns at the last minute, or they will overcook in the sauce.
- Meanwhile, make the rice. Heat the ghee and add the cinnamon, cardamom, cloves, black pepper and bay leaf. Fry for about 30 seconds and add the rice and salt. Fry for 3 minutes. Meanwhile, soak the saffron in the boiling water. Add the water to the rice, cover with very tight fitting lid or aluminium foil and lid and cook on a low heat for 20 minutes. Turn off the heat, check if the rice is cooked. If it is, gently fluff up with a fork and keep aside. If its not cooked, re-cover it, and leave on a very low heat for another 10 minutes.
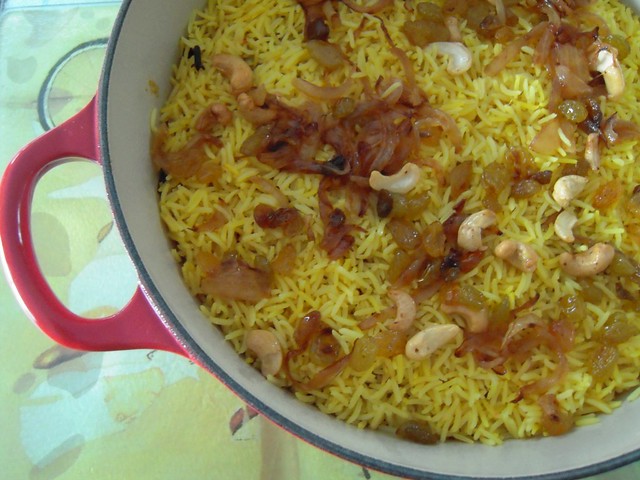
- For the garnish, caramelize the sliced onion with sugar till sweet and brown. Then toss the cashews and sultanas/ raisins in the same pan, very quickly (they burn easily, so keep an eye out). Keep aside
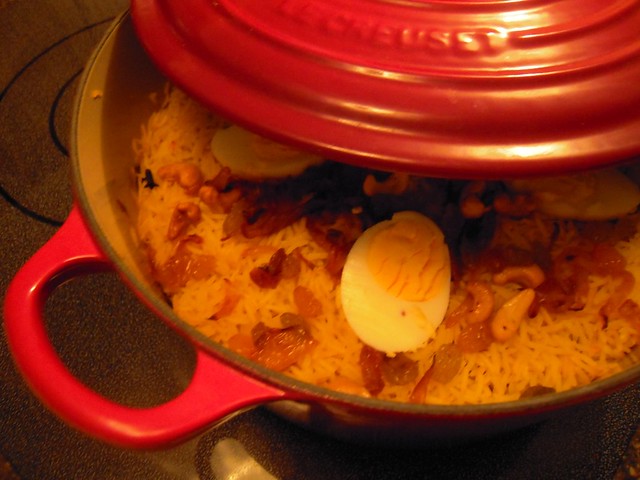
- Finally, To assemble, layer the rice at the bottom of a heavy, oven safe pot (I use my big Le Creuset for this). Then put one layer of prawn and sauce mixture over it. Toss in a few caramelized onions, raisins and cashews. Sprinkle a tiny bit of rosewater. Then layer more rice, then prawns, then onion/ raisin/ cashew, then rosewater, repeating until the rice and prawn mixture are used up. The top layer should be rice. Then top the rice with the fried onion, cashews and raisins. Sprinkle a little rose water on top. Garnish with more fresh coriander and mint.
- If you wish, you can boil a few eggs, and put them on top.
- The dish is now complete. If you are making it in advance, make sure rice and prawn mix are cool before layering, and once layered, cover the dish and put in the fridge. One hour before serving, preheat the over to 175 C, then place the covered dish in the oven. Turn off the oven. Leave the pot in the oven for roughly an hour or so the check to see if the biriyani is heated through (you can also decant to a serving dish and microwave, if you wish, but you lose the layers), then serve with a raita (basically, diced cucumber, tomatoes and fresh coriander tossed with some slightly salted yoghurt, flavoured with a touch of lemon juice and chilli powder).
- This dish freezes well after layering. If using from frozen, make sure you defrost thoroughly, then reheat in an oven (2 hours in an oven) or microwave.
- My, aren't you just exhausted by now?? Time to put your feet up, and get the other halves to bring you a nice glass of wine :-)
Sunday 3 October 2010
Just wanted to add this one on, as I have a delicious recipe for my prawn biriyani coming up that uses this spice mix. This recipe makes enough for one biriyani recipe. Increase quantities exponentially for a bigger batch that you can store in an airtight tin for up to a year.
This recipe has been born out of a lot of trial and error to find the spice level that suits our family, so do feel free to change it around to suit your spice tolerance.
Recipe:
3 inch stick of cinnamon or cassia bark
10 cloves
10 cardamom pods, lightly crushed (if using black cardamom, reduce to 5 pods)
4 bay leaves, dried
4 tbsp coriander seeds
2 tbsp whole cumin
1 tsp fenugreek seeds (methi)
1 tbsp fennel seeds
1/4 tsp of ground nutmeg (freshly grated is better)
3 or 4 pods of black cardamom, opened and lightly crushed (optional)
2 long mild red chillies
In a hot, heavy pan, add all the spices, except the nutmeg, and toss them around, constantly stirring, for around 1 - 3 minutes until they are lightly toasted and the kitchen smells heavenly! Do not allow the spices to burn, keep a sharp eye out.
Friday 1 October 2010
October 2nd 2010 has been announced as LiveSTRONG Day 2010. I first heard about this event from Ellie at Almost Bourdain and was immediatley inspired by it. The original LiveSTRONG with a Taste of Yellow event is hosted by Barbara at Winos and Foodies, and learnt more about both the charity and the event here.
In 2003, I lost my beloved grandfather to prostate cancer and I also have other friends and family members who have been affected by this disease. While some of these friends and family lived through this, others were not so lucky. So I have always been involved with any event that raises awareness about cancer and its effect on people. This is my humble effort to be more involved and also support the charity, originally founded by Lance Armstrong, the cyclist, who also survived this disease.
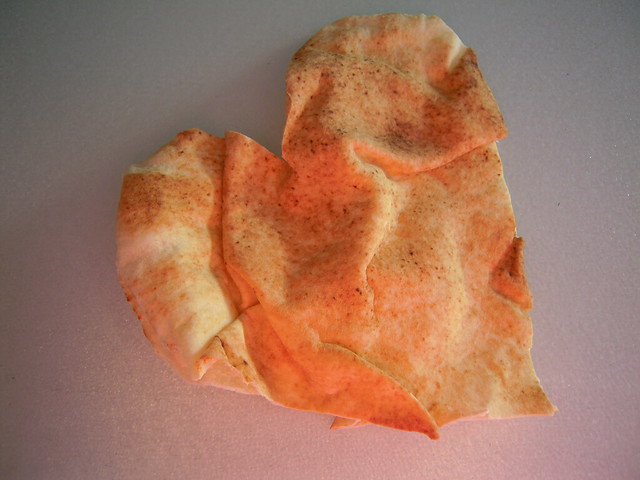
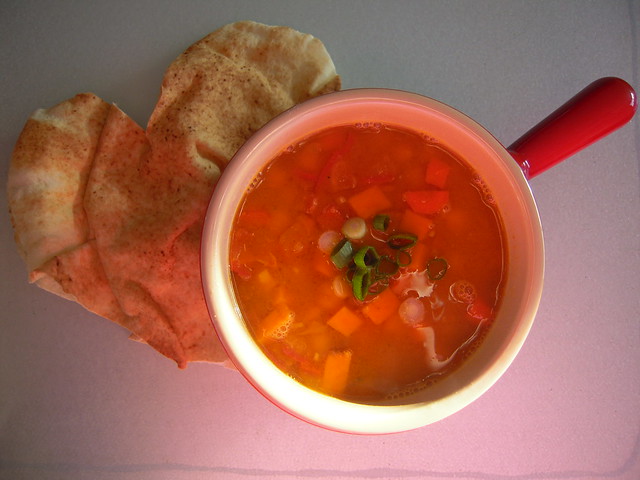
The theme for this year from blogger Barbara, is Yellow Heart. I did a bit of reading up around the theme, and was ready to go. I didn't have a lot of time to prepare, or go to the store, but luckily had enough ingredients for this easy yellow soup, which I usually serve with toasted pita bread. It took a matter of minutes to put the soup together and shape the pita into a heart as my contribution to the event.
These are my efforts, and the soup is dead easy to make for a weekday supper, and is packed full of vitamins and protein, and the spice turmeric, which has been linked to beating cancer. Obviously you can vary the recipe with whatever you have in the fridge!
Recipe:
1 medium onion, diced
1 tbsp olive oil
Around 1/2 - 3/4 cup yellow split pea lentils (chana dal), picked and rinsed
1 small sweet potato, cubed
2 carrots, cubed
1 big red tomato, chopped
1 tin of chickpeas (around 400g)
1/2 tsp of ground turmeric
1 flake garlic, chopped fine
1/2 inch piece of ginger, chopped fine
Around 1 litre of vegetable stock
Salt and Pepper to taste
2 spring onions, chopped, to garnish
In a pot, cook the lentils in enough water till they are soft, around 45 - 50 minutes.There won't be much water remaining, so don't bother draining them.
In another heavy pot, add the olive oil and saute the onion for about 2 minutes, until softened. Add the turmeric, ginger and garlic and saute for another 2 minutes.
Add the tomato, sweet potatoes and carrots, and stir around for about 4 minutes or so. Add the cooked lentils along with the cooking water to the pot, stir, then add the stock.
Simmer gently until the sweet potatoes are cooked (don't worry about the carrots being fully cooked, they add a nice crunch to the soup). Stir in the drained chickpeas. Simmer for about 2 more minutes.
Taste and adjust the seasoning to your taste. Serve garnished with the spring onions, with a toasted pita on the side.
Taste and adjust the seasoning to your taste. Serve garnished with the spring onions, with a toasted pita on the side.
Subscribe to:
Posts
(
Atom
)
