


Monday 20 December 2010


Well, its been an eventful year for sure!
Last December, we decided to make a giant life change and move to Canada. The decision was partly influenced by Kay's desire to move closer to his parents, and partly due to the fact we wanted to finally settle and put down roots in one place. It meant that we had to give up a wonderful life in the Wirral and take a big step into the unknown. It meant leaving behind friends we've made over the years, the snug routine we fell into, and my wonderful job that I loved! But, it was a decision we made together, and while there have been some regrets, on the whole I do feel it was one of the better decisions of our life together.
But, before we left I wanted a big trip to India first, to catch up with my family and friends there. So January saw me travelling all over India and meeting up with my lovely friends and spending quality time with my family, including my grandmothers.
Come February, we were in Edmonton in Canada. It was a shock to the system! From balmy tropical weather, to -15 to -35 days... but I survived with the help of a giant big winter coat and a cute new cat.
And then winter turned to spring and we stepped up our house hunt! We finally settled on a small, but open plan house, and it was such a treat to finally have our first house together as a family! First houses are always special, and for me, this one certainly is.
We spent the summer travelling back and forth from Terrace, visiting the in-laws and more importantly, stocking up on fresh fish and cherries for the winter ;-) And come winter, I now snuggle up happily by our wood stove in the basement, sipping on creamy hot chocolate, reading to a happy, sleepy little girl with a cat cuddled at my feet. Can life get better than this?
So, to celebrate my first Christmas in Canada in my own house, I leave you with this recipe for shortbread biscuits, that my dear MIL got from the back of the Canada Cornstarch box. These biscuits, I have since learnt, have gone down as a classic tradition for Christmas and after having tasted them I can see why!


Recipe:
(Printable Recipe)
½ cup Canada Corn Starch (other brands or bulk will work as well)
½ cup icing sugar
1 cup sifted plain flour
¾ cup butter
Method:
Sift cornstarch, flour, icing sugar together. Using either your fingers or two forks, mix in the butter, until a soft dough is formed.
Shape into 1 inch balls and place on an ungreased cookie sheet.
Flatten with a lightly floured fork.
Bake the cookies at 300 F/ 150 C for 15 - 20 minutes or until edges are lightly browned. These will be soft when they come out, so make sure you let them cool before you take them off the cookie sheet.
You can decorate them with bits of candied fruit or nuts, before baking. Alternately roll out fairly thick and cut into shapes.
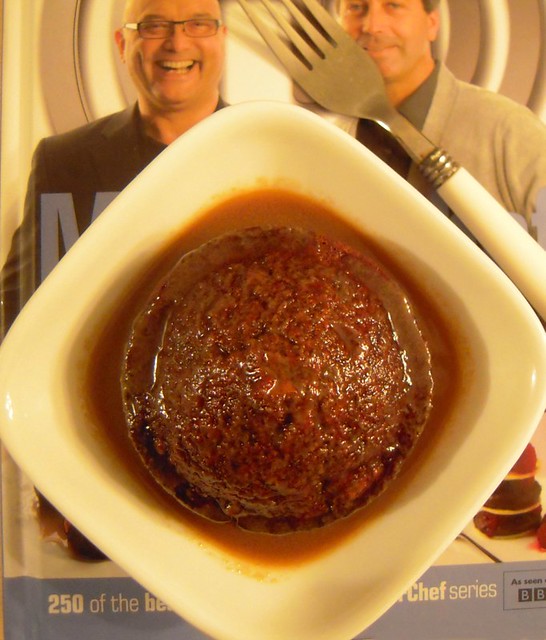
... is a delicous, moist, light-as-air sticky toffee pudding cake with scrumptious toffee sauce and homemade vanilla ice cream.
This cake was for Kay's birthday, again in December... now you see why I am pretty much run off my feet in December.
The recipe for this cake came from BBC's Good Food! I adapted it a little bit by adding 1/8 tsp of nutmeg, 1/4 tsp ground ginger, 1/4 tsp allspice and 1/4 tsp cinnamon instead of the mixed spice. The resulting cake tasted more gingery than the traditional pudding, but Kay and I are both partial to ginger, so it didn't matter very much. I made the vanilla ice cream using a recipe from 'The Perfect Scoop' by David Lebovitz. You can find one of his versions here.
We liked the cake so much, that its going to be our Christmas pudding this year, perhaps with a dash of brandy tossed into that toffee sauce just to make it Christmassy ;-)
Wednesday 15 December 2010
and
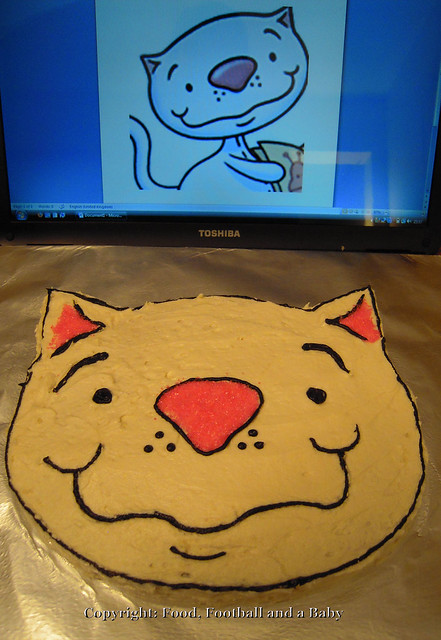
... decorated to look like Binoo from Toopy and Binoo. Oh dear :-)
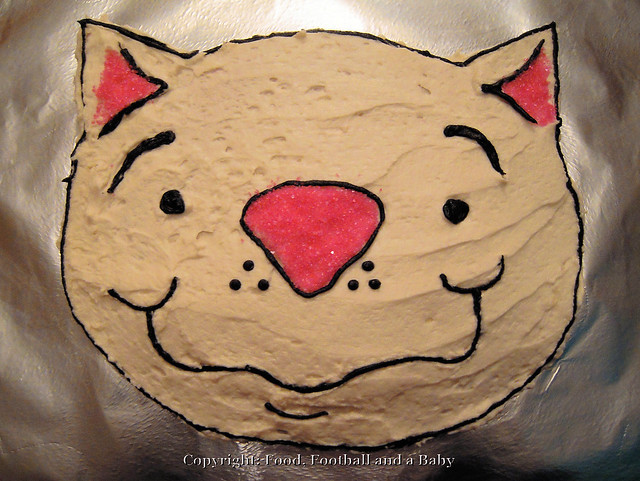
For those of who have never heard of Toopy and Binoo, enjoy the blissful ignorance of TV's most annoying lead character. For those of us who are suffering, here is the recipe for the cake and the buttercream frosting to make them palatable!
I needed the cake not to rise too much, as I was making it to cut into the shape of Binoo's head. After a long time of looking around, I settled on the Joy of Baking recipe, as it seemed like it was a denser cake than, say, an angel food cake. The only departure I made from the original recipe is that I added a teaspoon of lemon zest to the vanilla mixture to add some depth and a hint of citrus to the cake. It did make a big difference to the flavour, and made the cake adult friendly too. It worked brilliantly and there were happy faces and tummies all around.
I admit I was blackmailed into making and decorating the cake in that stupid cartoon character's shape, with Kay going on about how it was important to make memories that would last. I thought a easy chocolate cake would do the trick. But I allowed myself to be coerced into making the cake, and I must admit the look of wonder and awe on her face was worth every second of the staying-up-till-midnight-to-decorate-a-silly-cake-tiredness :-)
Friday 10 December 2010
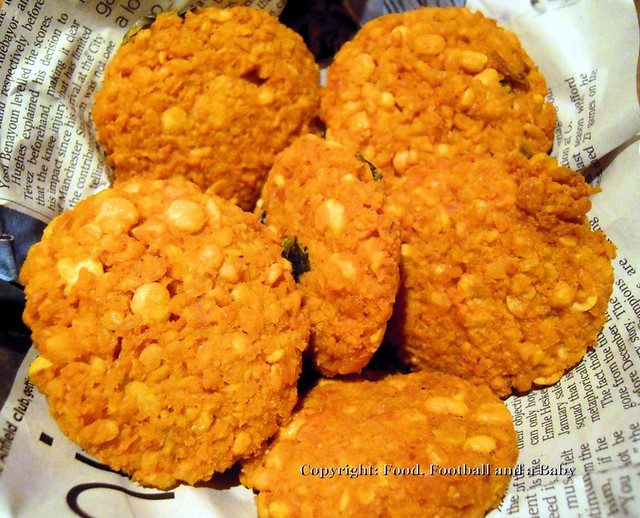
Chattambades are a delicious street snack from the Malabar coast. I thought they were pretty unique to Mangalore, until I had the Masala Vada in a London Kerala/ Sri Lanka restaurant (yes, really, the place is called the Palm Palace and its bang opposite Quality Foods in Southall!) and realised they were one and the same. Of course I then wanted to eat them constantly, and when my mum showed up in England, I was constantly badgering her to make them. She's a lovely mum, and she did. And they were delicious and tasted just as I remembered from Mangalore.
For some strange reason, for the past few days I had been craving these chattambades. The problem with making them is that they are really not a spur-of-the-moment snack. While chana dal or yellow split peas and curry leaves are a staple in my pantry and freezer, you do have to be fairly organised to soak the dal the night before, as its are ground raw with the seasonings. As usual, I tend to keep the spice down as Aditi doesn't really enjoy very spicy food but loves these chattambades. So feel free to increase the spices to your taste.
Anyway, to cut a long story short, I got myself organised, and I soaked the dal the night before. The next day yielded these delicious crispy, chewy snacks that we all gobbled down with coconut chutney and hot cups of chai.
Now that is what I call beating Old Man Winter flat down :-)

Recipe:
(Printable Recipe)
1 and half cup chana dal (yellow split peas)
1 or 2 long mild red chillies (alternatively, substitute 1/4 tsp hot chilli powder)
3 - 5 whole peppercorns
1 or 2 green chilli, chopped
1 sprig of curry leaves, fresh or frozen, chopped roughly
1/2 tbsp gram flour (chickpea flour)
1 tbsp rice flour (opt)
Salt to taste
Enough oil to deep fry
Method:
Soak the dal with double the volume of cold water, overnight if possible, otherwise, at least 6 hours. The dal will fluff up a little bit, as it absorbs the water.
The next day, drain the dal well and grind coarsely with the red chilli or chilli powder and the peppercorns, WITHOUT adding water. Don't process into a smooth paste as you want pieces of whole dal, it really adds to the texture of the finished vadas.
Scrape out the ground dal iunto a bowl, and add the chopped green chillies, curry leaves, gram and rice flours. Mix thoroughly, then season with the salt to your taste.
Shape into small balls, then flatten slightly using the palms of your hands (chatte (flat) ambade (vada), hence, chattambade)
Heat the oil until a drop of the vada batter rises quickly to the top covered in bubbles. Then drop in the chattambade, and deep fry until they turn golden. Take out of the hot oil, and drain on kitchen paper. The chattambades should be crispy on the outside and moist and chewy on the inside.
Serve hot with coconut chutney or ketchup and a hot cup of chai!!! Bliss!!
PS - I've been told that authentic chattambade does not have gram flour in it. I do know that, and I don't claim any authenticity with my recipes. They have been worked out by trial and error, and are based on what we like to eat. Also, as with all recipes, every single household will have their own for almost everything, a teaspoon extra here, a tablespoon over there, and that's how it should be :-)
Wednesday 8 December 2010
I've had a busy week, and I have been cooking non-stop thanks to a glut of birthdays. So I reached a point where I just didn't feel like spending hours in the kitchen. Not that I spend hours there normally, but, you know! I still need to get dinner out to the table, but I want to do it quickly and with minimum fuss. At the same time it has to be nutritious and appealing to the young and the old in the family.
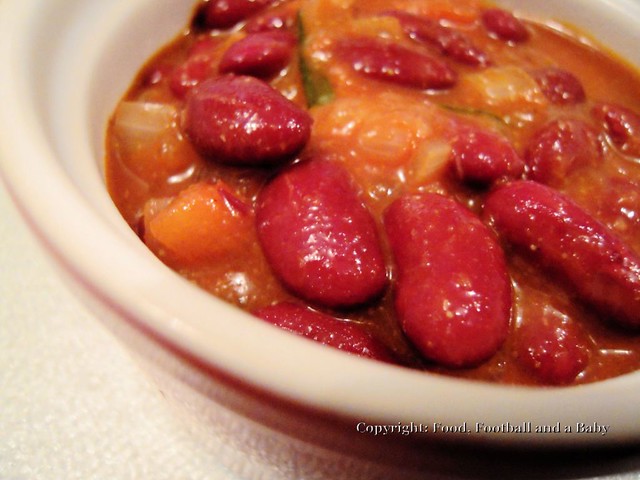
This is where rajma or red kidney bean curry really has its moment. Its a simple tomato based sauce, delicately spiced with a hint of heat at the end. Most Indian households will have a recipe for this delicious side dish. We are lucky enough here that we don't need to cook the beans from scratch as they come in tins, making this a store cupboard staple as well. I always have kidney beans, chickpeas, passata or diced tomatoes in the pantry, and there are times when they make my life immeasureably easier.
This version of rajma is very lightly spiced and not super hot. If you want it spicier, increase the green chillies and the red chilly powder and sprinkle over julienned ginger strips as garnish. I prefer to keep it simple with a sprinkle of fresh coriander at the end. This recipe works better with strained tomatoes or passata as it adds a rich red colour to the curry, but feel free to substitute with just fresh tomatoes instead.
Traditionally, rajma is eaten with rice (rajma - chawal) but I serve this rajma with couscous, saving even more time and energy.

Recipe:
(Printable Recipe)
1 tbsp olive or vegetable oil
1 medium onion, diced
1 tbsp ginger garlic paste (or 1 inch ginger and 2 flakes garlic, grated)
1 small hot green chilly, finely chopped
2 medium fresh ripe tomatoes, diced
1 tbsp ground coriander
1/2 tbsp ground cumin
1 tsp garam masala
1/4 tsp hot chilli powder
1 cup strained tomatoes, or Italian passata or tinned chopped tomatoes (I use passata)
1 tin red kidney beans (around 400g)
Salt and pepper to taste
Handful fresh coriander, chopped, to garnish
Method:
Heat the oil, then add the diced onions. Fry the onions till very lightly coloured, then add the ginger garlic paste and the chopped green chilly. Fry for another minute, then toss in the chopped fresh tomatoes.
Cook for 5 minutes or so, then add the ground coriander, cumin, garam masala and chilli powder. Fry for 3 minutes, and then add the 1 cup passata. Season with the salt and pepper. Stir well, and cook for about 5 - 7 minutes, until the masala comes together.
Into this masala, stir in the kidney beans, including any liquid, straight from the tin. Heat gently for 3 minutes or until the beans are heated through, then taste and adjust seasoning. Sprinkle over the fresh coriander to garnish, and serve with rice, couscous or naan.
Subscribe to:
Posts
(
Atom
)
