


Saturday 26 February 2011
Monsoons in coastal India, which run from June to September, are well know for their fierceness and relentless rain. As kids, we were all bundled up in raincoats and rain shoes, and sent to school looking like little rain slicked wet rats. Usually we were soaking wet by the time we arrived at school, and spent the rest of the morning trying to dry our skirts and overalls off. Usually the wettest of us lot were sat right under the school fan, so we would dry out faster. Of course this made us colder, and all we wanted to do was get out of there as soon as possible. If we were lucky, we would have a 'rain holiday', where we would trudge through gigantic puddles to get to school, only to be turned away at the gates... and then make our miserable way back, where we would drive anyone unfortunate enough to be home, absolutely crazy. Ah, happy days!
In Karnataka, and as a result, in Mangalore, we used to have an almost month long break in October for the festival of Dusshera. My mum, on the other hand, taught in Kerala, where they had a fortnight off for the feast of Onam, usually end of August. And while we were usually latchkey kids, it was a real delight after a cold, wet, rainy miserable day, to come home from school, and have mum there, usually making us a hot snack or two to have with a cup of milky coffee or tea.
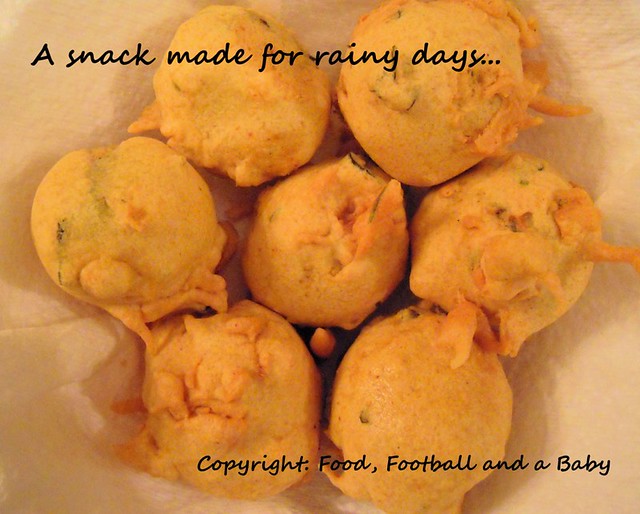
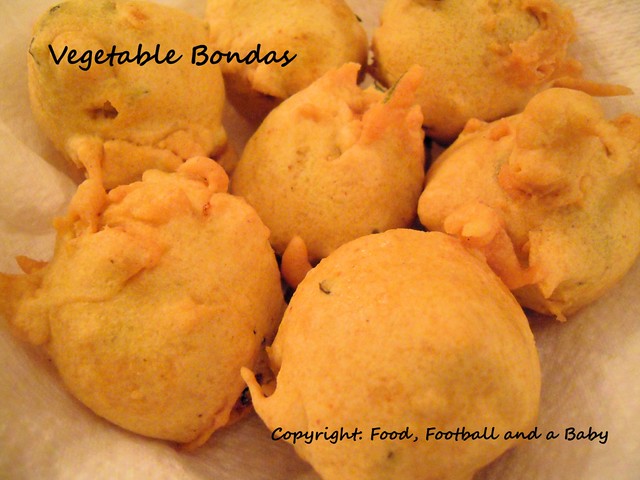
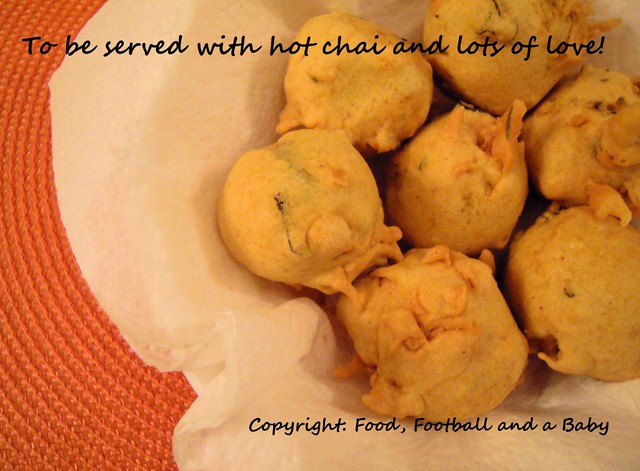
Sometimes, if we were lucky we got these bondas with our tea. Bondas are a snack that are available through most of South India, and we see them piled up at the street vendors, and in little restaurants. They are mainly served with chutney or ketchup, and basically comprise of a mixed vegetable and potato filling, coated with a spicy chickpea batter and deep fried. I cannot describe the way they tasted, crispy but soft on the inside, with a real spice kick from the chillies.
I was cold and miserable here in Edmonton last week, and I decided, to heck with the diet, I was going to make bondas to eat with tea. So I adapted a recipe from the Mangalore Ladies' Club Cookbook, and made these. They tasted so good with a cup of hot chai, and all memories of home just came flooding out [I think I am already annoying Aditi with all the stories about India, like the good half-expat that I am :-)]
Recipe:
(Printable Recipe)
For the vegetable filling:
1 large or 2 medium potatoes, peeled, and chopped
2 carrots, peeled and chopped
Generous handful of green peas, fresh or frozen
1 small beetroot, grated (optional)
1 green chilly, finely minced
1 clove garlic, microplaned
1/2 inch piece of ginger, microplaned
1 sprig curry leaves
1 tsp mustard seeds
1/4 - 1/2 tsp hot chilli powder or to taste
1/2 tsp garam masala
1 tbsp oil
Handful fresh coriander, chopped fine
Salt to taste (I used around 1 tsp)
For the spicy batter:
2 cups chickpea/ gram flour
1/2 - 1 tsp hot chilli powder or to taste
1/2 tsp garam masala
1/4 tsp amchoor (dried mango powder) (optional)
Salt to taste (I used 1½ tsp)
Enough water to make a thick batter
Oil for deep frying
Method:
Boil the potatoes, carrots, peas and beetroot (if using), until the vegetables are very soft. Drain and mash coarsely.
In a small pan, heat the oil and add the mustard seeds. When the splutter, add the curry leaves, ginger, garlic, green chilly, chilli powder and garam masala. Sauté quickly for around 20 seconds, then pour into the mashed vegetables.
Stir in the chopped coriander, and mix everything well. Add the salt, check seasoning, and add more salt if you think the mash needs it.
Shape the filling into small balls, and pop into the fridge to firm up a bit, if possible.
Meanwhile, make the batter. Stir together the chickpea/ gramflour, chilli powder, garam masala and salt. Add water little by little, until a thick batter is formed. The batter should be a little thicker than double cream. Adjust with more flour if the batter is too runny. Keep aside for a few minutes.
Heat oil for deep frying. The oil is at the right temperature when a drop of the chickpea batter rises quickly to the top covered in bubbles.
Take out the shaped vegetable balls. Dip into the batter, so the balls are covered with the batter. Carefully drop the balls into the hot oil. Again, like with other snacks, don't worry if the shapes are odd, it all adds to the taste :-) Fry the bondas till they are a light golden colour. Carefully lift out of the oil, and drain on kitchen paper.
Serve hot with ketchup, coconut or mint chutney, and a cup of hot tea is de rigueur, of course!
Note: If there is left over batter, just swirl it into the hot oil and fry till crisp. It tastes really good on its own too.
Friday 25 February 2011
This blog post has been sitting in my folder for a couple weeks now. Sometimes I can be such a lazy arse :-) It took Shireen's chocolate cake at Ruchik Randhap to finally make me get to blog it. Shireen's blog is amazing, by the way, go have a look at it. Some of her traditional Mangalorean food really makes me homesick.
I love the Italian Centre Shop here in Edmonton. It particularly stands out, as there is no real grocer or the likes of Marks and Spencer here. I think that it is a real shame because Edmonton could do with the likes of such supermarkets. The only place you can get nice fresh veg and fruits is the farmer's market, and while I love to visit and ocasionally splurge, I have found that my budget will really not allow for regular shopping there, as its really expensive. And, in general, grocery shopping is brutally expensive in Canada. I find myself easily spending more than $80 on a basic, regular grocery run, which is well on the higher end of the scale.
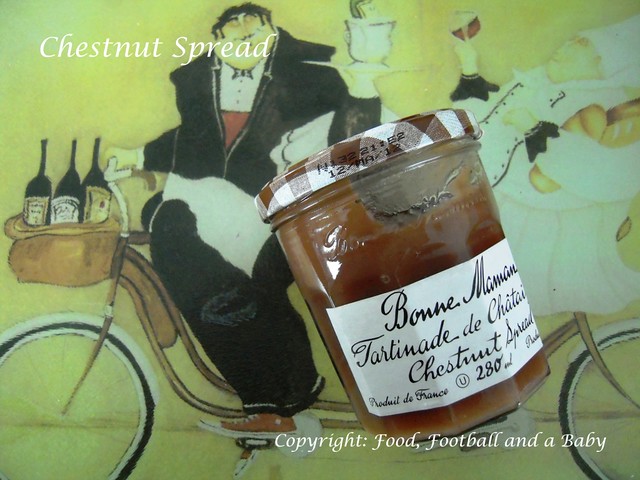
So, the Italian Centre has become my go-to place for stuff like cheese and salami (its also nice to have them in small packs as I am the only omnivore in the house) and European food like smoked mackerel, cheap Bonne Maman conserves and general pantry items that I like to stock at home. Its cheaper than Safeway, Save-on-Foods or Sobey's and gives me the opportunity to get things like Marmite at a better price.
I also like to pick up things there that I haven't seen or tried before. Which is where I found this Bonne Maman jar of chestnut spread.
I was intrigued enough to buy it, but was then stumped as I had no idea what I was supposed to do with it. A quick Google brought up a few recipes for chestnut cake, but none really used this particular spread.
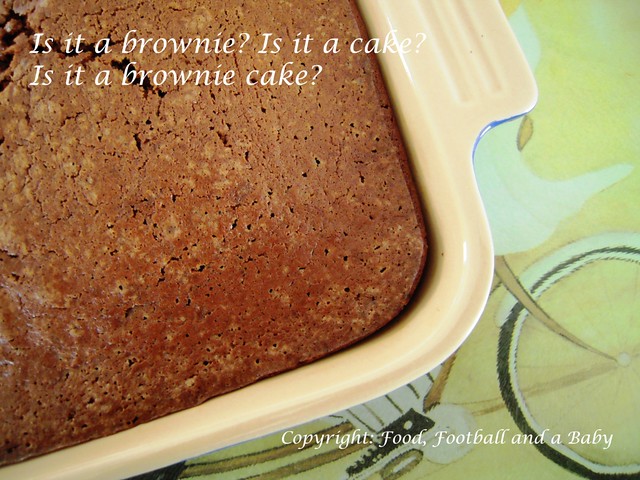
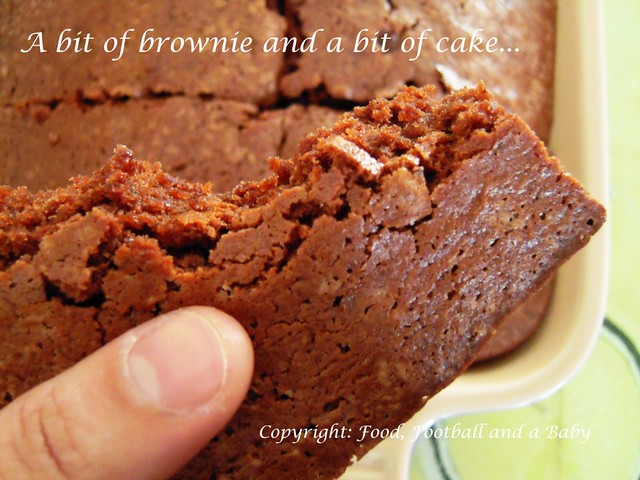
So the jar stayed in the pantry until a few weeks ago. I was rooting about to see if I could find a snack, and found this instead. I gave up on Google and turned to my trusted Mary Berry instead. Probably for the first time, I was feeling adventurous enough to try and modify a recipe. I picked her recipe for chocolate brownies, and adapted it to include the spread. This meant that I had to change quantities, and experiment haphazardly with quantities, but I was quite pleased with the end result.
I wouldn't call these brownies, as they weren't dense enough, but more on the cakey side, so this concoction is officially christened brownie cake. The taste of cocoa was quite strong, but surprisingly you could taste the chestnut spread in it too. The chestnut also made the cake beautifully moist, and it was practically melt-in-the-mouth. It disappeared quickly enough, so there were certainly no worries about how it tasted :-)
An apology though. The cup and weight measures are mixed up here, so you'll need to weigh out the butter. I converted the rest of the measures into cups.
Recipe:
(Printable Recipe)
75g butter (1/2 cup)
1 cup sugar (250 ml)
1 jar Bonne Maman chestnut spread (280 ml)
4 eggs
3/4 cup flour (roughly 200 ml)
1/2 tsp baking powder
1/4 tsp salt
3 tbsp cocoa
Method:
Preheat the oven to 350 F (175 C)
Sift the flour, salt, cocoa and baking powder together in a bowl.
In a separate bowl, cream together the butter and the sugar.
Add the eggs and chestnut spread and whisk together until well combined.
Now add the flour mixture to the butter mixture, bit by bit, until all the flour has been added. Scrape into a baking tray, and smooth out the top.
Bake for roughly 40 - 45 minutes until a skewer comes out clean and the edges are pulling away from the pan. Take out and leave to cool, then cut into squares.
Serve warm or cold, with cream or ice-cream.
Tuesday 22 February 2011

One of the most popular spice mixes around, Madras Curry Powder is a earthy, yet fragrant mix of spices, and is used for a number of dishes, both meat and vegetarian. This blend of spices is freely available in mainstream supermarkets, and popularly used as a subsitute for a more generic version of curry powder. The supermarket versions usually come in a hot blend or a milder version.
I use this spice mix rarely, as I tend to use more of the bafat, garam masala (recipe coming soon), biriyani and chole mixes. However, once in a while I use it for some dishes, like a cauliflower stir fry or a Indian style stew. So it was not high on my list of spice mixes to buy, and so I didn't have any in my cupboard.
That said, today things changed a bit. Jacqueline at Tinned Tomatoes is hosting a slow cooker challenge, and I wanted to make this delicious chickpea, squash and potato stew. But the recipe I looked at had Madras Curry Powder in it. And it was the main seasoning, so I was left in a bit of a ... errr... stew, as I didn't have any, and didn't want to go out in -17 C.

Then I thought, but why not try and make it myself? So I looked up the ingredient list of several big brands, and some online food sites and came up with this version. The reason I didn't follow any recipe to the letter is because when I make spice mixes, I like to go with a more personal feel. I tend to make mixes up by smelling the various spices as they are roasting, which gives me an indication of if I need to add more of a certain spice or not. I know this sounds silly, but its the way I cook. As you will too, once you cook Indian food more and more often.
Anyway, my nose didn't let me down this time, and I must admit that this curry powder turned out pretty well, so I guess that's another mix to cross of the bought list :-) As I don't use the mix very often, the recipe below only makes around 1/2 cup, so increase the quantities of spices if you want to make a bigger batch. It stores very well in a airtight bottle or tin, in a cool, dark place.
Recipe:
(Printable Recipe)
2 tbsp whole coriander seeds
1 tbsp whole cumin seeds
Around 4 inches of cassia bark or cinnamon stick
10 whole cardamom pods
1 tbsp fenugreek
1 tsp whole black pepper
5 - 6 long red mild chillies (Kashmiri chillies)
2 sprigs fresh or dried curry leaves (roughly 12 - 14 individual leaves)
2 tbsp ground turmeric
Method:
Toss together the coriander, cumin, cassia bark, cardamoms, fenugreek, black pepper and red chillies, one by one, in hot, heavy pan for between 30 seconds - 1 minute, stirring constantly. Remove spices to a bowl, and let cool.
In the same pan, toss in the curry leaves, until they crisp up, and start turning brown around the edges. You can skip this step if you're using dried curry leaves. Place the cooled spices in a spice grinder.
Add the ground turmeric to the grinder, and blend all the spices to a fine powder, opening the mixer and stirring a couple times to ensure a smooth mix.
Take out and store in an airtight tin or bottle.
Note: Turmeric and this spice mix stain clothes and white equipment, so take appropriate care while making the mix.
Wednesday 16 February 2011

This post is for Dom at Belleau Kitchen's A Random Recipe. I was quite intrigued by this challenge when I saw it in Phil's blog. Like quite a few people, I have a pretty large collection of cookbooks. My collecting has tapered off a bit in recent times, as I had to give up a significant part of my collection as part of the big move. But I still retained a sizable collection, and, like most people I know, I tend not to use them as much as I should. So this challenge was perfect for dusting off the shelf and making something different.
The rules said the book had to be picked randomly and the recipe too. So, as suggested by Dom, I brought down all the books from the cupboard (I have been meaning to sort them out for ages!), and ran my finger over the spines. I got Aditi to count to ten, and at the count of ten, stopped, and my finger was on this book here.
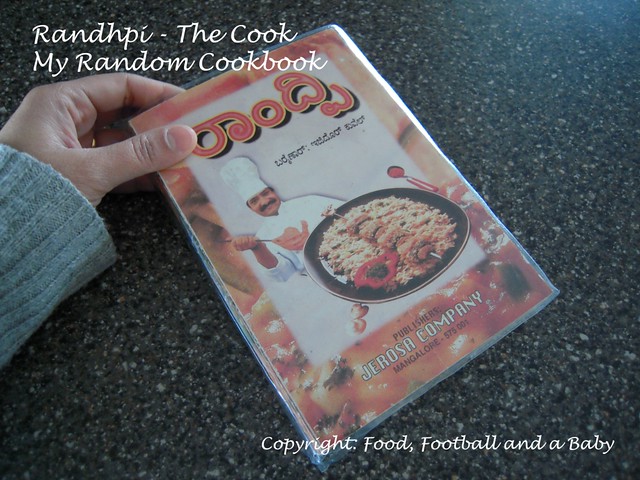
Wow, I had forgotten I even had this book! It's called Randhpi or The Cook, and its by Isidore Coelho. I remember these books being the staple of my mum's cookery book collection (that I have been slowly migrating to my own cupboard) and they are really good for easy everyday cooking. Ocasionally you get a recipe in them that starts with 'kill a young chicken and collect its blood', but I can live with that :-)
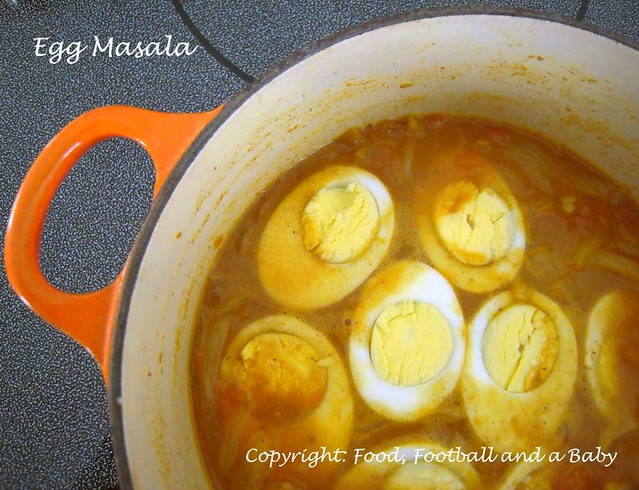
Then I opened it up, again randomly, and the recipe that showed up was this one. Egg masla.
I think I lucked out really :-) I had everything I needed to make it almost straightaway, except the vinegar, but that didn't matter. So I rushed into the kitchen, and rustled it up for our evening meal. It took less than half hour to put together, and tasted just like my dear mum's (co-incidence?). I wonder if I can get Dom to make this challenge a monthly one, as I can just see myself doing this random thing fairly often now. What a good idea it turned out to be!
And even better, my cookbooks are now all neatly organised alphabetically and by cuisine type and are all dust free and clean!

Recipe:
(Printable Recipe)
Adapted from Randhpi by Isidore Coelho
4 eggs
¼ kilo tomatoes (I used 2 medium)
1 large onion, sliced (dice them for a more presentable look to the dish, slicing looks messy, but the taste is the same)
1 tbsp oil or ghee (I used ghee, it adds a nice flavour)
4 tsp ground coriander
¼ tsp turmeric
1 tsp red chilli powder (I used ½ tsp, didn't want it super hot)
1 tsp garam masala
1 inch piece ginger, chopped finely
Salt to taste (I used 1 tsp)
A little vinegar (I used one tsp of lemon juice)
Method:
Boil and peel the eggs. Cut them in half lengthways.
In a sauté pan, heat the oil, then fry half the sliced onions till they are transparent. Add the spices, and fry for another few minutes, stirring.
Add the remaining onion, chopped ginger, salt and diced tomatoes. Fry for about 5 – 7 minutes, until the tomatoes are soft.
Add roughly 1 cup water to the mixture, and simmer till the curry is thick. Stir occasionally.
Taste, then add a little lemon juice or vinegar. Adjust seasoning. Gently lower the eggs into the curry, and take off the heat.
Serve with rice or naan.
Tuesday 15 February 2011

Chocolette's February challege for 'We Should Cocoa' is Tea. Now that is a real challenge, as I have not really had chocolate and tea before. I can imagine there could be delicious combinations of green tea and white chocolate, maybe? I am not a huge fan of green tea, so that was out for me.
But then, something clicked. What do I have practically every afternoon, around four? Well, tea and a biscuit, of course! Can anything be better than tea and biscuits in the afternoon? Unless of course it is tea creams and chocolate biscuits? Of course, gotcha!
I love dark teas, particularly my Nilgiri Tea that I smuggled into Canada. It's local to us (in India, that is, not here) and its a rarer tea in the sense that its not very well known outside the region, like say, Assam Tea. Nilgiri Tea is often used to make chai, as its a strong tea that doesn't get overwhelmed by spices and sadly, is a staple of commercial blended teas (sad, because its such a fantastic tea on its own). I use it quite liberally to make my Chai Ice Cream, and also as my go-to tea when I want to be reminded of home. I absolutely adore it, and I get my parents to send me loads through the Great Indian Trade Network [I will explain this one day :-)]
So I thought that Nilgiri Tea would work really well instead of Earl Grey for this tea cream recipe. The original recipe has been heavily adapted from Marcus Wareing's Earl Grey Tea Creams with Eccles Cake and Milk Foam (which is now not available on the BBC Food website, but luckily I was able to get a copy from an archive, and save it). Marcus made this for the Great British Menu challenge, and I remember watching it and just drooling over it! Of course, being the pleb that I am, I am using ordinary whipped cream on top of the creams, instead of milk foam! So, anyway, I figure I might take a few liberties in this challenge... and make this delicious dessert and serve it with chocolate dipped Cornish fairings, so adding the chocolate element.

Cornish Fairings are easily my favourite biscuit! I absolutely adore the gingeriness and have been known to add so much ginger that they are actually quite spicy. I got the recipe from Marie's 'The English Kitchen', which is a absolutely remarkable blog and my standby for delicious food for both everyday and fancy cooking!
I adapted Marie's recipe only slightly. Instead of the mixed peel, which I didn't have, I threw in a handful of chopped crystallised ginger. I also reduced the oven temperature to 150 C as my biscuits were burning at the bottom. And of course, I dipped them in melted dark Madagascar chocolate, then placed them in the fridge for 10 minutes to set.
Did the hotchpotch of recipes work? You bet it did. Of course, dark chocolate and ginger are best friends already. The tea creams were amazing, with a light texture and reminiscent of a pannacotta, and surprisingly, went very well with the chocolate dipped fairings. The slight bitterness of the dark chocolate and the spiciness of the ginger cut through the sweetness of the creams. The whole dessert worked as a whole, and I loved the fact that it was all very English but with a teeny Indian twist.


Recipe:
(Printable Recipe)
Note: This recipe makes two espresso cups of tea cream. For more increase quantities exponentially or refer to the original recipe here. If the recipe is not there, leave me a comment with your email address and I will send it to you)
2 egg yolks
65 ml sugar, measured in a cup measure (split into half)
80 ml milk
100 ml heavy cream or double cream
2 tbsp loose Nilgiri tea leaves (or 1 teabag)
1/4 cup whipping cream
2 tbsp sugar
Method:
Preheat the oven to 175 C.
In a small saucepan, heat the milk, cream and half the sugar till the milk is steaming. Add the tea leaves, and allow to steep for 3 - 4 minutes, until you get the desired colour. You can leave it quite light or go fairly dark like I did.
In a separate bowl, beat the egg yolks and the remaining sugar.
Gently strain the hot milk + tea mixture into the egg yolks, whisking to stop the yolks from curdling.
Place 2 espresso cups into a shallow roasting tin. Fill the cups two thirds of the way with the tea cream mixture. Then gently pour in hot water into the tin so it comes up to halfway of the cups.
Place in the oven, and bake for 30 - 35 minutes, or until the creams are set, with a slight wobble in the middle.
Take out of the oven, leave to cool then pop into the fridge until completely cold.
Whip the cream with the sugar, and using a piping bag, swirl on top of the tea creams.
Serve with the chocolate dipped fairings.
Saturday 12 February 2011
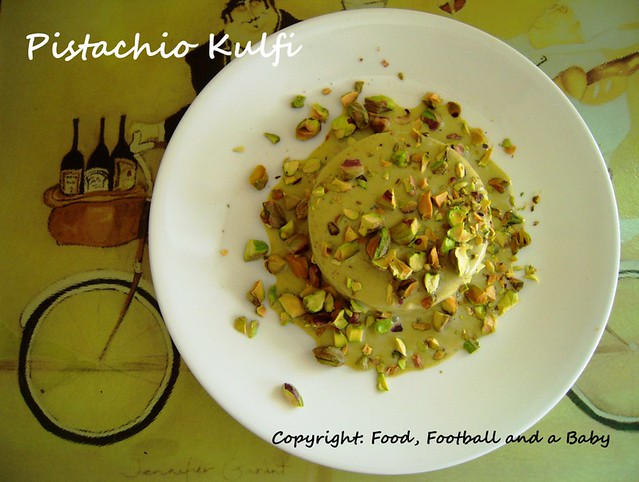
OK, first off, I have a confession to make. The first time I tasted this delectable, all Indian dessert was in Liverpool (ducks).
No defence, really, it just wasn't a dessert that crossed our path in India. Partly because of my mum's reluctance to spend hours stirring a pot of milk to get it to thicken and partly because it was just not popular in a Mangalore dominated by the presence of arguably, the country's best ice cream parlour (Ideal's)
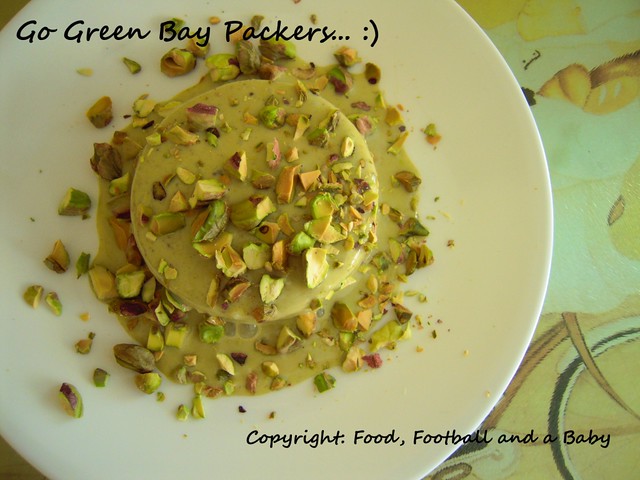
So the first time I had a kulfi was in the Maharaja (which, incidentally, does some of the best South Indian food I've tasted in England) in Liverpool. It made enough of an impression, that it stuck in my mind and when I wanted a quintessentially Indian dessert, I turned to it. As with the Dal Maharani and Prawn Biriyani, this was part of our Superbowl party menu. It was also green in colour, so worked with the fact that Kay wanted the Green Bay Packers to win (they did and I am claiming it was because I served a green dessert).
I looked for several recipes, but nothing that I found online or in my books really inspired me. For one, the majority had you stirring milk until it thickened, and while I am dedicated to my cooking, I am not that dedicated. So I took elements from a few different sources and came up with a version, that I thought would work well.
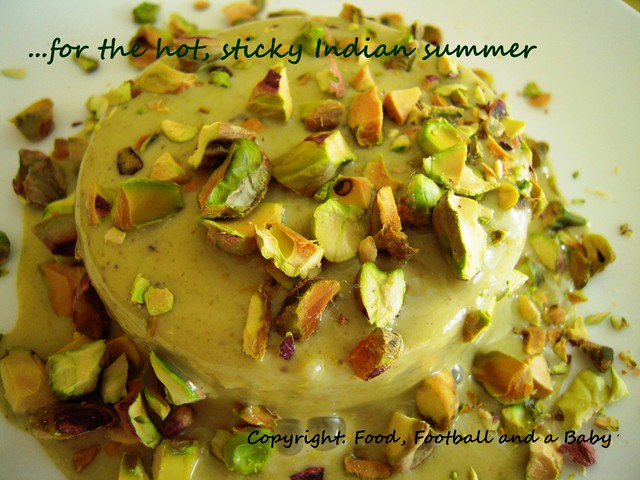
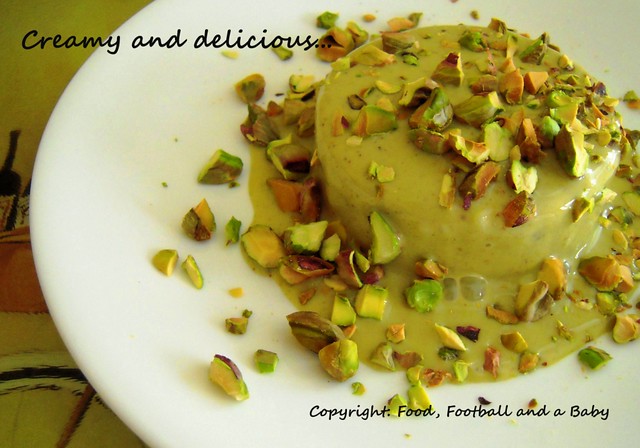
It did! It was creamy and delicious with an intense pistachio flavour that was enhanced, and not overpowered, by rosewater and cardamom. I was worried that I may have to churn it to get a creamy texture, as traditionally kulfis are not churned. But I didn't have to worry, as the kulfi was so creamy, it literally just melted in the mouth. The chopped pistachios added a lot to the texture, and overall this was a real success and a dessert that I will definitely be making very often now.
Recipe:
(Printable Recipe)
For the pistachio paste:
1 cup pistachios
2 tbsp rosewater
¾ cup whole milk
2 tbsp light honey or sugar
Making the rest of the kulfi:
300 ml sweetened condensed milk
2 cups whole milk
1 cup half and half or single cream
1 tbsp cornstarch
4 pods cardamom, seeds taken out and crushed
1 – 2 tbsp sugar
Handful pistachios, chopped, for the garnish
Method:
Using a powerful blender, grind the pistachios, rosewater, milk and honey or sugar to a very smooth paste. Put into the fridge.
To make the kulfi, take 4 tbsp milk out of the 2 cups milk, and stir in the cornstarch, whisking to a smooth paste, adding a little more milk, if necessary.
Scrape the condensed milk into a deep pan, and whisk in the milk, cornstarch mixture, half and half, crushed cardamom seeds and the sugar. Mix well, taste, and add a little more sugar if you want it sweeter. Remember, the condensed milk is already quite sweet.
Over a medium heat, bring this mixture to the boil. Lower the heat a little, and cook, stirring often for roughly 15 – 25 minutes, until the mixture is fairly thick and coats the back of a spoon. It should have reduced by a third too.
Take off the heat and refrigerate until cold.
Once the milk mixture is completely cold, take it out and whisk in the pistachio paste, mixing well.
Pour into kulfi moulds or ramekins or a freezer safe container and freeze overnight or until firm.
If you are freezing in ramekins, put them in a bowl of hot water to loosen the edges a bit, before unmoulding.
Serve with the chopped pistachios sprinkled over, as garnish.
Note: For mango kulfi, replace the pistachio paste with 1½ cups mango pulp and 1 tbsp rosewater.
Friday 11 February 2011
We had a few people over for a Superbowl party. Now, I freely admit, that my interest is not in that kind of football, but hey, any excuse for a party. And the game wasn't too bad either!
I wanted to keep the food simple, but delicious, and ideally something I could cook up the night before. So I decided on my specialty, prawn biriyani, because I could make the sauce the previous night, and I wanted a dal to go with it.
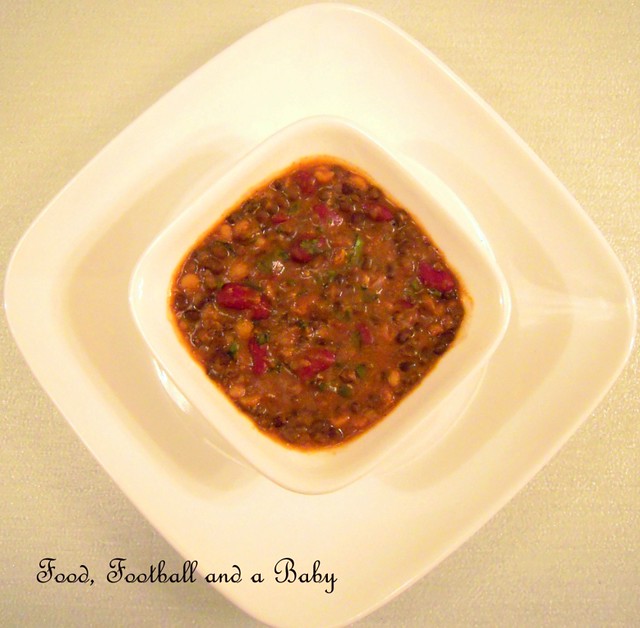
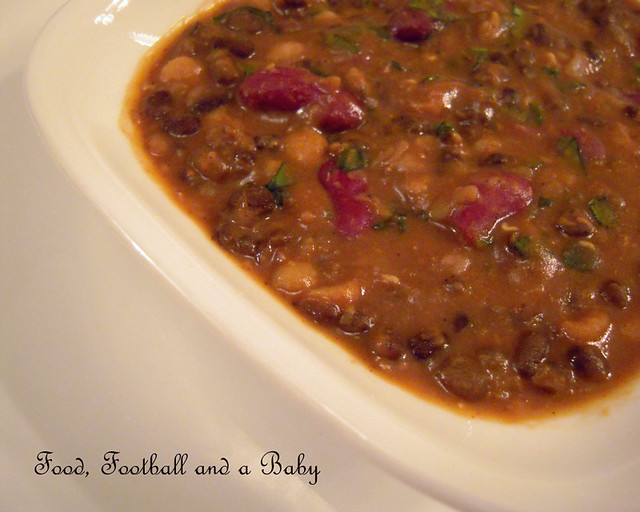
I was wondering if I should go with just plain tarka dal, but it seemed a bit pedestrian for a party. I wanted something a bit more fancy, which looked like I had made a little more effort. So I picked my second favourite dal, Dal Maharani. Dal Maharani is very similar to Dal Makhani (dal with butter) and Dal Bukhara (the famous dal from the Bukhara restaurant in Delhi). The only difference seemed to be the addition of chana dal (yellow split peas) and red kidney beans, and a slightly different spice mix.
I made up the recipe for this dish, as I was trying to recreate the taste based on the Dal Bukhara I remember eating. So it felt like I was doing a lot of 'add a little of this, and maybe a little more of that... nah, doesn't taste quite right, add more of this etc.'... but, in a rare moment of organisation, I actually kept jotting notes of what I was adding to it. Shocking, I know, but it actually meant that I could blog the recipe, without trying to remember how the heck I cooked it.
This dal does take a long time to cook, especially if you have no pressure cooker like me, but after the initial work putting it together, it basically just simmers away on a low heat, while you stir it ocasionally, so not super labour intensive! The longer you simmer it, the better it will taste. And it tastes terrific the next day, and freezes well too. So you may as well as make a big batch and freeze in meal sized portions for a quick dal fix!
Recipe:
(Printable Recipe)
2 cups whole black gram (black urad/ urid dal)
1/2 teaspoon baking soda (bicarb of soda)
1 cup chana dal (yellow split peas)
2, 1 inch pieces of cinnamon
2 dried or fresh bay leaves
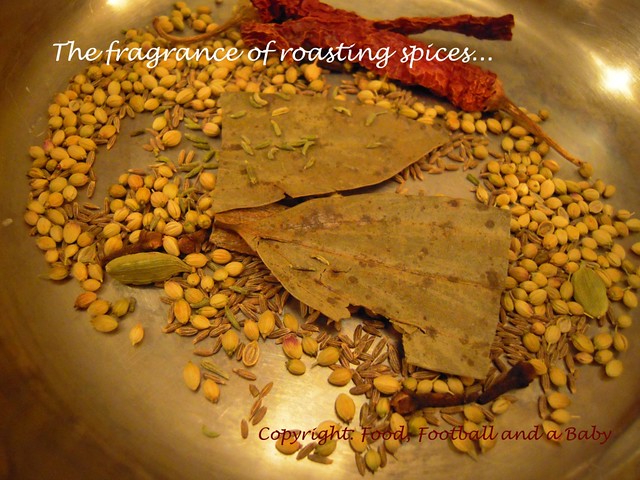
For the spice mix -
1 tbsp whole coriander seeds
1/2 tbsp whole cumin seeds
1 tsp fennel seeds
2 long mild red chillies
2 inch stick of cassia bark or cinnamon
4 - 5 whole cloves
2 pods cardamom
1 small petal of star anise (not the whole flower, just a petal)
1 dried bay leaf
To make the dal -
1 medium onion, diced very fine
3 cloves garlic, microplaned to a paste
1 inch piece of ginger, microplaned to a paste
1 tin of tomato paste (roughly 6 oz)
1/2 - 1 tsp hot red chilli powder
2 - 3 tbsp hot water
1, 400g tin of red kidney beans in water, don't drain
2 cups plain yoghurt
3 tbsp olive or vegetable oil (don't use extra virgin olive oil)
Salt to taste (I used 2 tsps)
To finish -
1/4 cup light cream (half and half)
2 tbsp butter
Fresh coriander, chopped
Method:
In separate bowls, soak the chana dal and the black gram separately in cold water overnight, or at least for 6 hours.
The next day, put them into separate pots (adding the bicarb/ baking soda to the black lentil pot), and cover with water. Bring to a boil, then turn the heat down and simmer until both the dals are cooked. It will take roughly 30 -40 minutes for the chana dal and around 1 hour for the black gram. Both the dals should be soft, but still be able to hold their shape. If you have a pressure cooker, cook both dals separately, until soft.
To make the spice mix, toss the spices together in a hot, heavy pan for about 1 minute, till they smell heavenly. Grind to a fine powder in a powerful blender.
In a big pot, heat the oil, and add the finely diced onion. Cook, stirring for 4 - 5 minutes, until onion is soft and just beginning to colour. Add the ginger and garlic, and cook for another minute. Add the tomato paste, ground spice mix and red chilli powder and stir till well mixed. You may have to add the hot water to make this mixture a bit looser. Cook together for 15 minutes or so, adding a little more water if the masala is too dry.
Now add the cooked dals and the tin of kidney beans (water and all) to the tomato mixture. Stir well, then add the yoghurt and salt. Stir together, taste and add more salt, if required.
Now simmer this mixture on a very low heat for at least 30 minutes (ideally 1 hour), topping up with a little hot water if its drying out. Taste again, and adjust seasoning as required.
Note: If freezing, let the dal cool at this stage and freeze in meal sized portions. Reheat, and then add the cream and butter to serve.
Just before serving, add the cream and butter to the dal, and stir well. Garnish with fresh chopped coriander. Serve hot with naan or rice. This tastes delicious the next day.
Wednesday 9 February 2011
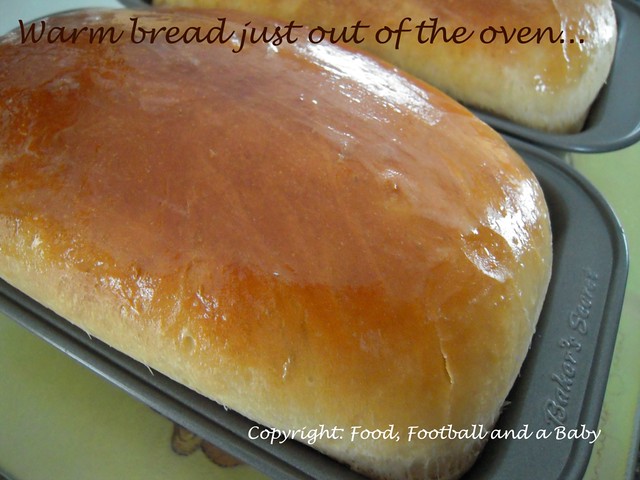

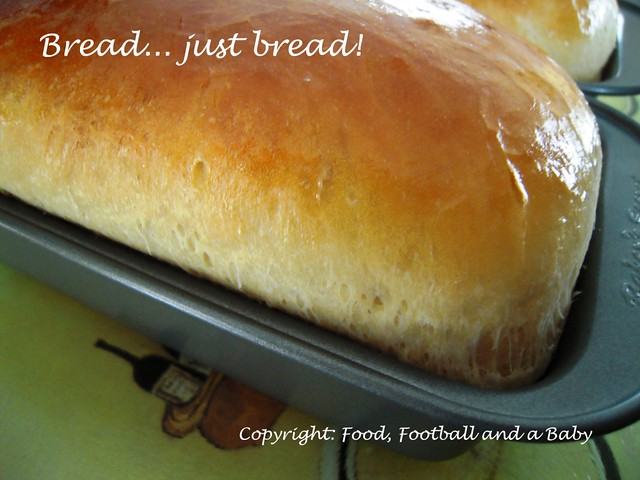
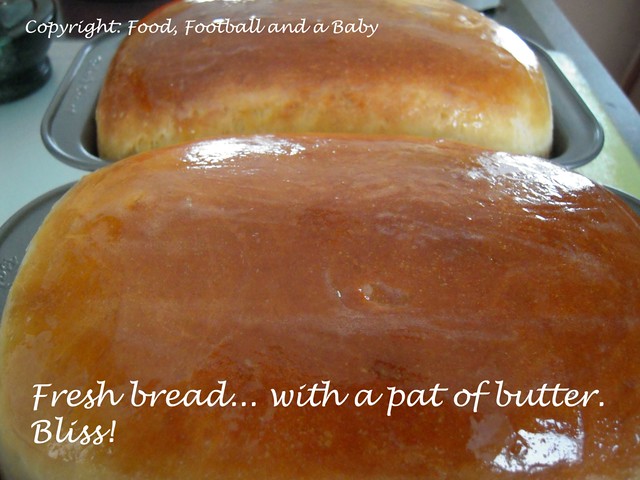
Can anyone think of anything better than cutting into a still warm slice of bread, and eating it with nothing else but a dab of salted butter? Thought not :-)
For the last few weeks, I have been baking all our bread at home. It all started when I took a look at the ingredient list on supermarket bread, did a double take, and went no way... there were things on it that need a degree in chemistry to understand. So I told Kay that I would have a shot at baking my own bread. Back in the UK, I had a cute compact Morphy Richards bread machine that I used to practically use everyday. However, it was a 220 watt machine, and as with most of our electronic stuff had to stay behind. But I was lucky enough to be given a bread machine by a friend here, and while I normally used it to make doughs for things like pizza and naan, I never actually thought of making bread in it (yeah, I know!!)
I like my breads dense enough to make sandwiches with, and with a softer crust. The Morphy Richards came with a recipe booklet that included a recipe for sandwich bread that I really liked. So I looked it up, and adapted it a bit, and voila! Fresh bread, practically every day.
Aditi and I love nibbling on slices that are lovely and warm fresh from the oven, and a few days ago, Aditi told me she wanted her bread plain with nothing on it. From a kid that loves her butter, jam and Nutella, that is a compliment, for sure :-)
Recipe:
Adapted from the Morphy Richards bread maker recipe book.
(Printable Recipe)
1 and 1/4 cup warm water
2 tbsp softened butter
½ tsp salt
3 tbsp sugar
2 tbsp powdered milk
2 cups white bread or plain flour
1 1/4 cup wholewheat bread flour
1½ tsp yeast
Whisk together yeast, water and ½ tbsp sugar. Keep aside for 2 minutes. In a deep bowl, add the flour, salt, rest of the sugar, milk powder and butter. Slowly add the water, and knead to a soft dough. Add a little more water if too dry, or a little more flour if too wet.
Note: If you have a bread machine, just add all the ingredients in the listed order, and set your machine to the dough cycle. It saves a lot of time and washing up! If you do this, skip the step above and below.
Roll the dough in a ball, pop into a greased bowl, and keep in a warm place to rise to almost ½ of its original size, preferably double. This usually takes about ½ - 1 hour.
Take out the risen dough, punch down, knead again for 2 minutes or so. Then shape the dough into a cigar shape, and pop into a greased loaf tin. Leave in a warm place again for 1 hour to rise (or you can heat the oven to its lowest setting, and put the tin in the oven, like I do, I feel it makes the bread rise better)
Once the dough has risen again to fill the tin, roughly 3/4 its size, turn up the heat in the oven to 175 C or 350 F, and bake for 20 – 25 minutes, until the crust is a lovely golden brown colour.
Take out of the oven, and brush a little melted butter on top, which will soften the crust a bit more. Take out of the tin, and let cool on a rack. You can cut it while it’s still warm (it will be slightly crumbly, but delicious), but if you’re freezing it, make sure it’s completely cold before putting in the freezer. Don't wrap it up before its completely cold.
Another note: You can replace the wholewheat with just white flour if you want white bread. But don't replace all the white with wholewheat, as it doesn't work that way round.
Subscribe to:
Posts
(
Atom
)
