


Showing posts with label Cakes. Show all posts
Showing posts with label Cakes. Show all posts
Monday, 28 November 2011
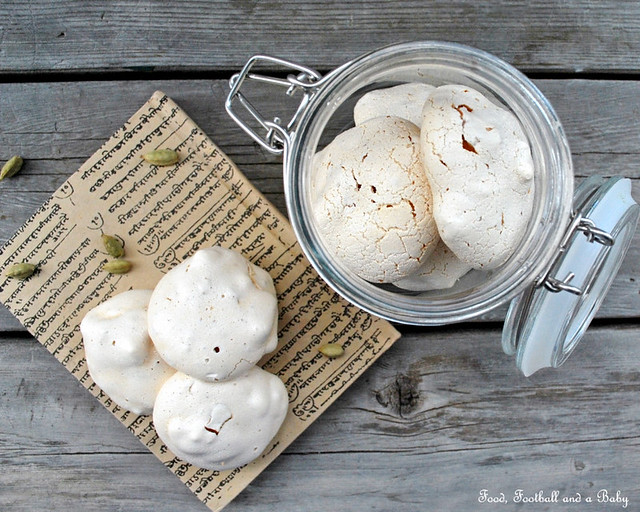
Mangalore has its own macaroon. It doesn't taste anything like what you would expect a conventional macaroon to taste like, but its a macaroon all the same. These Mangalorean macaroons are very similar to the German Wasp Nests that I made some time ago, and have the same texture and sweetness of those meringues, except that they are made with cashew nuts, rather than almonds. Pretty much every Mangalorean I know will instantly recall the taste (and price) of these macaroons, and remember them fondly. We used to buy them from Taj Mahal Sweets, and they were a delicious treat for special days.
My fondest memory of these macaroons is associated with my Aunt Kitty's visits. Aunt Kitty is a friend of my mum's, and she lives in a village outside Mangalore, where she's a teacher. She's a wonderful lady, who looked after me when I was a baby, and mum had to go back to work. She is a dedicated teacher, and everyone who knows her and works with her remembers her acerbic tongue, but at the same time, no one disputes her generous heart :-)
As kids, my sister and I loved it when Kitty Aunty (as we called her) came to visit, as we knew we were in for tons of treats. Aunty Kitty loved spoiling us, be it with ice creams from the famous Ideal's ice cream parlour in Mangalore or sweets from Taj Mahal or puffs from Venus Bakery. And of course, these macaroons, which she always loved to buy for us. Even when I was all grown up (some may dispute that fact, hehe) and heading to the UK, she tucked a small packet of these treats in my suitcase, so I wouldn't be deprived of them. I am lucky indeed to have such lovely aunties, and while I get to see them only rarely these days, I can never forget their huge influence on my life.
Sunday, 20 November 2011
I've been a little lazy this week. Its been a bit of a rough time, as I've been waiting on a few things, and I wasn't able to plan my weeks and cooking as much as I would have liked. I ocasionally get these kind of periods in my life, and I have to slog a bit to get through them. The weather hasn't been particularly kind either, as its been gray, cloudy, with tons of snow (oh, and its only beginning, sob!!) and no natural light of any kind, which usually inspires me to cook.
So, yeah, life's been a bit of a drag, and by the time I've cooked dinner, it's so dark, I really have no time to photograph either. I normally photograph on weekends, when I can find some natural light during the daytime, but the last weekend and this one has been so packed that I've hardly had any time to cook. We headed over to Calgary the weekend before, and had a real blast at the zoo. I wish I'd had some more time to explore the city, but Aditi and I bonded over the animals, and we loved the butterflies. The butterfly enclosure had an ovewhelming fragrance that reminded me of my mum's garden, and it brought back so many memories. We also enjoyed seeing all the Canadian animals, though I realised later that, except for cougars, we've seen practically all the others in the wild, including grizzly bears.
My friend Mike is a wildlife photographer in BC, and you should check out his wildlife and landscape pictures here, well worth a look, and you'll see so many beautiful animals, including the rare kermode bears.
Tuesday, 15 November 2011
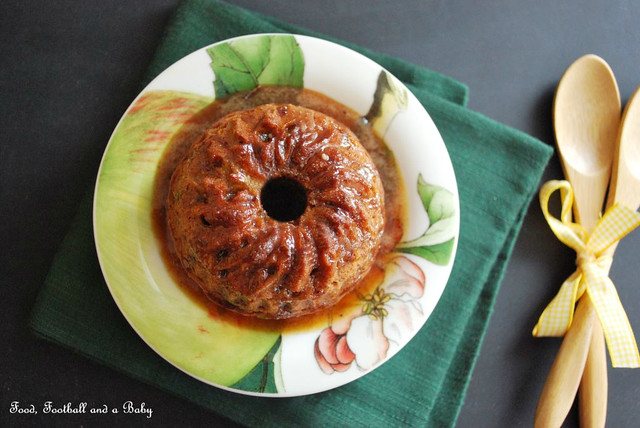
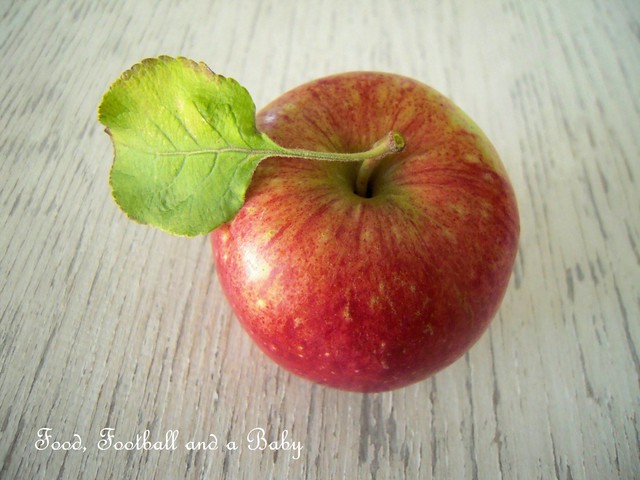
There is one fruit that you are going to see on this blog fairly often in the next few weeks, and that's the apple. I have a crateload of apples this autumn, thanks to my kindly neigbour. Mr M has an apple tree in his backyard, which, like his Evan's cherry tree, produces tons and tons of apples every year. This year he asked me to help him clear the tree. Little did I know that what he meant was, take all the apples home. Kay, Aditi and I, between us, picked every single apple off the tree, and we had a gigantic crateful. I spent days sorting through these apples.
Sunday, 25 September 2011
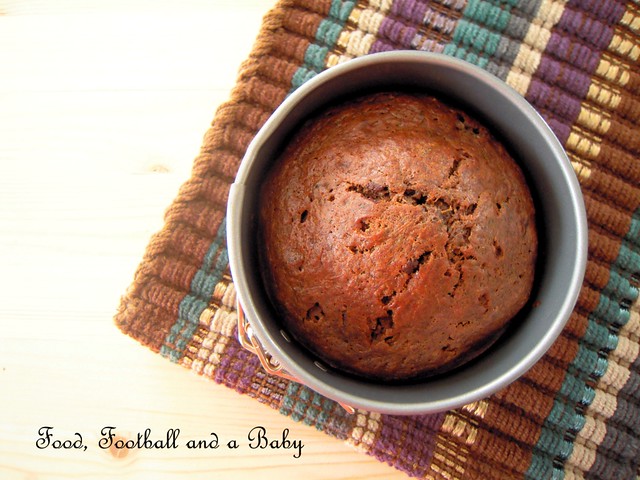
Its birthday month. Both for We Should Cocoa, who turn one, and me who turns... errr, lets not get into that!
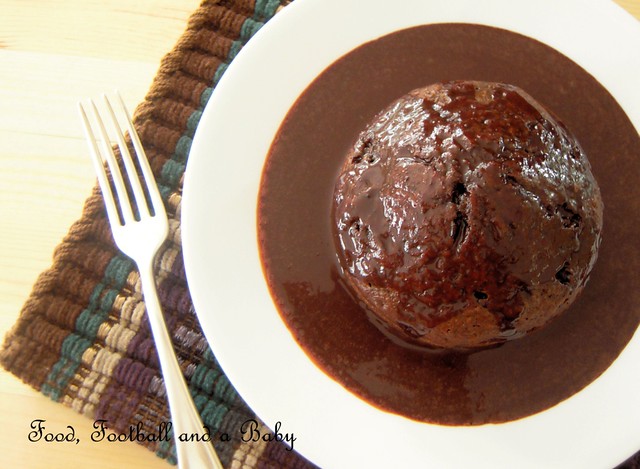
The challenge for this month was to come up with a birthday cake. For me, nothing screams birthday as much as a chocolate cake. As it turns out, I had the perfect cake recipe practically handed to me. My neighbour Vee, she of the Lemon Courgette Cookies fame had also passed on a recipe for a chocolate zucchini loaf. I've been waiting to try it out for a while, but like most good intentions, this one got side tracked by other things. You know what they say, the road to a diet is paved with chocolate cake recipes :-)
I finally got the chance to make it today, and hopefully in time for We Should Cocoa. I was a bit worried, as it was the first time I was making the recipe, so I scaled it down a bit. The zucchini came from my garden, as usual (sigh!) and I changed around a few bits as bobs (also as per usual for me :-))
This cake was just gorgeous! I used a good Lindt dark chocolate instead of chocolate chips, and the zucchini just kept it so moist, it was unbelievable. Instead of just serving it plain, I decided to then go all out and made a delicious dark chocolate cream sauce to go with it. After all its a birthday celebration!
Thursday, 23 June 2011
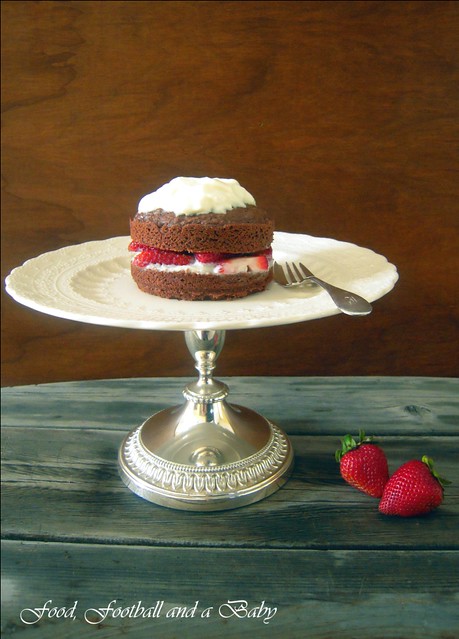
'A shortcake should be like a biscuit' said a formidable lady from Terrace to my MIL during their strawberry socials (I love that idea, anyone up for a strawberry social in Edmonton?).
Who am I to disagree? This wonderful shortcake recipe was passed on to me by my MIL, who told me that its an old recipe, that has been handed down quite a bit. Having gobbled up her shortcakes, I can see why this is a trusted recipe. Its Delicious, with that capital D fully justified.
Thursday, 2 June 2011
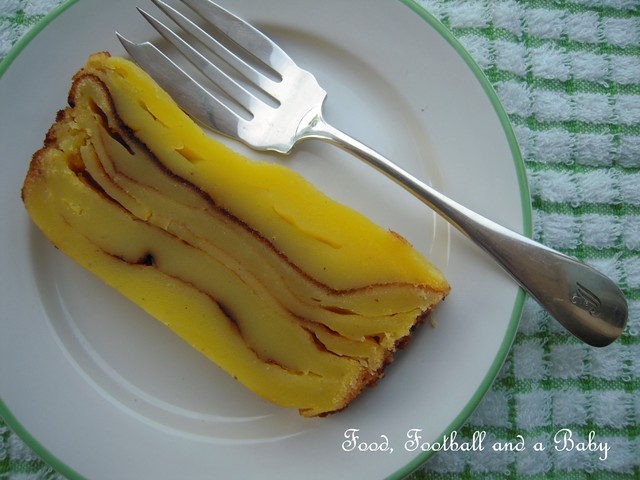
Ah... Bebinca. Now you can call it Bebinca, Bibique or Bibik, whatever you will, but believe you me, once you taste this dessert, I am fraid you are sold on it for life. That's what happened to me anyway.
Bebinca is a quintessential layered cake from Goa, and rightly famous, seeing as the amount of work that goes into it and the amazing taste that results. I have never really even attempted to make it at home previously. First off, I never really had the time, and second, the work always put me off. But on the other hand, its not like my friendly neighbourhood grocer sells bebinca here in Edmonton, so if I wanted it, I had to make it myself. So after a long long time of browsing the internet, calling my dear mum and aunties, checking out my favourite Goan cookbook, I finally came up with a recipe. I found that there were very few recipes for Bebinca online, but to be honest, now that I have made it, I can understand why buying it is a much much much more easier option.
Saturday, 2 April 2011
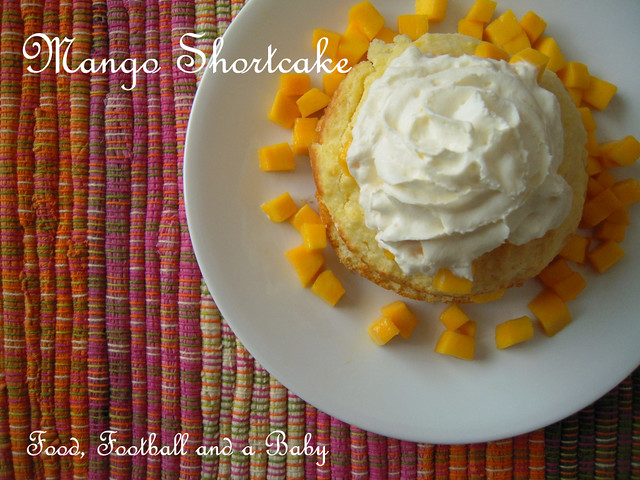
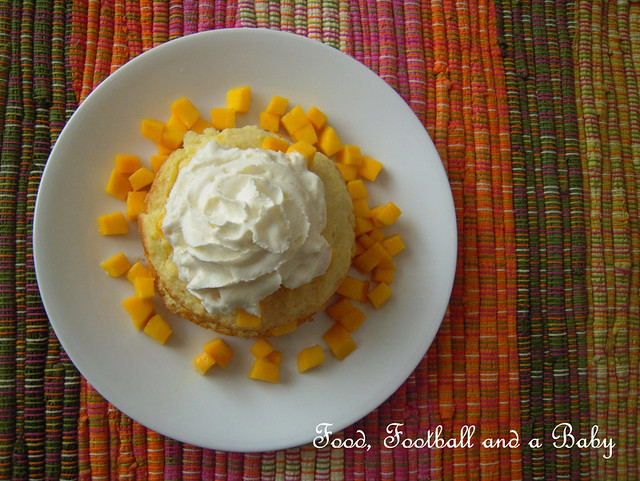
Last week, I had a box of strawberries waiting to be eaten, and I figured, I should finally make that shortcake. So, that morning, I told Aditi that we would have strawberry shortcake for dessert that night. Her face just crumpled, and she was almost on the verge of tears... I was a bit worried there.
Tuesday, 22 March 2011
I am always late to the party. Don't know why, I just am! So not only did I manage to miss a big chunk of 'We Should Cocoa', I also managed to miss 'Forever Nigella' 1 and 2. So I was determined not to miss Number 3, and with unseemly haste (Nigella would be so disappointed, a ladylike saunter would be more her style) rushed off to Sarah's Maison Cupcake to check out the new Forever Nigella challenge.
I was delighted to find that the theme was 'Ciao Italia', Italian cuisine has been a family favourite of ours, not least because its so classic and delicious, and usually on the quick side. I am, of course, talking about the pastas, pizzas and lasagnes that are a staple of our everyday dinners. And of course, Italian food is hands down the best comfort food in the world. To come back to my point, this challenge made me think a bit. I wanted to make something deliciously Italian, but didn't want it to be the usual Italian meals I cook.
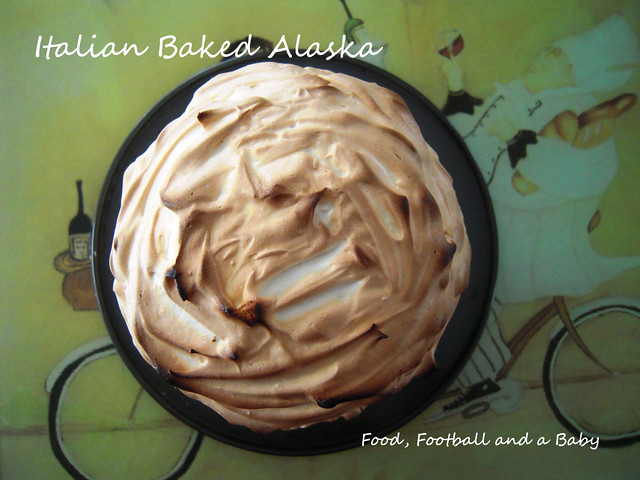
I browsed Nigella's website pretty thoroughly, and this lovely dessert caught my eye. Italian Baked Alaska! Now, as it turns out, Kay had been asking me to make a baked alaska for a while now. But I have always demurred, especially since I have never really been a good meringue maker. My first meringue around five years ago was a complete sticky, messy disaster, and I have never managed to find the confidence to make it again.
But this time round, I decided it was time to conquer the meringue demons. So the Italian Baked Alaska was the target. Nigella's recipe was remarkably simple, but as usual, I have to go and make a simple thing complicated, right? Right.
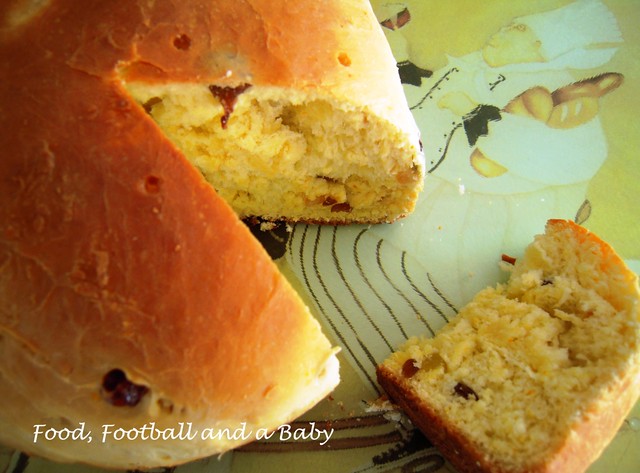
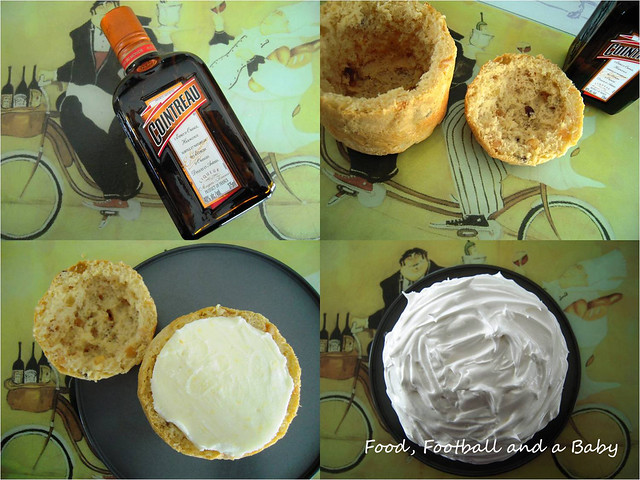
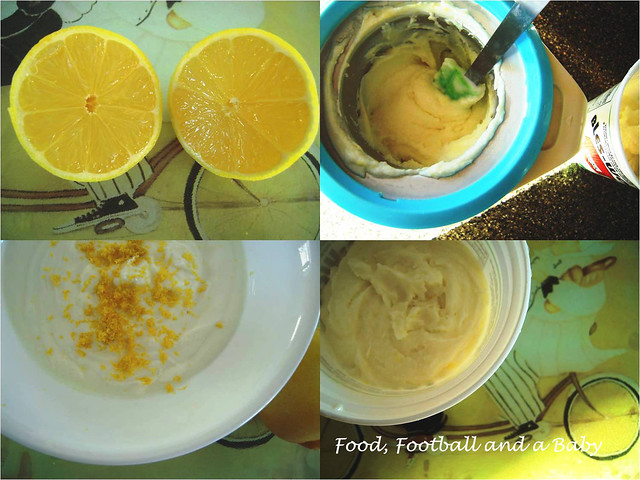
I decided to make my own panettone to start with. Then, instead of the plain vanilla ice cream, I figured I should have something lower in fat (ha!). So I settled on a lemon frozen yoghurt, as the filling. I also didn't want to make a huge alaska, so I scaled down the recipe quite a bit. And budgetary constraints meant that I replaced the Grand Marnier with Cointreau (I figure one orange liqueur tasted much like any other, purists, feel free to choke me round about now)
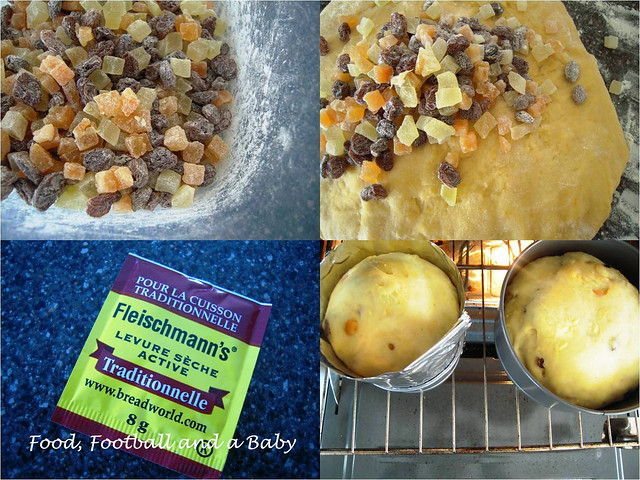
I toyed with the idea of making it alcohol free so the sprog could have some, but then figured she probably wouldn't like the lemony filling, so went all out alcohol-wise (am ignoring the peanut gallery, who're telling me I am really doing it so there's lots more for me ;-))
For the panettone, I used this Canadian Living recipe. The website has this neat bit where you can scale back the recipe to adjust the quantities. So, other than scaling back the recipe in half, I did not make any changes to it. I pinched off about a quarter of the dough, and baked it separately in a mini baking tin. The remaining dough, I just popped into a standard baking tin, and we had the panettone with tea. The panettone was fine, it wasn't the best or the lightest I've had, but it worked just fine for this recipe.


Italian Baked Alaska
Printable Recipe
Lemon Frozen Yoghurt Recipe
3 cups plain yoghurt
1 tbsp grated lemon zest (I used a microplane for zesting)
1 cup sugar
1/2 cup fresh squeezed lemon juice
Pinch of salt
Method:
Put the three cups of yoghurt into a cheesecloth draped over a bowl, then hang the yoghurt for up to four hours. You will be left with roughly 2 cups of very thick yoghurt after this step.
Whisk in the lemon zest and juice, sugar and salt.
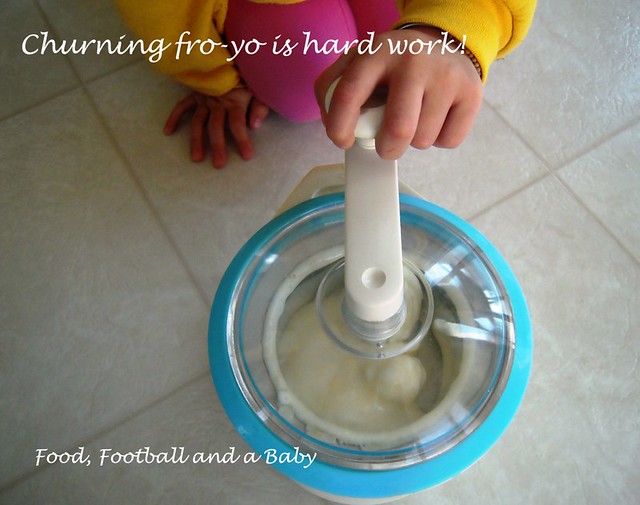
Churn in an ice cream maker until creamy. Pop into a freezer safe container, and freeze till ready to pop into the panettone.
Assembling and baking the alaska:
3 large egg whites
3/4 cup sugar
1 tbsp cornstarch
Slice the top off the panettone. Using your fingers, scoop out the insides (and eat), leaving a shell. Sprinkle the Cointreau into the panettone shell. Now stuff the panettone with the lemon frozen yoghurt, packing it down gently, but firmly. Sprinkle more Cointreau over the insides of the 'lid', and replace it on top of the panettone. Put back into the freezer while you make the meringue.
Make the meringue. Beat the egg whites, using an electric whisk, on a medium speed, until frothy. Then, on a fast setting, beat the egg whites, until they hold stiff peaks. Add the sugar, little by little, whisking well in between additions. Using a spatula, fold in the cornstarch right at the end,
When all the sugar has been used up and the egg whites are glossy and stiff, use a spatula to layer the meringue over the frozen yoghurt stuffed panettone. Don't leave any gaps.
At this point, you can freeze the assembled alaska, until you're ready to bake it.
When you're ready to bake the alaska, preheat the oven to 200 C (400 F) and pop the alaska directly from the freezer into the oven.
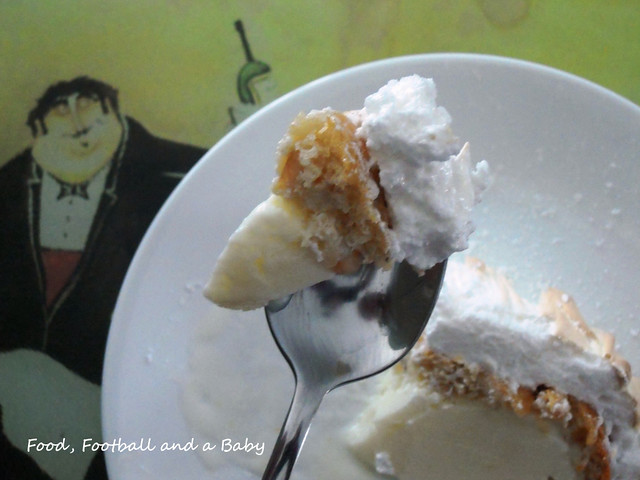
Bake for roughly 6 - 10 minutes (depending on how hot your oven gets, mine had been on all day, and was pretty hot, so cooked in roughly 7 minutes), until the meringue peaks start to brown. Take out of the oven, slice and serve immediately.
This recipe is going to Sarah at Maison Cupcake's Forever Nigella Blogging Event. The theme for March is 'Ciao Italia'!
Thursday, 10 March 2011
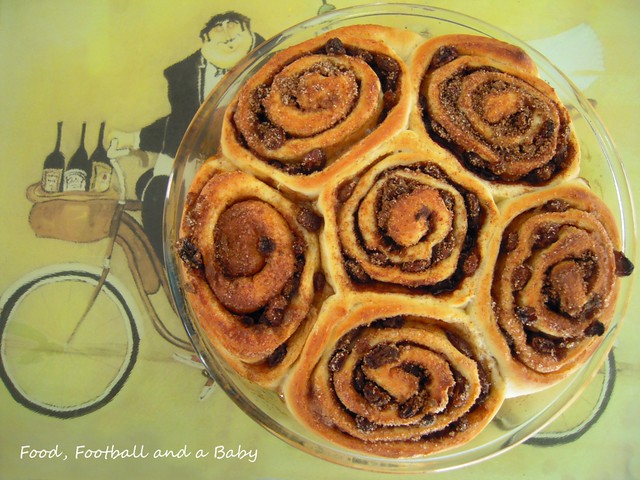
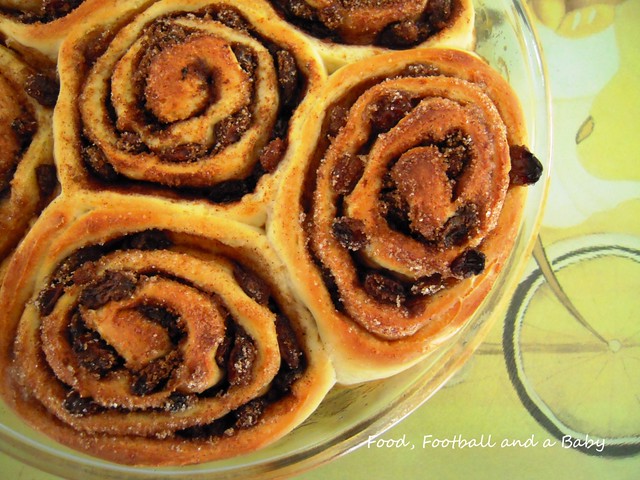
Whenever Aditi and I head over to Southgate Mall, we pass CinnZeo in the food court, and we have the same dialogue practically every time.
Me: Oh, what's that then?
Aditi: Its all nice and warm and cinnamony.
Me: Oh, what's that then?
Aditi: Its brown and soft and sweet.
Me: Oh, what's that then?
Aditi: Its tasty tasty good.
Me: Oh, what's that then?
Aditi: Mommyyyy... you're so mean, we passed the cinnamon bun place already... waaaahhhh!!
Me (very insincerely): Oh, sweetie, what a shame, maybe we can make some buns at home instead.
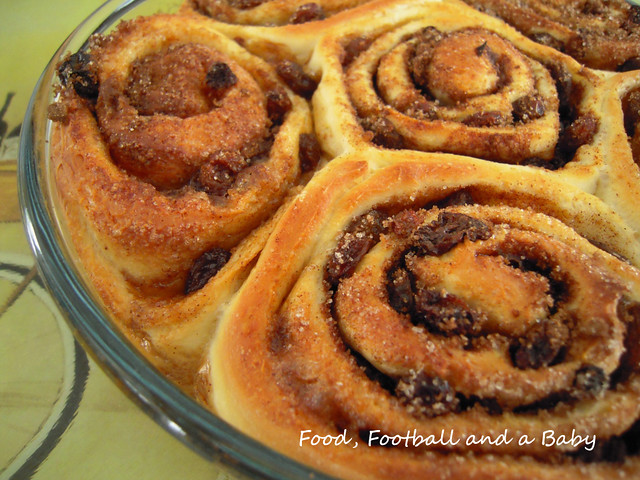
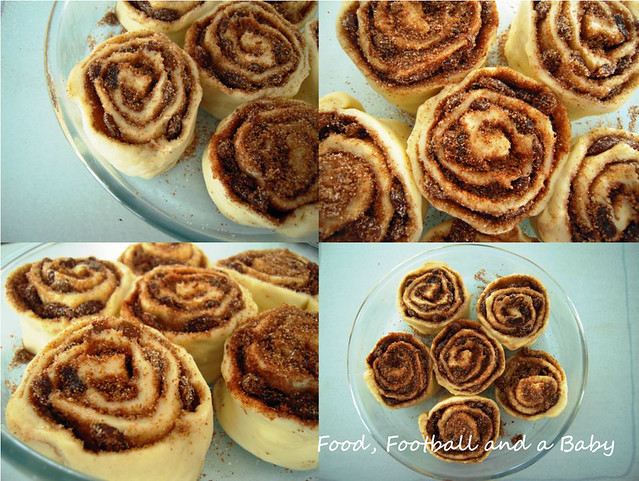
Yeah, that's me and my daughter. Aditi loves cinnamon buns, and well, so do I, but not when one bun furnishes the entire day's worth of calories and sugar at once. If Aditi and I are lucky (or exceptionally smart), we pass Cinnabon when they're doing their little sample hand outs. We love that, and both have a piece, and that's my craving sated for a day at least.
But for the last few days, Aditi has been pestering me to make some cinnamon buns, especially since I made her a small one from leftover dough from my hamburger rolls. So I figured, why not, and dug out a recipe that was given to me by my dear MIL. This recipe has shortening in it, and I never made it when I was in England, as we couldn't manage to get shortening there. I tried it once with suet, but it didn't work out, so I relied on this Easy Living recipe instead. The buns were good, but not spectacularly great, so I never made them a lot.
Anyway, I decided it was time to pull out MIL's recipe for roll dough (she told me she got it from the Better Homes and Gardens Cookbook, she's not sure which edition though) The recipe is for plain roll dough, that you would use to make hamburger and hot dog rolls, but is made a little richer with the addition of extra shortening and sugar to use for cinnamon buns.
I was very impressed by the quality and taste of these buns, and they were so simple to make, especially if you have a bread maker to take the hassle out of making the dough. MIL said that pretty much everything she'd tried from that book had turned out exceptionally well, so I have another book of recipes to copy off her now.
This recipe makes double the dough needed for the buns. You can just double up on the buns or make plain rolls with the rest of the dough, if you like. I also added raisins to the buns, as I quite like the textures. You can add them or leave them out, and you can also use crushed walnuts or pecans as the filling. Once the buns are out of the oven, you can glaze them with a dark sugar syrup or ice them with cream cheese frosting, but I didn't bother with that, as I felt the buns were pretty delicious on their own.
Either way, I had a very happy, sticky and hyper little girl all of yesterday :-)
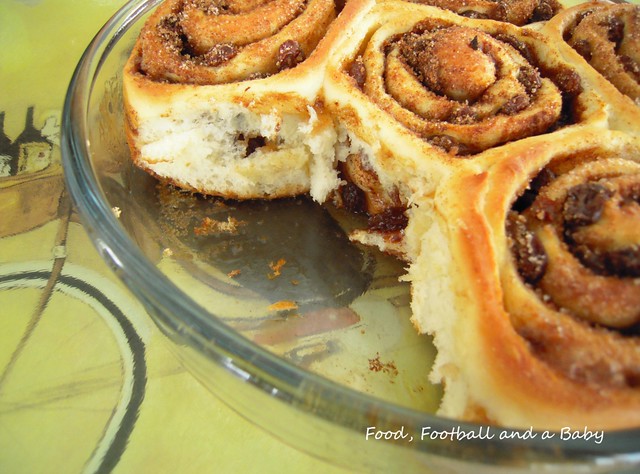
Recipe:
(Printable Recipe)
Adapted from the Better Homes and Gardens Cookbook
Plain Roll Dough:
1 tbsp active dry yeast
¼ cup water + ¼ cup extra
1 cup milk, scalded
2 tablespoons sugar
2 tablespoons shortening
1 teaspoon salt
3½ cups sifted all purpose flour
1 egg
Method:
Soften active dry yeast in warm water.
Combine milk, sugar, shortening and salt; cool to lukewarm.
Add 1 cup of the flour and beat well.
Beat in softened yeast and egg.
Gradually add the remaining flour to form soft dough, adding a little more warm water if required.
Cover and let rise in warm place till it doubles (1½ to 2 hours)
Turn out on lightly floured surface and knead for a few minutes. Then make cinnamon buns, as noted below.
Note: For a richer version, increase either the shortening or sugar or both to ½ cup.
Cinnamon Buns:
1/2 plain roll dough, as above
1/2 cup brown or white sugar (I use a mixture of both)
1/4 cup melted butter
1½ tsp cinnamon
1/4 cup raisins
On lightly floured surface roll ½ of the plain roll dough to a rectangle.
Combine ½ cup brown or white sugar, ¼ cup melted butter, and 1½ teaspoons cinnamon, spread over dough.
Sprinkle with ¼ cup raisins and/or chopped walnuts or pecans.
Roll lengthwise, as for jellyroll.
Seal edge, then, using a very sharp knife, cut into 1-inch slices.
Place cut sides down in greased pan and leave in a warm place and let rise again till double in size.
Bake in moderate oven 350 F for 15 to 20 minutes.
Frost with confectioners’ icing if desired.
Note: This only uses half the plain dough recipe. You can make plain rolls or buns with the rest. Shape and place into greased pan - let rise until double and bake.
- Lisa's 'Sweets for a Saturday ' Lisa, I've not missed a single one so far :-)
- Alli-n-son's 'Sweet Tooth Friday'
Do visit their blogs, some amazing treats on offer.
Friday, 25 February 2011
This blog post has been sitting in my folder for a couple weeks now. Sometimes I can be such a lazy arse :-) It took Shireen's chocolate cake at Ruchik Randhap to finally make me get to blog it. Shireen's blog is amazing, by the way, go have a look at it. Some of her traditional Mangalorean food really makes me homesick.
I love the Italian Centre Shop here in Edmonton. It particularly stands out, as there is no real grocer or the likes of Marks and Spencer here. I think that it is a real shame because Edmonton could do with the likes of such supermarkets. The only place you can get nice fresh veg and fruits is the farmer's market, and while I love to visit and ocasionally splurge, I have found that my budget will really not allow for regular shopping there, as its really expensive. And, in general, grocery shopping is brutally expensive in Canada. I find myself easily spending more than $80 on a basic, regular grocery run, which is well on the higher end of the scale.
So, the Italian Centre has become my go-to place for stuff like cheese and salami (its also nice to have them in small packs as I am the only omnivore in the house) and European food like smoked mackerel, cheap Bonne Maman conserves and general pantry items that I like to stock at home. Its cheaper than Safeway, Save-on-Foods or Sobey's and gives me the opportunity to get things like Marmite at a better price.
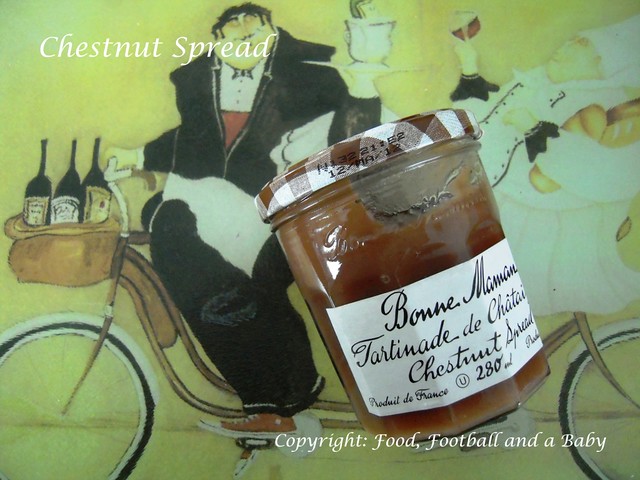
I also like to pick up things there that I haven't seen or tried before. Which is where I found this Bonne Maman jar of chestnut spread.
I was intrigued enough to buy it, but was then stumped as I had no idea what I was supposed to do with it. A quick Google brought up a few recipes for chestnut cake, but none really used this particular spread.
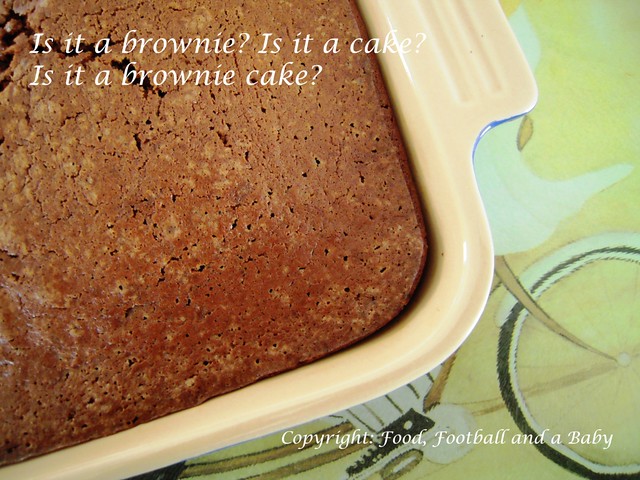
So the jar stayed in the pantry until a few weeks ago. I was rooting about to see if I could find a snack, and found this instead. I gave up on Google and turned to my trusted Mary Berry instead. Probably for the first time, I was feeling adventurous enough to try and modify a recipe. I picked her recipe for chocolate brownies, and adapted it to include the spread. This meant that I had to change quantities, and experiment haphazardly with quantities, but I was quite pleased with the end result.
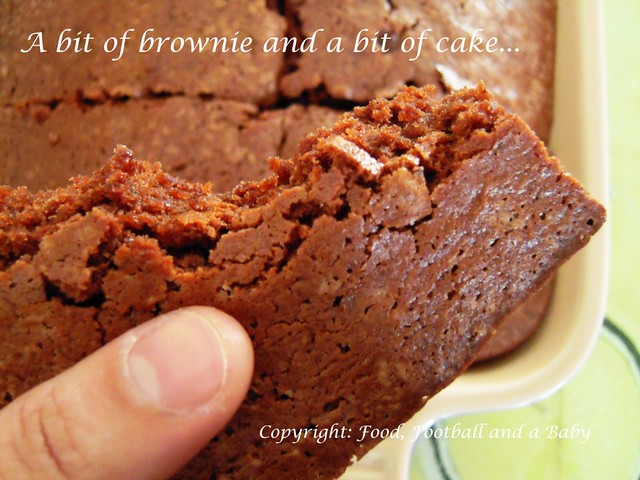
I wouldn't call these brownies, as they weren't dense enough, but more on the cakey side, so this concoction is officially christened brownie cake. The taste of cocoa was quite strong, but surprisingly you could taste the chestnut spread in it too. The chestnut also made the cake beautifully moist, and it was practically melt-in-the-mouth. It disappeared quickly enough, so there were certainly no worries about how it tasted :-)
An apology though. The cup and weight measures are mixed up here, so you'll need to weigh out the butter. I converted the rest of the measures into cups.
Recipe:
(Printable Recipe)
75g butter (1/2 cup)
1 cup sugar (250 ml)
1 jar Bonne Maman chestnut spread (280 ml)
4 eggs
3/4 cup flour (roughly 200 ml)
1/2 tsp baking powder
1/4 tsp salt
3 tbsp cocoa
Method:
Preheat the oven to 350 F (175 C)
Sift the flour, salt, cocoa and baking powder together in a bowl.
In a separate bowl, cream together the butter and the sugar.
Add the eggs and chestnut spread and whisk together until well combined.
Now add the flour mixture to the butter mixture, bit by bit, until all the flour has been added. Scrape into a baking tray, and smooth out the top.
Bake for roughly 40 - 45 minutes until a skewer comes out clean and the edges are pulling away from the pan. Take out and leave to cool, then cut into squares.
Serve warm or cold, with cream or ice-cream.
Monday, 20 December 2010
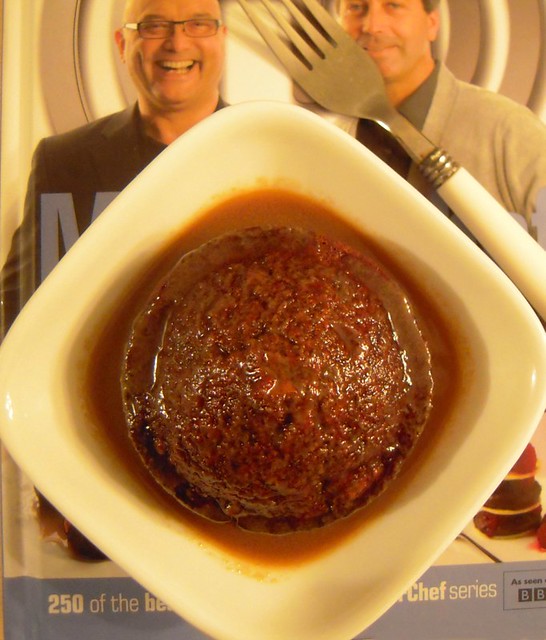
... is a delicous, moist, light-as-air sticky toffee pudding cake with scrumptious toffee sauce and homemade vanilla ice cream.
This cake was for Kay's birthday, again in December... now you see why I am pretty much run off my feet in December.
The recipe for this cake came from BBC's Good Food! I adapted it a little bit by adding 1/8 tsp of nutmeg, 1/4 tsp ground ginger, 1/4 tsp allspice and 1/4 tsp cinnamon instead of the mixed spice. The resulting cake tasted more gingery than the traditional pudding, but Kay and I are both partial to ginger, so it didn't matter very much. I made the vanilla ice cream using a recipe from 'The Perfect Scoop' by David Lebovitz. You can find one of his versions here.
We liked the cake so much, that its going to be our Christmas pudding this year, perhaps with a dash of brandy tossed into that toffee sauce just to make it Christmassy ;-)
Wednesday, 15 December 2010
and
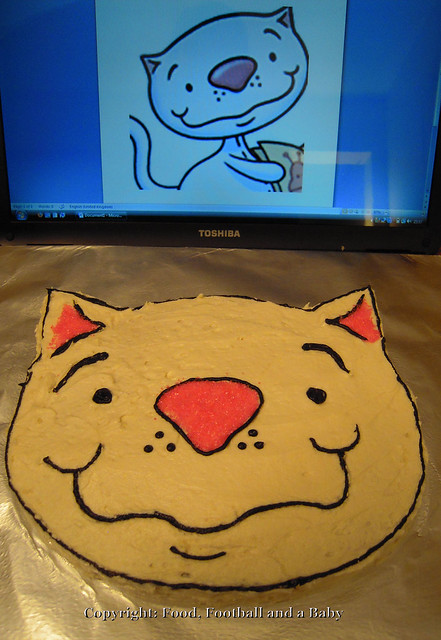
... decorated to look like Binoo from Toopy and Binoo. Oh dear :-)
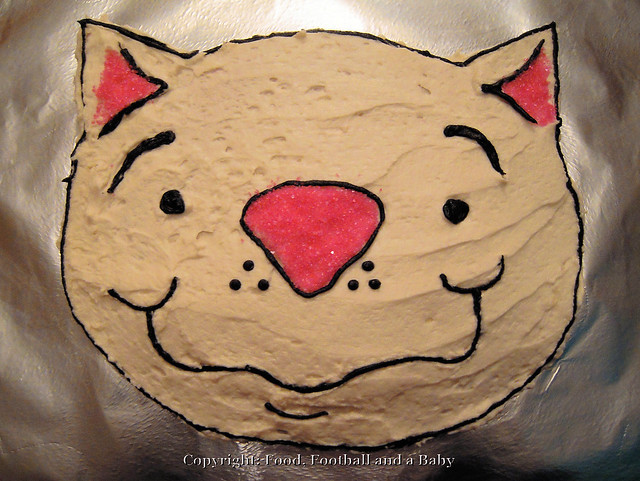
For those of who have never heard of Toopy and Binoo, enjoy the blissful ignorance of TV's most annoying lead character. For those of us who are suffering, here is the recipe for the cake and the buttercream frosting to make them palatable!
I needed the cake not to rise too much, as I was making it to cut into the shape of Binoo's head. After a long time of looking around, I settled on the Joy of Baking recipe, as it seemed like it was a denser cake than, say, an angel food cake. The only departure I made from the original recipe is that I added a teaspoon of lemon zest to the vanilla mixture to add some depth and a hint of citrus to the cake. It did make a big difference to the flavour, and made the cake adult friendly too. It worked brilliantly and there were happy faces and tummies all around.
I admit I was blackmailed into making and decorating the cake in that stupid cartoon character's shape, with Kay going on about how it was important to make memories that would last. I thought a easy chocolate cake would do the trick. But I allowed myself to be coerced into making the cake, and I must admit the look of wonder and awe on her face was worth every second of the staying-up-till-midnight-to-decorate-a-silly-cake-tiredness :-)
Thursday, 25 November 2010

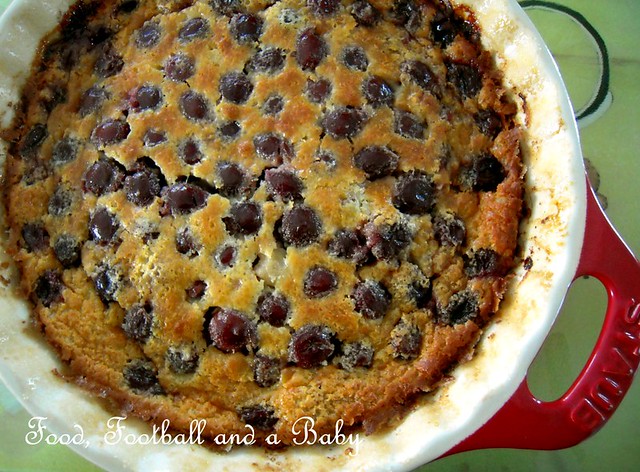
What do you get when you are in a mood for a custard, but also a cake? Why, a clafoutis of course!! This divine dessert is a delight, delicious, decadent and droolworthy. And quite simply a cinch to make if you're up to an afternoon of baking, but its not quite time to break out the Christmas recipes.
Thanks to a few bucketfuls of fresh Bing cherries from our friend in Terrace, I have a freezer full of cherries that are just waiting to be made into desserts through the long cold winter. Truly a taste of summer, these cherries remind me of this summer's drive back from Terrace to Edmonton. We had a bucket of cherries between the drivers and passenger seats, and our lips were stained black from snacking on them all the time. Ocasionally we'd toss a couple into the back seat where there was an eager kid just waiting to chow down on them. Ah, memories.

Fresh cherries are not something I grew up with and the cherries we got back in India were either the small, sour varieties or came in a bottle with enough sugar syrup to kill all of their character. Of course, this meant that when I did finally taste fresh cherries off the tree, I was a kid in a candy store... Aditi, Kay and I spent more time at that tree in Terrace than with the in-laws :-)
My favourite recipe for cherry clafoutis is one from Raymond Blanc, God of all French Cooking (and Gallic good looks, of course!) This particular version has been adapted a bit, because I did not have some ingredients, plus I wanted to make it a little lighter. The original version is here, and also available in the BBC's Foolproof French Cookery, so feel free to try them out!
This tastes best warm, just taken out of the oven, and left to sit for a few minutes (if you have the patience), but I have had it the next day cold and with a scoop of homemade vanilla icecream and it's still pretty divine. Of course, it is even better with fresh cherries, but frozen work just as well.
Recipe:
(Printable Recipe)Cherries:
500g cherries, pitted, fresh or frozen (if using frozen, measure them out when they are still frozen)
A couple tbsp dark rum or kirsch
About 100g sugar
Clafoutis:
100g plain flour
5 tbsp sugar
A pinch of salt
3 eggs + 1 egg yolk
Zest of one small lemon
2 drops natural almond extract
150ml milk
150ml single cream or half and half
70 - 75g butter, melted to a light brown colour
Method:
Mix together the cherries, rum or kirsch and sugar in a bowl, and pop into the fridge for a couple hours. If using frozen cherries, leave out for the cherries to thaw. If they haven't thawed sufficiently in time to be added to the batter, defrost quickly in microwave.
Preheat the oven to 180 C or 350 F.
In a big bowl, whisk together the flour, salt, sugar and eggs and egg yolk. Add the lemon zest and almond extract and stir together. Now add the milk and cream and whisk until well blended.
The melted butter should still be hot at this point. Slowly drizzle it into the batter, whisking constantly until it is all incorporated.
Stir in the cherries and any remaining marinade into the batter.
Grease the baking tray or pie pan with a little butter, and sprinkle over some caster sugar.
Pour the batter into this prepared tray or pie pan, and bake for 35 - 40 minutes, resisting the urge to open the oven at this time. Keep an eye on the clafoutis, and when it looks like its browning on the top, gently open the oven, and skewer it. If the skewer comes out clean, the clafoutis is done. If not, let it bake for a few more minutes. Take it out of the oven, and let it rest for a few minutes.
Serve with ice cream or heavy cream.
Monday, 18 May 2009
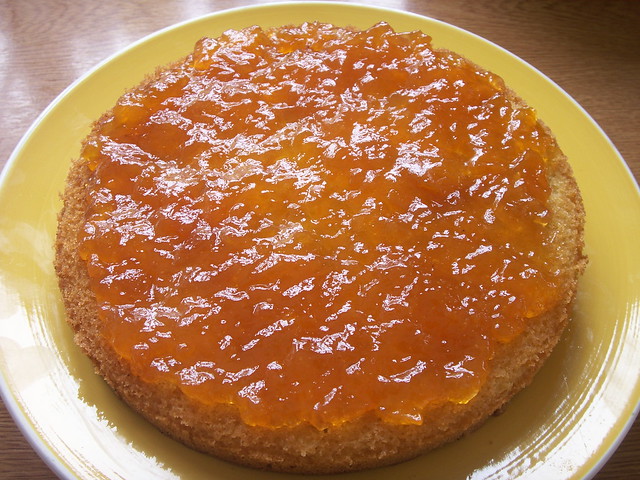
One of my favourite British traditions. You really cannot go wrong with this classic cake. Its a lovely, moist sponge cake, that has jam sandwiched in the middle. You can use almost any kind of jam, and flavour the cake any way you want. It tastes amazing with a hot cuppa, and little sandwiches... here I am coming over all Brit :-) With this recipe, I have used orange zest to give the sponge a hint of citrus and used apricot jam which adds a lovely tang to the super sweet cake.

Recipe:
225g self raising flour
225g unsalted butter softened
225g caster sugar
4 large eggs
1 tsp baking powder
Zest from 2 oranges
Enough apricot jam to spread over the cake
Method:
Preheat the oven to 175 degrees celsius. Grease and prepare two round loose bottomed cake tins. I use the standard ones I got from HomeBargains, and they've served me just as well as my fancy ones.
In a large bowl, sift in the flour and baking powder. Mix in the butter, sugar, eggs and orange zest, and beat well for about 3 minutes with an electric beater. Turn out the prepared cake mix equally into the 2 tins, smoothing out the surface.
Pop into the preheated oven, and bake for between 20 - 30 minutes, until a skewer inserted into the middle of the cake comes out clean. Take out the cakes, and leave to cool fully... otherwise the jam will melt.
Take one of the cakes and turn it upside down. Gently brush it with some apricot jam, then slather on more jam, as much as you want really. I use about half a Bonne Maman jar.
Pop the other cake on top of the jam and press down gently. Dust some icing sugar on top and serve with a nice cup of builder's... er... Earl Grey tea :-)
Tuesday, 14 April 2009
 A classic, seriously easy to make and a real favourite cake of the whole family. A slice tastes amazing with a cup of tea during lazy spring evenings! My favourite part of the cake is that the cherries sink to the botton while baking, and therefore the last bite is always a cherry filled sensation! Mmm...!
Kind of funny, but I remember reading and loving Enid Blyton's Famous Five series, and always wanting to try Aunt Fanny's cherry cake, in which all the cherries sink to the bottom of the cake, and Anne describes it as the best last mouthful in the world. Add ginger beer and egg sandwiches, and you could have a summer picnic right out of Enid Blyton's world!
If you don't like the cherries at the bottom (why, why??), then you need to wash and dry them thoroughly to get rid of all the sticky juices. This gets them lighter and they are more likely to stay in the middle of the cake.
 Recipe:
 225g unsalted butter, softened
225g self raising flour
225g caster sugar
50g ground almonds (optional)
1 and 1/2 tsp baking powder
4 eggs
200g or so glace cherries
Method:
1. Wash and dry the cherries thoroughly and quarter the large ones, halve the rest.
2. Preheat the oven to 180 degrees, gas mark 4, 350F.
3. In a large bowl, using an electric mixer, beat together the butter, flour, sugar, eggs, almonds and the baking powder until well mixed (about 2 minutes or so). You can use a wooden spoon to beat as well, but make sure everthing is well mixed in.
4. Fold in the cherries.
5. Grease a 8 inch deep round cake tin, and line it with baking paper (I use nonstick, so only use the greased tin, its never hurt the cake really!).
6. Turn out the cake mixture into the tin, level the top with a spatula, and bake for about 1 hour and 15 minutes or so. Check after an hour, if the cake is not sticky in the middle and if the edges have pulled away from the tin, its done. The top should be a light brown colour.
7. Let the cake cool, and then turn out, and serve with a cup of tea. The cake freezes well, so I cut it into wedges and individually freeze them, for a quick treat :-)
Subscribe to:
Posts
(
Atom
)


