


Friday, 28 January 2011

This is my version of the famous Bombay street food. Deliciously spicy vegetable curry, served with chopped onions and a lemon wedge and fresh-out-of-the-oven bread rolls or pav.
I used a prepared spice mix for this dish, as its probably one of the best brands of mixes around, called Everest Pav Bhaji Masala , and I honestly don't think anything I could make at home would match up to the quality of this one. The actual dish is fairly easy to make. Its definitely spicy, but you could tone down the spice by using less of the spice mix, plus cook the onion-tomato-spice mixture for a longer time, as it helps absorb the spice better.
It's also the condiments that make this dish unique. You have to have lemon wedges and chopped raw onions on the side. I used a few spring onions too, and they were delicious. Splash of butter on the bhaji. I also used plain oven bottom bread rolls in place of the Bombay pav, and they work really well.
 Recipe:
 (Printable Recipe)
1 tbsp oil
1 medium onion, chopped
3 garlic cloves, minced to a paste
1/2 inch ginger, minced to a paste
1 green chilli, chopped fine (optional)
1 400g tin of chopped tomatoes
1/4 tsp ground turmeric
2 or 3 tbsp Everest pav bhaji masala or any other kind of pav bahji masala
2 cups steamed chopped vegetables (I used 1 potato, 2 carrots, big handful of peas, 1/4 head of cauliflower chopped fine, 1/2 yellow pepper and 6 - 7 mushrooms, sliced)
1/2 cup water (use the water the veggies were steamed or boiled in)
Salt and pepper to taste
Handful of fresh coriander, chopped
To serve:
4 bread rolls, split and buttered
1 lemon, quartered
1/4 onion, chopped
1 spring onion, chopped
Method:
Heat the oil, and fry the onion for about 5 minutes, until soft. Add the ginger and garlic, and chilli, if using, and saute for another 2 minutes.
Add the tomatoes, turmeric and pav bhaji masala, and cook for at least 15 minutes, stirring ocasionally until the masala is fairly dry and the oil starts to separate from it.
Add the veggies and the water, and stir together. Simmer for another 5 minutes, adding a little more water, if required. Using a masher, coarsely mash the vegetables together into the curry.
Season to taste. Sprinkle over the fresh coriander and stir together.
To serve, shallow fry the buttered bread, butter side down for roughly a minute or two, until lightly coloured. Serve the bhaji topped with a splash of butter, with the fried bread, chopped onion and spring onion and the lemon wedges on the side.
Monday, 24 January 2011

When I was a kid, we had relatives that lived in the Middle East. Every time they came home it would be with bagfuls of chocolates and treats of the kind that were not available to us at home in India. Some of these tastes I have never forgotten. For example, I love Werther's butterscotch caramels, or the taste of tinned Kraft cheese (blush!). There was another candy that my uncle used to bring us. The name has been long lost among dusty memories (I think it may be Kopika, but I am really not sure), but the taste has not been forgotten. It tasted of coffee and chocolate. Just that. Coffee and chocolate, each easily identifiable, but melding together in a distinctive taste.
I have never had cause to think of those chocolates for a long time, but for a concoction I came up with this evening. I was browsing Mangocheeks' Allotment to Kitchen blog, and she mentioned entering the 'We Should Cocoa' blog event, which is being hosted by The Chocolate Teapot. The theme for this month was 'Surplus Stock or Leftovers', and obviously one of the ingredients had to be chocolate or cocoa products.
What a splendid idea, I thought. I had a cup of half and half, and another of whipping cream that I had left over from my last ice cream making endeavour (maple icecream with pecan praline, if interested) I also had a bar of milk chocolate that I had carefully hidden from both Kay and Aditi. Trust me, if you knew those two, you would hide any chocolate you had too along with anything else that may be remotely connected to sweets.
Well... to be honest... actually I had forgotten that I had hidden that chocolate bar, I found it while looking for my sieve, which had disappeared among the dark recesses that comprise my kitchen cupboards :-)

Anyway, I thought, since I found the chcolate, why not enter the event? As most of you probably already know, I am a big fan of David Lebovitz and his book 'The Perfect Scoop'. I had a quick browse through his recipes, and settled on the chocolate ice cream, Philadelphia style (without the egg custard). But you know me. I can't resist tinkering, and so I thought, hey, why not add coffee to the chocolate, wonder what that would taste like? I mean, mocha tastes pretty good, and chocolate and coffee are already pretty good mates anyway.
Well, I had my answer, it tasted pretty good. Just like that long lost taste of coffee candy, each flavour was distinctive in the icecream, yet they didn't fight each other. I used decaf instant for this recipe (for the child's sake), but you can use full caff coffee or even espresso, if you feel like it. I also used milk chocolate, as I am not really a huge fan of dark chocolate (except when its cooked into a brownie or my father-in-law's great aunt Nell's chocolate cake, mmm)
So here I am, sitting in a comfy chair in my bay window, lost in old memories of chocolate, candy and cheese. Well, mostly that tinned cheese, but let's not dwell too much on that 'kay :-)

Recipe:
(Printable Recipe)
Adapted from 'The Perfect Scoop' by David Lebovitz
1 cup half and half (single cream + whole milk) (250 ml)
1 cup whipping or heavy cream (250 ml)
3 tbsp cocoa powder
3 tbsp instant coffee powder (I used decaf)
1/2 cup sugar (125 ml)
100g milk chocolate, chopped
Pinch of salt
In a saucepan, heat the whipping cream with the sugar, salt and cocoa till it boils, and the sugar is dissolved. When the mixture is boiling, add the coffee and whisk till it dissolves.
Take off the heat and add the chopped chocolate, stirring well until it melts.
Add the half and half and whisk together well, until smooth. Refrigerate until cold, then churn in an ice cream maker until creamy!
Yum!
Note - This recipe will only make about half a quart of icecream, as I used leftover cream. To make more, double the recipe.
Friday, 21 January 2011
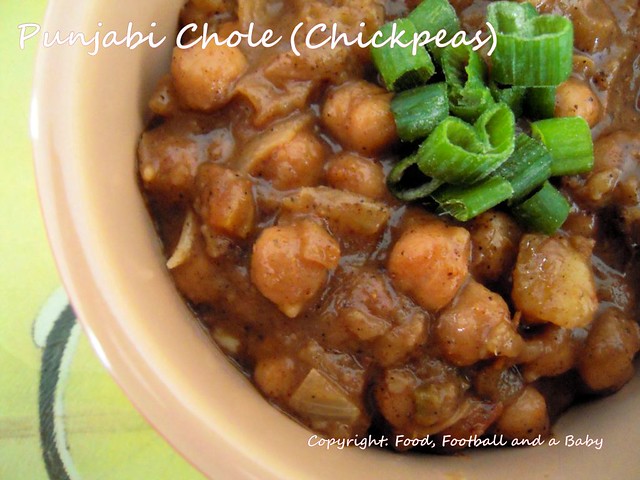
There are always some days when you crave the taste of something that came in a ready meal packet. Yes, you read that right, a ready meal packet. I almost never buy ready meals, but I make an exception for Ashoka Punjabi Choley. I love the taste of the plump chickpeas cooked in a spicy sauce, quintessentially Indian!
However, since moving to Edmonton, I found that I very rarely have the chance to go to Asian supermarkets (which I haunted when we lived in England), which means my stock of packets of chole was sadly depleted.
So, as necessity is the mother of cooking, I decided to get off my lazy backside and have a stab at making them myself. I make a version of chana masala, which is good, but its not Punjabi Chole. So I started looking around for a good recipe.
I follow an amazing blog called 'A Mad Tea Party'. When I googled 'Punjabi Chole' the first hit was Anita's recipe. It looked awesome and after drooling for a while over the pictures, I hit my kitchen cupboards.
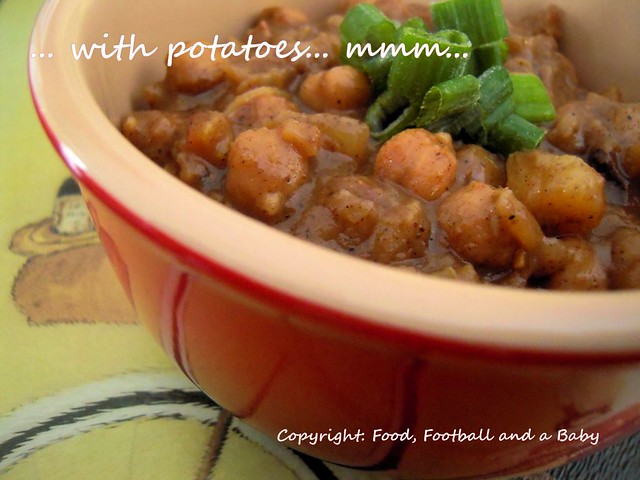
I adapted Anita's recipe a little bit, as I did not have a few ingredients and my essential laziness meant that I certainly wasn't going to be organised enough to soak the chickpeas and cook them. I also had to leave my pressure cooker behind in England (sob, sob) so it would have taken a long time to cook them. So I went with tinned chickpeas and tomatoes. I also substituted a few spices as I had run out of a few (I really need to get to a Asian store soon!!) and added potato cubes to the chole to make them a bit more substantial. I also skipped the chilli powder and slit green chillies, to suit the spice tolerance level in our house.
The dish is still fairly spicy, but Kay was able to handle the spice well, so I haven't bothered reducing the ground spice content. If you want it less spicy, just reduce the peppercorns which are the source of heat in this dish. Anita's dark roasting method, which I had never tried before, made a huge difference to the dish and the taste was very different to the chole you get in a restaurant.
The end result was that this concoction tasted divine. Not super authentic (I highly recommend you try Anita's recipe if you want to be authentic), but still absolutely delicious! Just like the stuff from the packet tasted, but better (I know, just humour me, OK) It immediately became a new favourite in the house, and its freezable to boot, so a huge success all round!!

Recipe:
(Printable Recipe)
500 g or so, tinned chickpeas
1 large potato, cubed into small dice, and boiled till just tender.
1 large onion, diced fine
1 250g tin, chopped tomatoes
1 garlic clove, grated
1 inch piece of ginger, grated
2 tbsp oil
Salt to taste
For the spice mix:
2 tsp coriander seeds
1 tsp cumin seeds
1 inch piece of cassia bark (or cinnamon)
3 whole cloves
3 black cardamoms (opened and use the seeds only) or substitute 4 green whole cardamom pods, like I did
1 pod marata moggu (optional, but adds a really smoky taste to the dish)
1 tsp whole black pepper
2 dried long mild red chillies
1 big dried bay leaf
To garnish:
1 spring onion, sliced or handful of fresh coriander, chopped.
Method:
Put all the spices into a heavy pan, and roast, stirring constantly, until they are almost black in colour. They don't have to be jet black, I roasted mine to a dark brown colour. Transfer to a powerful blender or spice grinder and grind to a fine powder.
Note: You can double or triple the spice recipe, and store the ground spice in an airtight tin for use later as well. Of course, fresh ground spice does taste a lot better.
In a pan, heat the oil, and cook the onion on a medium heat till soft and starting to brown round the edges. Add the ginger/ garlic and stir for an additional minute.
Add the tomatoes to the mixture, and cook, stirring until the tomatoes are very squishy. Add the ground spice mix and salt to taste. Cook down, stirring for about 10 - 15 minutes, until the masala is fairly dry.
Add the chickpeas, along with any water in the tin, and the potatoes, and stir together gently. Simmer for an additional 5 minutes. Garnish with spring onions or fresh coriander and serve with rice, roti or naan.
Wednesday, 12 January 2011
First off the bat, let me apologise for the infrequent posts these last few weeks. There are a few reasons for that, not excuses. Its been a crazily busy holiday season, with friends over for Christmas, then a week's trip to see the in-laws which involved driving on the cold, wintry roads for four whole days.
And then the cable that connects my camera to the computer acts up, so all these lovely pictures I took are languishing in the depths of a memory card. The cable only works if you hold it a certain way, and to be honest, it takes so long to get it right, that I just do it when I have a full card. Its a pain otherwise. And without pictures, the blog just looks so dull!
Then the drain on my kitchen sink decides to back up and leave loads of standing water all over the place. Which means it's impossible to do any dishes and if there's one thing I hate hate hate it is a messy kitchen. Its impossible for me to gain an joy out of cooking when there's a thousand dirty dishes piled up and the dishwasher is playing up by leaking all over the place (well, I may be exaggerating ever so slightly!) I have tried all the natural drain decloggers, but nothing seems to work, so sadly its going to have to be a blast of chemicals to clear it.
And to top all of it, the temperature outside has been between -25 and -42, with around 5 feet of snow, and I'll be darned if I am going to wade through drifts as high as my waist!
Well, now that I have finished my catalogue of woes (and you've tired of reading through them :-)), there was only one thing that would cheer me up. Ice cream! Luckily I had done a grocery shop before the weather went all psycho on me, so I had the makings of a kiwi ice cream (the fruit, not the New Zealander).
This ice cream has a bit of a backstory. I first heard of it when we had a housewarming party. We had a few friends over, and since I had just got my ice cream maker, I asked the kids what flavour they would like to make. J chose vanilla, and S chose kiwi! I was a bit surprised at the choice of kiwi, but it was a challenge. So I found an old Ben and Jerry's recipe and made the icecream. The icecream was delicious, but there was a distinct bitter undertone to it. I put it down to having pureed the kiwi in a blender, and thus crushing up the seeds, and thought no more of it then, because it still disappeared.
Then a few weeks ago, I had a tub of Greek yoghurt and a bowl of kiwis going bad. So I decided to whisk up the two and make kiwi frozen yoghurt. This time I mashed the kiwi instead of pureeing it, but to my surprise the bitterness was more pronounced this time around.
It couldn't have been the seeds, so I decided to dig around. And to my surprise this was what I found. So it wasn't the seeds, but an enzyme within the kiwi itself that was causing the problem. The site recommended blanching the kiwi in boiling water before using to break down the enzyme. I thought it was worth a try and by this time I was getting annoyed, as my lack of perfect kiwi icecream was becoming a personal nemesis.
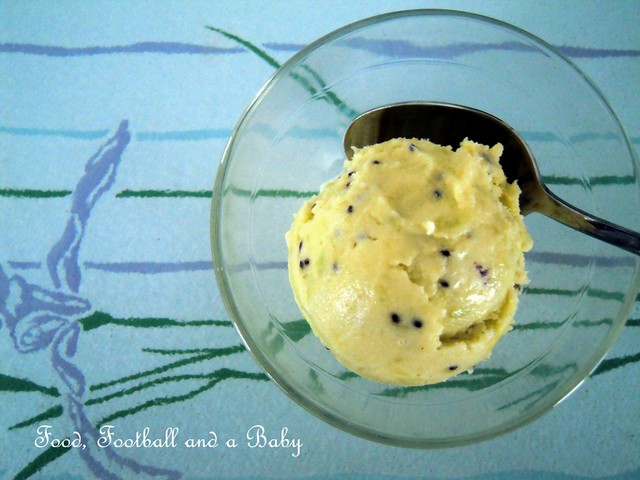
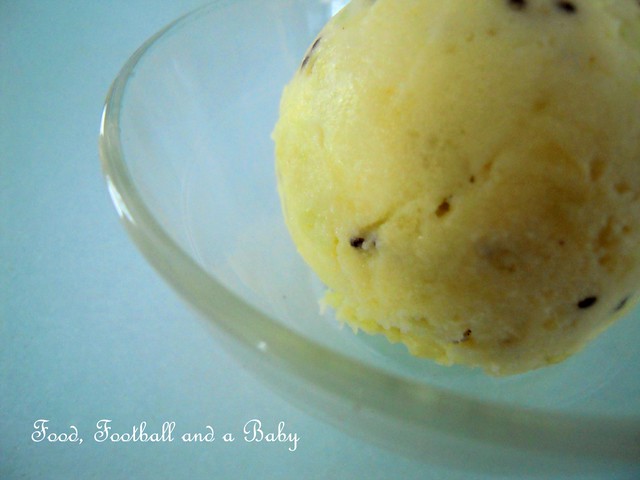
So when I made this icecream, I modified the Ben and Jerry's recipe, and incorporated the blanching method, along with a few other things, and finally... success!! This icecream was absolutely delicious with no bitterness whatsoever. It had a slight citrus tang to start with before melting into a sweet, creamy kiwiness. And the colour is stunning, the palest of green with darker green flecks and seeds scattered around. The pictures really don't do it justice.
The taste of kiwifruit is quite pronounced and I suggest that if you have really sweet ripe fruit, you may want to reduce the sugar down a bit. I also made it lower fat by using half and half (single cream). This recipe uses raw eggs, so using pasteurised may be a better option.
If you want to make it lower fat, you can even substitute strained Greek yoghurt for the cream. Do strain the yoghurt first though, as the tang of the kiwi and yoghurt together may make the taste a bit sour. Also, blanch the kiwi for an additional minute or so, to make sure the enzyme has completely broken down.
Either way, a taste of this made all my woes disappear, as I float in a blissful ice cream induced haze! The sink is still backed up, the dishwasher still acting nuts, the house is a tip and the child is unwashed, but as Miss O'Hara says, "Tomorrow I'll think of some way . . . after all, tomorrow is another day."
Recipe:
(Printable Recipe)
7 - 8 ripe small kiwifruit, peeled and cut into small chunks
Roughly 2 cups boiling water, or enough to completely submerge the kiwifruit
2 cups (500 ml) half and half or single cream
3/4 cup + 1 tbsp sugar
2 large eggs
Pinch of salt
1 + 1/2 tsp lemon juice (optional)
Method:
Place the chopped kiwifruit in a heatproof bowl, and pour over the boiling water. Blanch, stirring ocasionally for 60 - 90 seconds and then strain out the water completely.
Mash the kiwi well. Stir in 1 tsp lemon juice and 1 tbsp sugar and pop into a refrigerator for at least 15 - 20 minutes, an hour if possible.
Whisk the eggs and sugar until pale and creamy, then add a pinch of salt and the lemon juice. Whisk in the cream, until well blended. Stir in the mashed kiwifruit, until well mixed. If possible, refrigerate until the mixture is very cold.
Take out the mixture and churn in an ice cream maker until creamy.
Due to the fruit bits in this ice cream, it may be a bit icy. So take out a few minutes and let the ice cream soften up before serving.
Subscribe to:
Posts
(
Atom
)
