


Saturday 25 September 2010
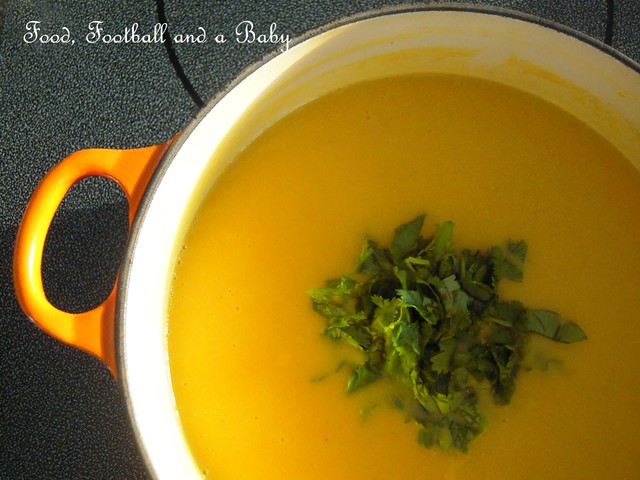
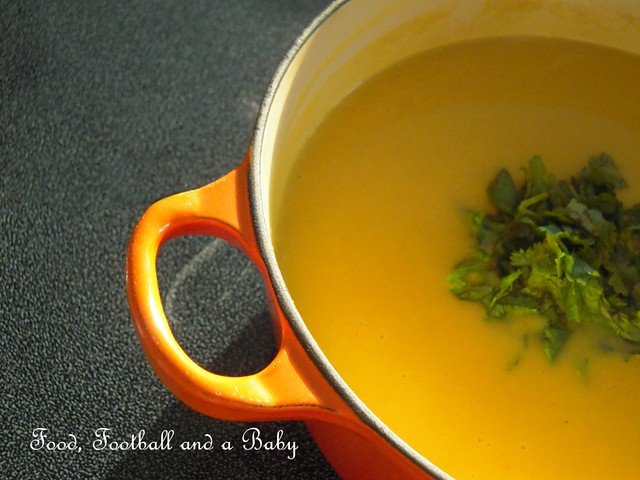
I just realised that I never did post the recipe for this soup here. This is one of my recipes in the Masterchef Cookbook, and one that I make fairly often. The delicate sweetness of butternut squash is enhanced by the slightly spicy kick at the end, and the fresh chopped coriander adds a touch of bright flavour, and brings the soup together (see what I did there? I totally referenced JT and GW) I remember when I made it in the MC kitchen, I used a food processor to blend the soup. It ended up being chunky, so I panicked and sieved it, which made it too thin... one of the reasons I went out that year :-( I've never had the problem ever since though!!
The squash for this recipe was grown in BC, so its fairly local. The fresh coriander comes from our new herb garden, and I am loving using all the herbs. I use a little bit of coconut milk to add richness to the soup, but you can skip it if you want a more intense squash flavour. Served with a hunk of French bread, this is a perfect light autumn meal.
Recipe:
1 butternut squash, peeled, seeded and cubed
1 medium onion, chopped
1 stick of tender celery, chopped (optional)
3 garlic cloves, chopped
1/2 inch piece of ginger, chopped
1/2 tbsp ground coriander
1 tsp ground cumin
1/4 tsp hot chilli powder
1 tsp garam masala
Around 500 ml hot vegetable stock
Around 250 ml coconut milk
Salt and Pepper to taste
A splash of olive oil
A big handful chopped fresh coriander or chives
A big handful chopped fresh coriander or chives
In a large pan, heat the olive oil, and toss in the onion and celery. Cook for around 2 minutes until the onion is soft, then stir in the ginger and garlic. Cook another minute, then add the cubed squash and the spices. Stir and fry for around 3 minutes or so, until the squash starts to fray around the edges. Pour in the hot stock and the coconut milk, bring to a boil and simmer until the squash is very soft.
Transfer to a blender and blend till smooth. Season with the salt and pepper. Swirl in some fresh chopped coriander and some coconut milk to serve.
Thursday 23 September 2010
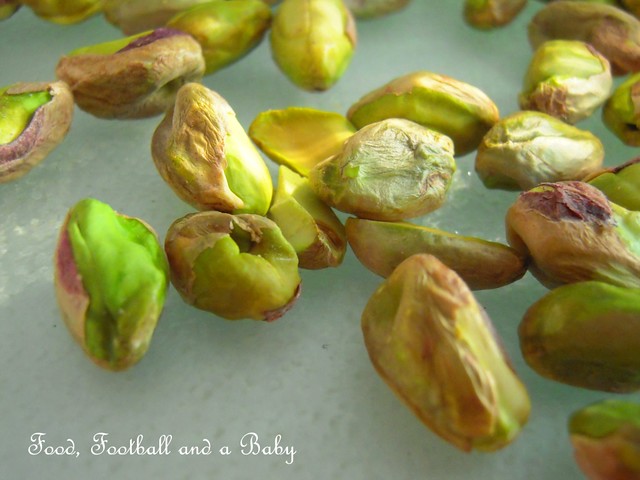
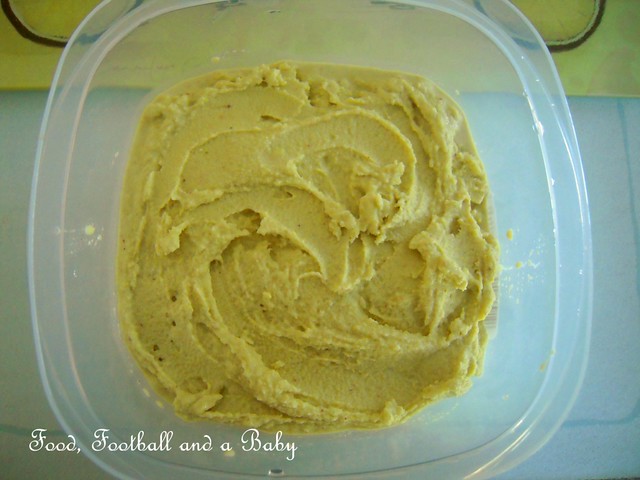
Pistachio icecream is one of my all time favourites. After drooling over David Lebovitz's version for a long time, I decided to finally try it out, with a few tweaks. David uses pistachio cream made from Sicilian pistachios, however, budget constraints mean that I really cannot afford it. So my pistachios came from an Asian store on 34 Ave in Edmonton, and I think, were from Iran. Normally I am always able to get shelled pistachios, but for some reason most of my usual stores were out of them, so I ended up having to shell a bunch of unsalted ones. Ow, did my fingers ever hurt!! I did do a decent job of shelling them though, and while the paste wasn't the bright green of David's Bronte Crema di Pistacchio, it wasn't too bad either.
The pistachio taste is pretty intense in this recipe, so I toned it down a bit by whisking in some half and half, which, strictly speaking, makes this recipe ice cream, and not gelato. However, the finished product was delicious, and I served it with a drizzle of honey and a few chopped nuts, which really added to the taste.
While making the pistachio paste, I realised that my normal blender would not grind the paste finely, so I used my heavy duty Indian Panasonic Mixer Grinder, which worked perfectly. I also added some rosewater while grinding up the nuts, which I think really enhanced the taste, while offering up a delicate fragrance. Rosewater is normally quite powerful, so a little goes a long way, but here the pistachios are strong enough to hold their own in this case.
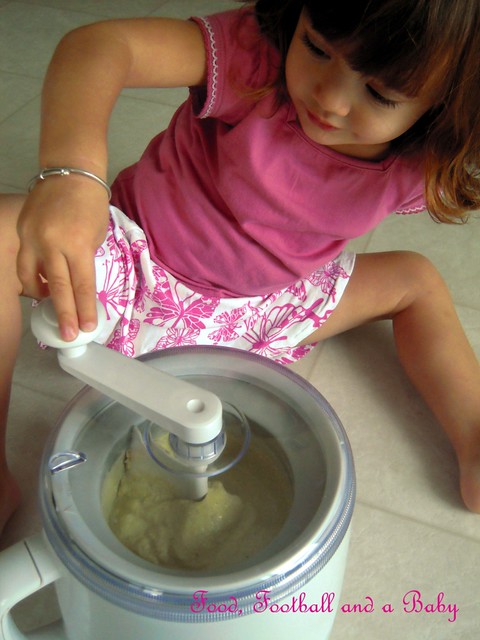
Aditi does the hard work of churning up the ice cream
Aditi does the hard work of churning up the ice cream
Recipe:
For the pistachio paste -
1 cup (250 ml) shelled pistachio nuts
2 - 3 tbsp rosewater
4 - 5 tbsp honey or to taste
1/3 cup warm water
For the ice cream
2 cups whole milk (3.25%) (500 ml)
2 tbsp cornflour/ corn starch
1/2 cup sugar (125 ml)
1/2 cup half and half (125 ml)
Method:
In a powerful blender, grind the pistachios, rosewater, honey and warm water to a fairly smooth paste. Transfer to a bowl and pop into the fridge.
Take 1/4 cup milk and whisk in the cornflour till smooth. Heat the remaining milk with the sugar, up to boiling point (do not allow to boil), then whisk in the milk/ cornflour mixture. Heat for another 3 - 4 minutes, stirring constantly, and not allowing the mixture to boil. Take off the heat, allow to cool right down, and then whisk in the half and half. Transfer to a bowl and put into the fridge for at least 2 - 3 hours, until cold.
Mix together the pistachio paste and the milk mixture, refrigerate for a while longer, if possible overnight. Churn the chilled mixture in an icecream maker until done. Serve with a drizzle of honey and a few chopped nuts.
Tuesday 21 September 2010

You probably already know about my love affair with anything ginger [and no, I am not talking about my husband ;-)] If you didn't, well, then I love ginger. Fresh, candied, sauced, cooked... you name it, I'll eat it.
My favourite ginger recipe of all time is 'Alyaso Doas'... basically ginger preserved in a sugar syrup. My mum makes it at home, and I ate it by the bottleful. I haven't attempted to make it yet, as I have just not found the right tenderness in the ginger here. When I find fresh root ginger that's tender, with a bite and no strings, I'll make this recipe, which takes about a week to make. And then live happily ever after!
Until then, this Ginger Lemon and Honey Icecream will have to tide me over. Ginger, lemon and honey are old friends. I am sure we've all had honey ginger lemon tea, and been soothed by the citrus, while our colds have been chased away by the warm spiciness of the ginger, our tastebuds tickled with the honey!!
The base for this recipe the Lemon Icecream from David Lebovitz's 'The Perfect Scoop'... what do you mean, you haven't heard of David Lebovitz? Here's his site, and I promise you'll never leave it (just come back to mine ocasionally, please!)
I have made his original recipe, which is delicious, but tinkered a bit with this particular one, and I must admit, its turned out really nice. This icecream probably won't cure a cold, but it will give you a refreshing blast of summer citrus loveliness with a warm hint of wintery gingeriness, with the sticky sweet honey as a counterpoint.
What better way to welcome autumn?
Recipe:
Finely shredded zest of 2 lemons
Juice from 2 lemons or more depending on the juiciness of the lemons (make it up to 125 ml or 1/2 a cup)
Around 3 tbsp of ginger juice (crush root ginger in a blender, and strain out the juice using a cheesecloth)
3/4 cup sugar
2 cups of half and half (single cream, substitute whipping cream for extra creaminess)
A pinch of salt
A generous handful of candied ginger, chopped fine
A few tablespoons of honey
Put the sugar, lemon zest, lemon and ginger juice into a blender and blend thoroughly until the sugar is dissolved (alternatively, use an eletric mix to whiz the mixture up). Add the half and half/ cream to the mixture and blend till its all well combined.
Chill in a fridge for about an hour or more. Take the chilled mixture out, and stir together, then churn in an icecream machine, adding the candied ginger bits halfway through the process. Swirl in the honey while transferring the icecream to a freezer safe container.
If you don't have an icecream machine, put the prepared mixture, without the honey, into a freezer safe container, stir in the ginger bits and freeze for about 2 hours. Take out and whiz it up, to break up the ice crystals, repeating this step every hour for 2 hours. Swirl in the honey. Then leave to freeze overnight.
The icecream will be fairly hard, so (if you have the patience) leave to soften for a few minutes before serving.

Sunday 19 September 2010
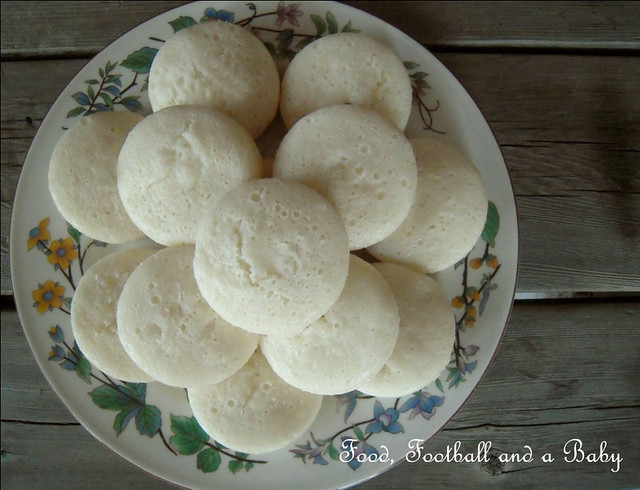
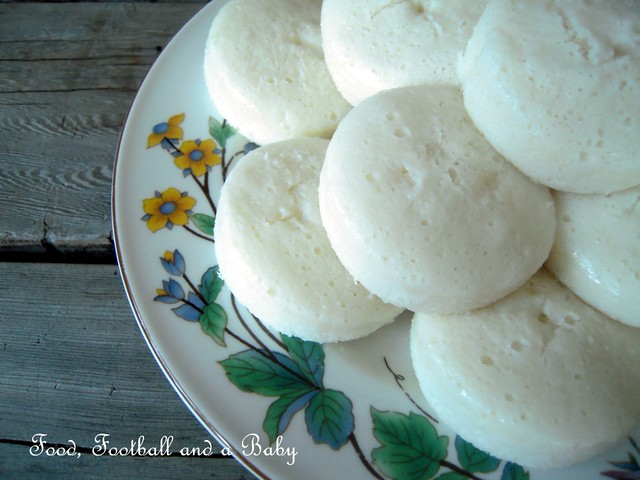
One of my very favourite comfort foods. The first thing I do as soon as I land in Mangalore, is to head off to Gokul Vegetarian Hotel (restaurants are often called hotels in India) and sit at a marble topped table and eat my masala dosa. If I am starving, which is almost always the case, I order the goli baje (will post the recipe soon), deep fried, delicious balls of flour and seasoning.
Potato bhaji is the filling for a masala dosa. A spicy concoction of potatoes, onions, tomatoes and gentle spices. It can be eaten not just with a dosa, but also with chapatis, bread or rice. This is another of those recipes for which everyone has their own version. This is my easy version.
Recipe:
2 large potatoes, cubed small
1 tsp black mustard seeds
1 onion, diced
1 tomato, diced
1 inch piece of ginger, chopped fine
1 green chilly, chopped fine
1/2 tsp ground turmeric
1 or 2 tbsp oil
1 sprig of curry leaves
1 and 1/2 tsp salt or to taste
In a deep pan, heat the oil, then toss in the mustard seeds and curry leaves until the seeds splutter (about 10 seconds). Toss in the onion, saute for 4 minutes or until its soft. Add ginger and chilly, saute for another minute. Add the tomato and the turmeric, and cook until the tomato is squishy, about 5 -6 minutes. Add the potatoes, and stir to coat them with the masala.
Add enough water to the pan to just cover the potatoes, and simmer until the potatoes are soft. Season with the salt. Roughly mash the potatoes, leaving chunks intact. Stir together and check seasoning, adjusting if necessary.
Serve with dosas, chutney, rice, chapathi, or just as a side dish.
Thursday 16 September 2010


I am always desperate to get more protein into Aditi. She eats fish very rarely, and is actually turning into a full vegetarian (so essentially, we have a vegetarian, a pescitarian and a carnivore in the same house). So, within a usual meal, I try to make sure that she gets enough protein and iron, sans meat. This means that mealtimes can be a challenge, because she's decided, in her contrary 2 year old way, that eggs are now her enemy. As this was her main source of protein, I now have to come up with other ways to make sure she gets her (and our) essential nutrients in other ways.
However, do you ever have that feeling, when the fridge is sort of emptyish and its raining hard outside that the last thing you want to do is go to a store to pick up stuff for supper? Well, that's me some nights. Its been miserable weather here for the last few days, as summer makes way for autumn, but I am putting off getting my winter coat out at least for a while. So Aditi and I make do with what's in the pantry and fridge.
It was one of those days today, so I scrounged around in the fridge. I had already made a Maple Syrup Cake in the afternoon, so didn't want a long cooking spell in the evening too. So we decided on couscous, an easy to cook, protein filled grain. I had a fresh courgette, given to us by our friend (she of the guerilla garden, more to come!) and a few odds and ends lying around the fridge. Plus, raisins, which are full of iron.
Once I threw together this simple warm salad though, Adz and I both loved it, so this concoction is going into the recipe files.
Recipe:
1 pack of couscous, prepared to package directions
1 courgette, diced small
1/2 onion, diced small
2 spring onions, chopped
2 flakes garlic, chopped fine
1 tin chickpeas, drained
A generous handful raisins
Olive oil
Salt and Pepper to taste
Prepare the couscous according to package directions. Fluff it up, and leave to dry out a bit.
In a pan, add a little olive oil, and saute the onion till its light brown. Add the chopped garlic, and stir for a minute. Add the courgette and half of the spring onions, sauteeing for about 5 minutes or so on a medium heat, until the courgette is cooked, but still has a bite to it. Add the chickpeas, and stir till they are heated through.
Tip this mixture into the cooked couscous, mixing it all together well. Stir in the remaining spring onions and raisins. Season to taste. And... that's it!
You can obviously vary the recipe by adding anything you have around really. And a few nuts and herbs for added texture if you like.

Well? Mum? Are they cool yet? Can I eat them? Can I? Eh? Please? Are they cool yet? Can I have one? Mum? Please? Cookies? Chocolate chip ones? Please? Are they cool? Can I have one? Please mum? YES, really? Yummy!
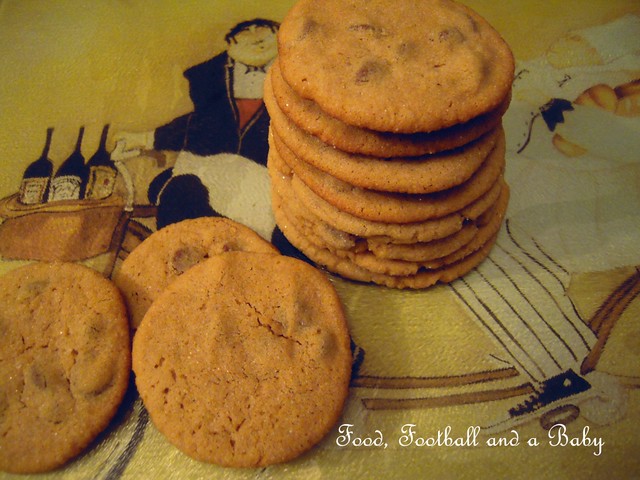
Grrr, I cannot believe I have been finally brainwashed into calling biscuits, cookies! That said, this one is so American (Canadian, even), that even my half Brit self cannot bring myself to call them biscuits. The way I see it, if they are hard and dunkable, they're biscuits, crisp with chewy centres makes them cookies (see, trying hard to convince meself!!)
Anyway, before I get all consumed in my biscuit versus cookie battle, I better talk about the actual recipe itself. There is nothing as North American as a chocolate chip cookie, unless its peanut butter of course! The thing is, I am a heathen, and I don't actually like chocolate chip cookies, or peanut butter, for that matter.
Sometimes, however, the likes of my two and half year old will override my dislikes. She's been badgering me for chocolate chip cookies all week, so I finally gave in and we made these together. I added peanut butter too, in for a penny and all that. Surprisingly, the mish mash turned out delicious. Even I was persuaded to have a couple (though sadly one dissolved in my tea, note to self: do not dunk cookies!)
This recipe is based on one from Best of Bridge, however, I decided to tinker about with it, as I tend to do. Especially when I have stuff in the baking cupboard that really needs to be used up. If you just want plain peanut butter cookies, see here. I made these with half butter/ half margarine, but feel free to use all butter for a really delicious biscuit.
Recipe:
1/3 cup butter and margarine
3/4 cup light brown sugar
1 egg
1/3 cup self raising wholewheat flour (otherwise use plain) or just use 1 cup white.
2/3 cup white flour
1 tsp baking powder
1/4 tsp salt
1/2 cup chunky peanut butter
Around 1/4 cup chocolate chips (use half cup if skipping the walnuts)
Around 1/4 cup chopped walnuts or pecans
Granulated sugar
Method:
Preheat oven to 150 degrees C.
Let the butter and margarine soften, then whisk it with the sugar and egg till its nice and creamy. Add the peanut butter and stir hard using a wooden spoon. Then add the chocolate chips and the walnuts. Mix well.
Mix the flour, baking powder and salt together, then add to the peanut butter mixture, combining well. The dough will be very soft.
Using your fingers, shape into little balls (or big ones, depending on how big you like your cookies) Roll around in the granulated sugar.
Place on a greased cookie sheet, flatten slightly, and pop into the oven for 8 - 10 minutes. Keep checking as they brown and burn quickly. When they are light brown, and not quite set in the middle, take them out using a flat spatula, and very carefully (they will be very crumbly at this stage), put them on a flat surface to cool thoroughly. Or, let them cool on the sheet. When cold, they will be crisp but with a satisfyingly chewy centre with soft chocolatey bits. Don't DUNK in hot tea :-)
Store in a biscuit tin, and they freeze well too.
Wednesday 15 September 2010
Saturday 4 September 2010
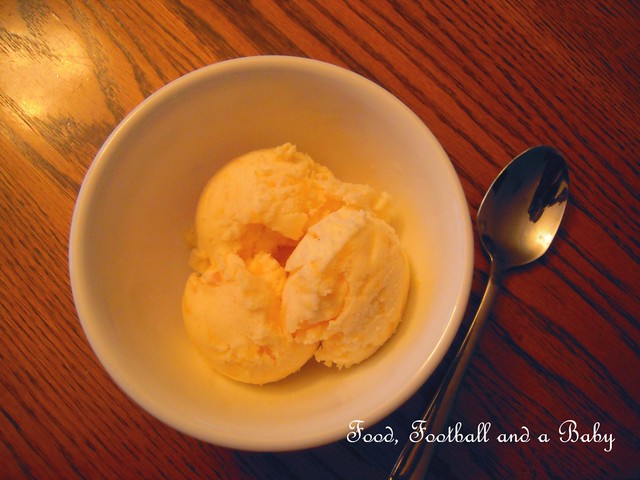
The base of this recipe is Ben and Jerry's Fresh Georgia Peach ice cream. I have significantly cut down the cream and sugar :-)
Of course my peaches were from BC, not Georgia :-) I got a giant box of peaches from the superstore, and froze a whole bunch, made peach preserves and peach pie, and the rest got tossed into this icecream. I must admit, I loved this one... the taste is very subtle and peachy, and does taste of summer. We tried it with some maple syrup topping, and while I wouldn't use very much, as the taste of maple can overpower the delicate taste of peach, a little bit does accentuate the flavours.
This icecream will be a little icy, due to the fact that it has chopped peach bits in it, so make sure you take out of the fridge for a few minutes before serving. If you want the full rich flavour, substitute whipping cream instead of the half and half (single cream) and increase the sugar by 1/2 a cup. Also, try to use pasteurised eggs, as this recipe does use raw eggs in it.
Recipe:
2 cups (500 ml) fresh sweet peaches, chopped fine (or processed coarsely)
1 cup sugar (250 ml)
2 tbsp lemon juice
2 1/4 cups of half and half (single cream) (625 ml)
2 eggs
1 cup milk (250 ml)
1 tbsp peach schnapps (optional, but will keep the icecream from getting too hard)
Method:
Stir together peaches, 1/4 cup sugar, peach schnapps and lemon juice. Pop into the fridge, stirring every so often for a few hours (an hour minimum)
Strain the juices from the peaches into a bowl, and return the peaches to the fridge.
Whisk the eggs and sugar in a deep bowl, till creamy, then whisk in the milk and cream and peach juice. Stir in the chopped peaches and freeze in an ice cream maker.
If you don't have an icecream maker, follow this method I used for chai icecream, which works as well.
Serve with a dribble of maple syrup or chocolate sauce.
Enjoy!
Subscribe to:
Posts
(
Atom
)
