


Showing posts with label Breads. Show all posts
Showing posts with label Breads. Show all posts
Monday, 16 March 2015

Some of the best times in my life were at JNU or Jawaharlal Nehru University in Delhi. I was a pretty sheltered kid for most of my life and lived at home when I first went to college. But by the time I'd graduated with my degree, I was ready for adventure, and in that spirit, I applied to go to what is arguably one of the best liberal arts universities in the country. Getting into JNU wasn't easy, as I was competing with the best of the best in a pretty stiff entrance exam. Luckily for me, I made it through and it was with giddy excitement that I headed off to university, leaving home for the first time. My mum and uncle came with me to Delhi to see me off, and get me settled in, and while there was a tinge of homesickness, the relaxed atmosphere of JNU made me feel at home and like I'd been there all my life.
JNU is like no other university in India. First off, it is a staunchly left-wing university, deeply political and very liberal in its outlook, compared to the rest of the universities in India. Classes were only held on Monday to Wednesday, and the rest of the time was all self-study. Let's just say for a fresh-out-of-the-'burbs nineteen year old, coming from a convent school and college environment, all the freedom certainly went straight to the head. I made friends easily, and before I knew it, I was comfortable ensconced in the JNU lifestyle.
One of the best things about JNU was its huge collection of street eateries, called 'dhabas'. Almost every hostel, where students lived, had a dhaba in front of it, and they served food pretty much twenty four hours a day. The JNU late nights are famous, and before long, I was in the habit of attending my afternoon classes, then hanging out with my friends late into the night, drinking copious amounts of chai and black coffee, and eating anda paratha (egg layered rotis), spicy bread omelette, freshly made, piping hot pakoras, samosas and meat tikkas. We rarely made it into bed before five in the morning, and it was not unusual for us to have breakfast before heading to bed. Ah, the joys of being young and sleepless.
Thursday, 5 January 2012
Well, 2012 has started off with a bang!
To start off with, some of my recipes on how to cook winter vegetables with an Indian twist have been featured on the website Cooks United. If you haven't already, check out this interesting recipe sharing website. Not only does it have an impressive list of interesting recipes, but also a lively discussion forum where you can ask and answer questions about cooking and baking. Along with the forum and recipe collections, Cooks United also features a magazine section, with articles, features and tips on cooking for the season and techniques. You can sign up to interact with other like minded souls, or just browse through their collection of recipes, the dessert ones in particular are to die for. You can save, exchange and rate recipes as well. What more would a dedicated foodie want?
Its only been a week or so, but the post I wrote about kids and restaurants has had several comments and has incited a really lively debate. I seem to have struck a nerve, particularly with parents, about the way in which kids are treated in restaurants. I wanted to confess that that particular post has been sitting in my drafts folder for a long time. It took a tweet from a fellow mum on Twitter about her experience at Ikea, to get me to hit publish on that post. I am quite glad I did, in a way. Its been cathartic, but also at the same time, has brought about several reactions from people that I didn't expect. Thank you to all those who took the time to read and engage with the post. I have every intention of responding to all the comments, but that will probably be another blog post in itself.
Friday, 10 June 2011

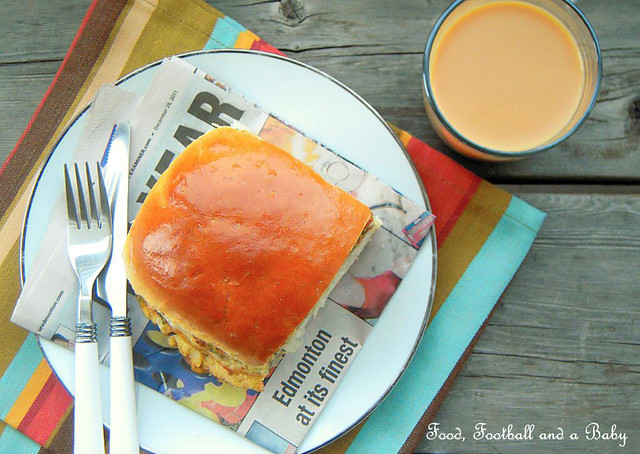
This was my favourite breakfast as a kid. And my mum's too, as it was fast, simple and packed full of flavour. I think mum got the recipe from one of my uncles, and over time she modified it, so it suited our taste.
For a short and easy ingredient list, this salad packed quite the punch. I remembered it some time ago, when I was making the Italian bread salad, Panzanella. I figured that while mum made this as breakfast, there was no reason why I couldn't make it as a light lunch or supper. With the weather being beautifully nice and sunny now, I hate spending more time in the kitchen than I have to. So this dish ticked all the boxes for me. It used storecupboard ingredients, is unusual enough for company, and is so tasty!

The flavour here, as with the Panzanella, is predominantly tomatoey, but the similarity stops there. This salad is smoky with curry leaves, and mustard seeds, has a hint of sweetness from the tomatoes and sugar, and a wow! spicy moment that comes from biting into a whole peppercorn, and the bread just calms everything else down.
I never cease to be amazed at the flavour that comes out of a dish that is simplicity itself to put together. As my mum says, its fast enough that she got to work on time, hearty enough to keep us filled until lunch, and fussy enough so everyone felt looked after. These were the days when the women of the family had to make sure everyone was fed and watered, and then rush off to work outside the house, We are a lucky generation, indeed, that we had such wonderful role models for mothers and aunts. All I say is, result...

Recipe:
(Printable Recipe)
1 teaspoon mustard seeds
1 teaspoon cleaned urad dal (black gram)
1/2 tsp whole peppercorns
2 sprigs curry leaves
1/2 onion, chopped
2 juicy tomatoes, chopped
1/2 tsp salt
1 tbsp sugar
1½ tbsp oil or ghee
1/2 a loaf of bread, cut or torn into medium sized cubes.
Method:
In a wide pot or wok, heat the oil or ghee, then add the mustard seeds, urad dal, whole peppercorns and curry leaves. Fry till the mustard seeds start to splutter.
Add the chopped onions, then fry for 2 - 3 minutes, until the onions are soft, and lose their raw smell.
Add the tomatoes, sugar and salt, and cook for another 2 - 3 minutes. The tomatoes should just start breaking down a little bit. Take the pot off the heat and let cool for a minute or so.
Add the bread chunks to the onion/ tomato mixture and mix well, coating chunks of bread with the spicy, tomatoey mixture.
Serve warm or cold.
Thursday, 14 April 2011

Last Sunday was a day to remember for Aditi. First, she had her first ever unparented swimming lesson. Very exciting for her, and brilliant for me, as I sat on the side and shot the breeze with other mums. She loved it, and had a lot of fun, and made friends so very quickly. I felt a little bit excluded, as I realised that my baby girl is growing up, and before I know it, she will be getting her first tattoo (gah!) and leaving home... but that's how life is, and we all live and learn.
Wednesday, 9 February 2011
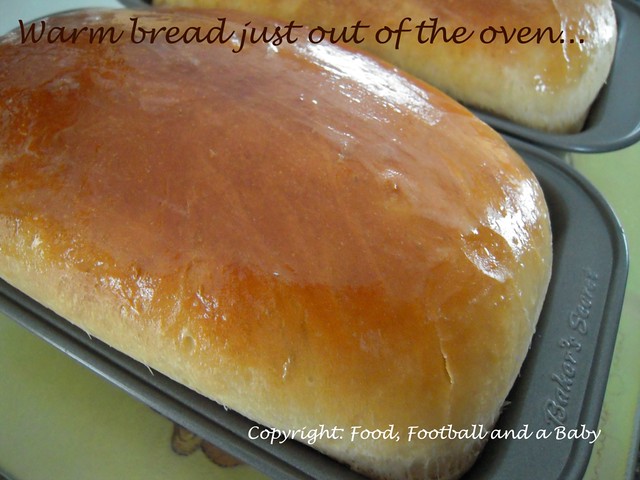
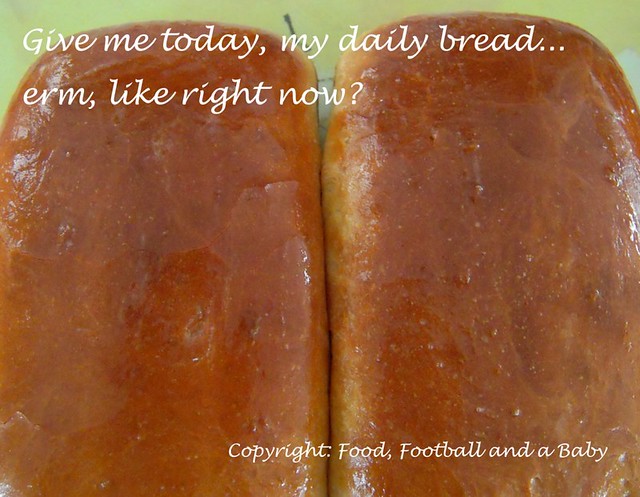
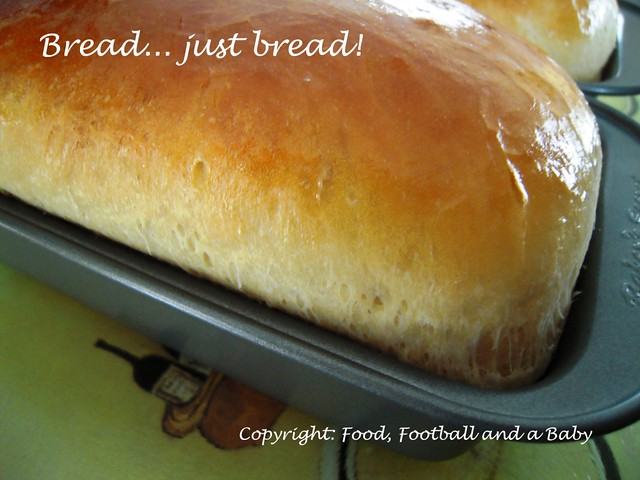
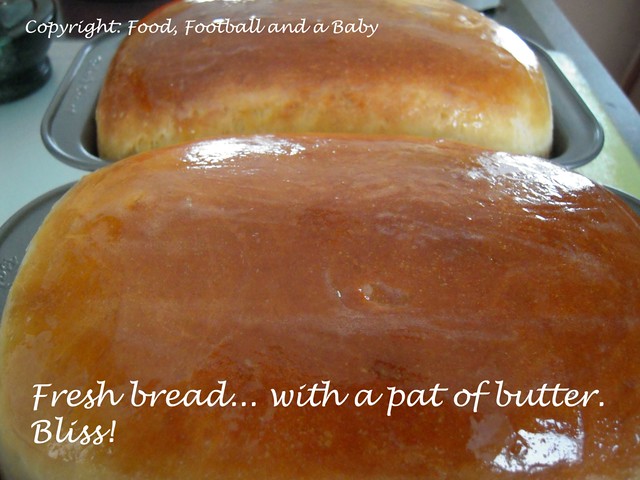
Can anyone think of anything better than cutting into a still warm slice of bread, and eating it with nothing else but a dab of salted butter? Thought not :-)
For the last few weeks, I have been baking all our bread at home. It all started when I took a look at the ingredient list on supermarket bread, did a double take, and went no way... there were things on it that need a degree in chemistry to understand. So I told Kay that I would have a shot at baking my own bread. Back in the UK, I had a cute compact Morphy Richards bread machine that I used to practically use everyday. However, it was a 220 watt machine, and as with most of our electronic stuff had to stay behind. But I was lucky enough to be given a bread machine by a friend here, and while I normally used it to make doughs for things like pizza and naan, I never actually thought of making bread in it (yeah, I know!!)
I like my breads dense enough to make sandwiches with, and with a softer crust. The Morphy Richards came with a recipe booklet that included a recipe for sandwich bread that I really liked. So I looked it up, and adapted it a bit, and voila! Fresh bread, practically every day.
Aditi and I love nibbling on slices that are lovely and warm fresh from the oven, and a few days ago, Aditi told me she wanted her bread plain with nothing on it. From a kid that loves her butter, jam and Nutella, that is a compliment, for sure :-)
Recipe:
Adapted from the Morphy Richards bread maker recipe book.
(Printable Recipe)
1 and 1/4 cup warm water
2 tbsp softened butter
½ tsp salt
3 tbsp sugar
2 tbsp powdered milk
2 cups white bread or plain flour
1 1/4 cup wholewheat bread flour
1½ tsp yeast
Whisk together yeast, water and ½ tbsp sugar. Keep aside for 2 minutes. In a deep bowl, add the flour, salt, rest of the sugar, milk powder and butter. Slowly add the water, and knead to a soft dough. Add a little more water if too dry, or a little more flour if too wet.
Note: If you have a bread machine, just add all the ingredients in the listed order, and set your machine to the dough cycle. It saves a lot of time and washing up! If you do this, skip the step above and below.
Roll the dough in a ball, pop into a greased bowl, and keep in a warm place to rise to almost ½ of its original size, preferably double. This usually takes about ½ - 1 hour.
Take out the risen dough, punch down, knead again for 2 minutes or so. Then shape the dough into a cigar shape, and pop into a greased loaf tin. Leave in a warm place again for 1 hour to rise (or you can heat the oven to its lowest setting, and put the tin in the oven, like I do, I feel it makes the bread rise better)
Once the dough has risen again to fill the tin, roughly 3/4 its size, turn up the heat in the oven to 175 C or 350 F, and bake for 20 – 25 minutes, until the crust is a lovely golden brown colour.
Take out of the oven, and brush a little melted butter on top, which will soften the crust a bit more. Take out of the tin, and let cool on a rack. You can cut it while it’s still warm (it will be slightly crumbly, but delicious), but if you’re freezing it, make sure it’s completely cold before putting in the freezer. Don't wrap it up before its completely cold.
Another note: You can replace the wholewheat with just white flour if you want white bread. But don't replace all the white with wholewheat, as it doesn't work that way round.
Wednesday, 15 September 2010
Sunday, 24 May 2009


Yay!! My 50th post! Who would have thunk?
What better post as my 50th, than that all time favourite, pizza? Everyone has thier favourite pizza recipe, and this is my version of the Italian classic. Friday night tends to be pizza night for us, depending on if I am working from home or not. If I am, then I make the dough at about three in the evening, letting it rise and then making the pizza at about five, so that we can all sit at the table, the grown-ups [well, sorta grown-up :-)] with a glass of wine and the little one scoffing it greedily. And why not, its three of her favourite things, crisp bread, cheese and tomato, all together.
I like to hand stretch my pizza dough, but a rolling pin does the job fine too. The lovely thing about a pizza is that once you've got the basics, you can go all out and be as creative with the toppings as you wish, really! We've never had the same topping twice. Plus, by making your own crust you control the amount of oil and salt that goes into it, making the healthier for kids, in particular.
Basic Pizza Dough
400g plus a little more strong white bread flour (plain and 00 is fine too)
15g dried yeast, reactivated in 150 ml warm water and pinch sugar mixture
1/2 tsp salt
1 or 2 tbsps olive oil
About 100 ml warm water
Put the flour and salt into a bowl, drizzle the oil on top. Then put in the yeast mixture, drawing together the mixture into a soft flexible dough. Use some of the 100 ml water if you need to. Knead into a pliable dough for about 4 - 5 minutes. I use dough hooks to mix up the flour/ yeast mixture, and then knead by hand.
Roll the dough into a ball, and put into an oiled bowl, keeping it covered in a warm place for about an hour or so until the dough doubles in size.
Punch down the dough, and knead again for a few more minutes. Then using the heel of your hand, stretch the dough into a rounnd pizza crust. You can make it as thick or thin as you prefer. I like it relatively thin and crispy, but you can leave it thicker for a deeper crust.
Put the pizza on a pizza tray or a baking sheet, and top with homemade tomato sauce. Then pop on your preferred toppings (I used mushroom, green peppers, ham and onions) and top with grated mozzarella and cheddar.
Bake in a preheated oven at 225C until the crust is crisp and cooked and the cheese melted.
Tomato Sauce
This is my lazy version that I use tinned tomatoes for. You can replace them with fresh plum tomatoes for a better taste sensation.
400g tin of chopped tomatoes
2 tbsp olive oil
1 clove of finely chopped garlic
1 tsp dried oregano
1/2 onion finely diced
Seasoning
In a pan, saute the onion in the olive oil till transparent and soft. Add the garlic and stir for a minute. Throw in the tomatoes and the oregano, stir and simmer for about 15 minutes. Season with salt and pepper. Let the sauce cool, and use to top the pizza or as a base for pasta sauces.
Wednesday, 22 April 2009
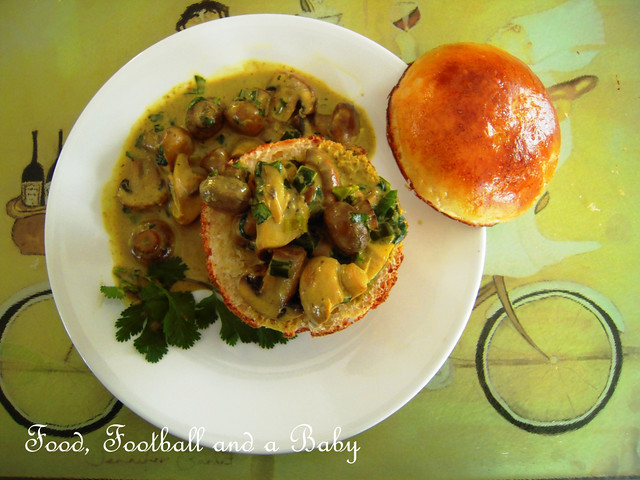
I came back home pretty stressed out and wanted to do something to relieve the stress. After playing with Adz for a while, it was time to bath and put her into bed, so while I enjoyed the time with her, I was still feeling like I wanted to hit something very hard. That's when I turned to my favourite stress reliever, making bread. I had fresh olives in the fridge, and a bunch of mint leaves, plus there were chives growing in the garden. I also had red onions in the back of my cupboard, so I thought of one of my favourites, olive bread. This recipe is actually Rena Salaman's from her wonderful 'Greek Cooking' but I've tweaked it, so it suits my taste. Feel free to look for the original recipe, as its fabulous. I borrowed the book from the library, so I only have a scribbled version that I kept in my recipe folder.
Olive Bread
400 g strong white bread flour (or use half wholemeal, it tastes just as good, and is healthier)
About 250 ml warm water
1 tsp sugar
1 tsp dried yeast
1 tsp salt
1 medium red onion, sliced finely
3 tbsp olive oil (virgin, extra-virgin is fine)
3 tbsp fresh herbs, finely chopped (coriander, parsley, chives, mint or a combination) This is not a hard and fast measurement, just go with whatever you have and however much you want to add.
About 150g olives, roughly chopped (try not to use the ones in brine, ideally ones you get in a deli are better, you can use any kind, but they do need to be pitted)
1. Reactivate the yeast in 100 ml warm water, adding sugar and whisking to dissolve the yeast. Leave until frothy. Preheat oven to 200 C. or 375 F.
2. Fry the onion in 1 tbsp olive oil, until soft and only very lightly coloured.
3. In a bowl, put the flour and salt. Stir together and add the olive oil, olives, fried onions and herbs. Add the yeast, and enough of the remaining water to pull together into a soft dough. You can do this by hand, or use dough hooks. Knead for about 10 minutes. Put into a lightly oiled bowl, and leave it in a warm place for about an hour and half, until doubled in size.
4. Turn out the dough, punch lightly and knead again for about 3 or 4 minutes. Roll the dough into a big ball or 2 small balls (reduce baking time)
5. Oil a baking sheet or a tray, and pop the dough on it. Very lighlty cover with cling film and leave in a warm place again for about half hour or so, unitl the dough rises again. Doesn't have to double, but should rise at leat by a third.
6. Put the bread into the oven and bake for about 45 minutes or so, until tapping on the crust elicits a hollow sounding noise. If the crust is browning too quickly, cover loosely with aluminium foil and continue to bake.
7. Enjoy with a pat of butter.
All stress was relieved, and a nice slice of bread to round off the day too :-)
Saturday, 18 April 2009
Here's the recipe for the eggs. Its the quickest way to jazz up a boiled egg, and it goes well as a lunchbox treat, as well as with a nice biriyani. I know the pic looks a bit rude, didn't mean to do that, husband ate a piece of the paratha before I could get the pic and so I had to cover that bit with the eggs :-)
Masala Spiced Boiled Eggs (makes four to six)
4 - 6 hard boiled eggs
1 tsp vegetable oil
1 tsp mild Kashmiri chilly powder (or 1/2 tsp hot powder)
1/2 tsp ground turmeric
1/2 tsp ground pepper
1/2 tsp salt
1/4 tsp garam masala powder
1. Heat the oil in a shallow pan, and put in all the spices. Saute the spices for about 1 minute or so, making sure they don't burn.
2. Meanwhile gently cut into the eggs a little bit, all around the egg till the yolk, but don't cut into the yolk.
3. Then put the eggs into the mixture, and roll them around until well coated with the masala. Heat the eggs through and serve. Yum!!!
Friday, 10 April 2009
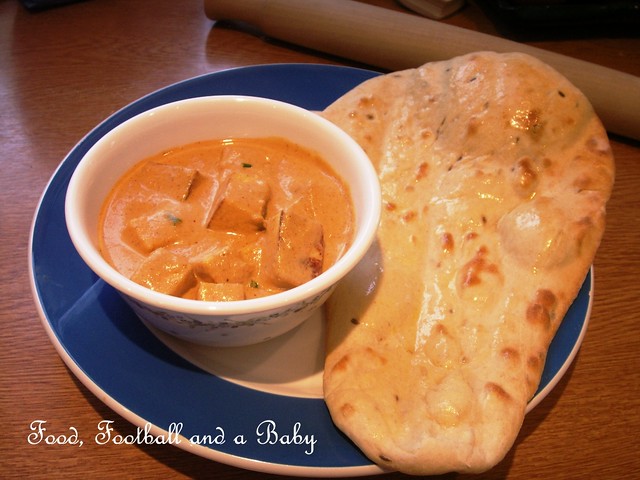
This dish holds several memories of my time in Jawaharlal Nehru University (JNU) in Delhi. Its a stunning campus, with loads of green spaces. I spent the best two years of my life there, while doing an MA in Sociology! I also made some of my best friends there. JNU is known for its famous dhabas. Many a night have I spent under the stars eating hot egg parathas with chai at Ganga dhaba and drinking Maamu’s famous mango lassi, eating those finger-lickin pakoras at the Godavari dhaba. I tried the political thing too, but it wasn’t for me and that’s another story :-)
Anyway, coming back to the food, I hated the food that we got in the hostel mess. So most nights would find me wandering off to one of the dhabas or to the many cheap eateries dotted around the campus [what was I doing during the day, you ask? Sleeping is the answer; those nocturnal wanderings came with their price, and studies, what studies? :-)] One of my favourite eateries was Teflas, a round non-descript building with some good food and dirt cheap prices for those with a cast iron tummy of course :-) My favourite food here was the shahi paneer (or a damned good version of it) and butter naans. I had other favourites which I will talk about in later posts, but this was my ultimate comfort food! So about nine years after having been a not-so-starving student (parents were very generous, thanks ma), I remember the food there fondly, and I had a real craving for it. So I decided to try and make my version of the paneer and naans, and they came out bloody good! And no Delhi Belly afterward either :-) Can’t ask for more than that surely??

Recipe:
2 packs of paneer, cubed
3 medium sized tomatoes, chopped (or 225g can chopped tomatoes)
½ inch piece of ginger
4 garlic cloves, peeled
2 tsp coriander seeds
1 tsp cumin seeds
2 inch piece of cinnamon
5 cloves
½ tsp or more if desired, hot chilli powder
25 gms blanched almonds or cashews
100 ml greek yoghurt or 150 ml single cream
1 medium onion, diced
About 2 tbsp butter (replace with oil, not olive oil, if desired)
Salt to taste (or about 1 tsp)
Chopped fresh coriander to garnish
Method:
In a shallow pan, heat the butter gently and fry the onions till soft and light brown. Add the chopped tomatoes to the pan, and fry for about 5 minutes, until the tomatoes are mushy.
Toast the coriander, cumin, cinnamon and cloves for about 30 seconds.
In a blender, whizz together the friend onion and tomatoes, toasted spices, ginger, garlic, chilli powder, and almonds or cashews to a fine and not grainy paste. You may have to add some water to the blender to get a smooth paste.
Meanwhile, fry the cubed paneer in a little butter or oil for about 2 minutes until golden, and don’t worry about getting the cubes evenly golden.
Put the ground paste into the pan, and cook until any rawness disappears. Again, keep adding a little water if the sauce gets too dry. Turn the heat off, and let the sauce cool for a little bit. Then add the yoghurt or cream, and fold it in gently.
Season to taste, and then add the paneer pieces to the sauce. Garnish with fresh coriander leaves, and serve with the naans.
Butter Naans
2 tsp yeast (dried is fine, but you’ll need to reactivate it. I use Allinsons)
1 tsp caster sugar
3 cups plain flour + a little more, if required
1 tsp salt
1 tsp baking powder
1 tsp cumin seeds
½ tsp caraway seeds (optional)
2 tbsp or less oil (I use sunflower, olive or vegetable also works)
6 tbsp Greek or natural yoghurt
1 cup (250 ml) warm water
[Optional garnishings (fresh coriander/ garlic/ nigella seeds/ sesame seeds etc)]
Method:
Put the yeast and sugar in a warmed bowl and pour over 50ml hand-warm water. Don’t make the water too hot, or you’ll kill the yeast. Stir with a fork until the yeast is dissolved and leave in a warm place for about 5 minutes or so. The yeast should start frothing.
Sift the flour, salt, baking powder into a large bowl. Add the cumin and caraway seeds.
Make a well in the middle and add the yeast mixture, yoghurt and oil. Add just enough water to knead into smooth, soft dough. Knead well.
Grease a large bowl lightly; roll the kneaded dough into a ball, put into the bowl. Cover with a dishcloth and leave in a warm place for about 1 or 2 hours until the dough has risen and almost doubled in size.
Punch down the risen dough lightly and divide into 6 or 8 balls. Roll out the naans into a bicycle seat shape, or if you can’t be bothered, just round. They should be roughly around 1/4 - 1/2 cm thick. Don’t do too thick, or it will be doughy, too thin will make it crispy. The proper size will come with practice, and it’s a personal preference too.
Grease a baking sheet, and put one or two naans on it. Pop them under a preheated grill for about 2 minutes each side (keep a sharp eye on them, when they start getting light brown spots and puffing up, its time to turn them over)
Make the rest of the naans the same way. Brush a tiny bit of salted butter over them so the butter melts on the hot naan.
Wrap all the naans in aluminium foil and put them into a warmed (not too hot) oven and they will stay warm until eating time.
PS – If you want any garnishings on the naans, add them at step 5, rolling them gently into the naan. Continue cooking them as before. For peshwari naans, chop some nuts and raisins finely and add a little grated coconut to make the filling. Take a ball of dough and stretch it out, put a little filling in the middle and close the dough around the filling, rolling it out into a ball. Then roll the dough ball out gently so that the filling doesn’t escape the naan and cook as before.
PPS - You can also make the dough in a bread machine. Once the dough has had its first rise, take out and shape naans by hand.
Subscribe to:
Posts
(
Atom
)
