Ah... Bebinca. Now you can call it Bebinca, Bibique or Bibik, whatever you will, but believe you me, once you taste this dessert, I am fraid you are sold on it for life. That's what happened to me anyway.
Bebinca is a quintessential layered cake from Goa, and rightly famous, seeing as the amount of work that goes into it and the amazing taste that results. I have never really even attempted to make it at home previously. First off, I never really had the time, and second, the work always put me off. But on the other hand, its not like my friendly neighbourhood grocer sells bebinca here in Edmonton, so if I wanted it, I had to make it myself. So after a long long time of browsing the internet, calling my dear mum and aunties, checking out my favourite Goan cookbook, I finally came up with a recipe. I found that there were very few recipes for Bebinca online, but to be honest, now that I have made it, I can understand why buying it is a much much much more easier option.
This recipe is based on the Bebinca from the fantastic 'Essential Goa Cookbook' by Maria Teresa Menezes. This little book is a gem! I picked it up from a tiny bookshop in India, and I adore the recipes, and Tessa's beautiful stories that go with them. The book doesn't have pictures, but does have some cute, quirky illustrations by the celebrated Indian cartoonist Mario Miranda.
There are so many legends about Bebinca (probably have come about thanks to the sheer amount of work that goes into this dessert). Some say it takes a 100 eggs, other 100 coconuts, some say it has to be exactly 20 layers. Fatima da Silva Gracia, author of the book 'Cozinha de Goa' comes up with this explanation -
'There is a legend that says that Bebinca was made by a nun called Bibiona of the Convento da Santa Monica in Old Goa. She made it with seven layers to symbolise the seven hills of Lisbon and Old Goa and offered it to the priest. But, he found it too small and thus the layers were increased. There are some claims that it is made with 20 layers. But, ideally it is 14 or 16 layers' (See note for reference)
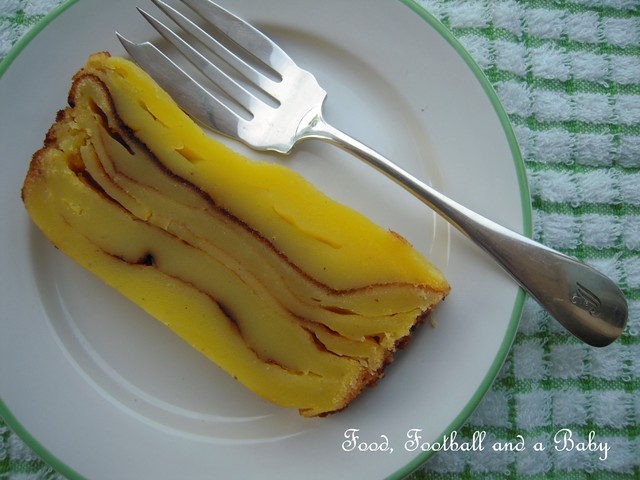
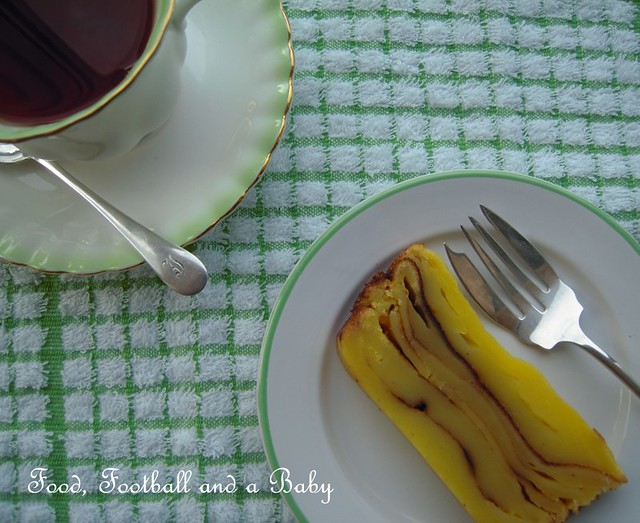
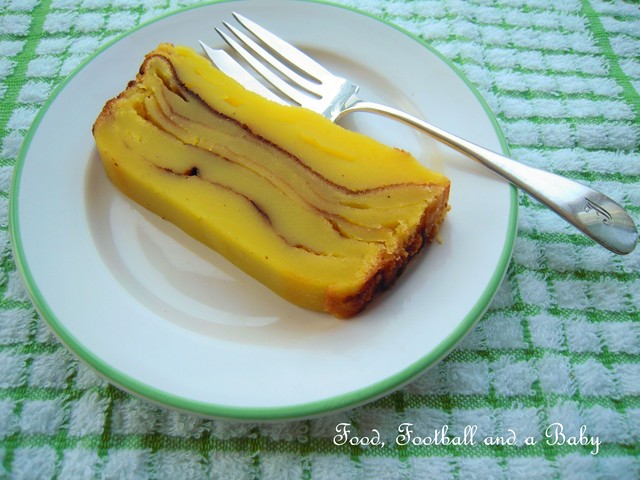
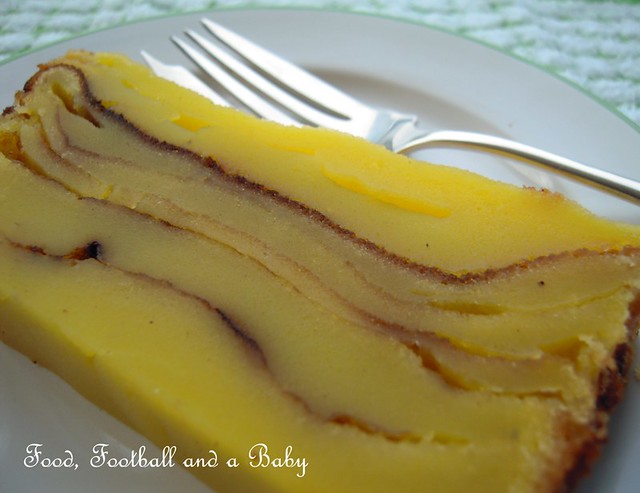
Now I didn't manage to get the full 14 layers, as my loaf tin was quite small, and honestly after I checked the amount of ghee that went into it, no bleeding way was there going to be 14 layers. I managed to get 8, which I thought was pretty respectable, though I am sure a true blue Goan would disagree. And I did make some changes to the recipe, to work with what I had here. Its not like I can run out and find coconuts fresh off the tree.
I already got a comment saying that the bebinca was a little too yellow (I got the eggs from Four Whistle Farm) Like the comment from my cousin, the bebinca was a bit too yellow, but this did completely depend on the colour of the egg yolks you're using. Organic eggs do tend to have a yellower yolk. There's also a bunch of notes that come after the recipe, as I had to modify, change and adapt the recipe on the go.
The result? Well, lets put it this way. The entire loaf, with its gazillion calories disappeared in less than 24 hours!! It was Delicious, with a capital D! The taste was exactly the same as the traditional Goan Bebinca. The appearance wasn't fantastic, but then I think those sneaky Goans cut their Bebincas to make them all even, naughty naughty ;-)
I am afraid this will definitely have to be a once-a-year treat for us, considering that I spent almost 3 hours prepping and baking, and its not as if you can sit down during the process. But the results are so worth it, and until I get my quota of Bebinca boxes from India, this will have to suffice (What was that from the peanut gallery? This cake was bloody good, you infidels, and I may even dare to say would pass muster among the Goans themselves ;-))
Recipe:
(Printable Recipe)
2 cups coconut milk
2 ½ cups sugar
1 ¼ cups plain flour
2 whole eggs
6 egg yolks
½ tsp salt
1½ tsp grated nutmeg
A lot of ghee and I mean that!
A few extra tbsp of caster sugar
1 loaf tin or small cake tin
Method:
Sift the flour, sugar, salt and 1 tsp nutmeg into a large bowl.
Beat the eggs and egg yolks for about 1 - 2 minutes till they are well mixed and creamy. Gently whisk in the 2 cups thick coconut milk.
Now using a large spatula, fold the egg – coconut mixture into the flour – sugar mixture, beating well till a thick batter is formed. The batter should be of pouring consistency, but not too thin. If it is too thick, then add a little more coconut milk, a little at a time, until this consistency is reached.
Taste, and add the remaining nutmeg if needed.
Preheat an oven to 300 F (150 C). Turn off the oven after preheating, then turn the top grill part on.
Grease the loaf tin with 2 tablespoons of ghee. Put the empty tin in the oven for about 3 minutes. Now using oven gloves, take the tin out and quickly pour in 1 – 2 cups of batter, depending on how thick you like your layers. I only used about 1½ cups for each layer.
Put the tin in the middle of the oven, and cook the first layer for roughly 5 – 10 minutes, until you can see that the top of the layer is set, and browning nicely. It browns fairly quickly, so keep an eye out. Sorry, but you can’t sit down during this process. Check by inserting a skewer into the layer, if its clean, the layer is done.
Once the first layer is browned, take the tin out using oven gloves, and drop in 1 - 2 tablespoons ghee on top of the layer. Press down slightly with a spatula. Then sprinkle over a tbsp of caster sugar. Then pour another 1 – 2 cups of batter over the first layer to make the second layer. Bake again in the oven for 5 – 10 minutes, or till you can see the top go brown, then take out, pour another tbsp ghee on top, sprinkle the caster sugar and pour batter to make a third layer. Keep making the layers until the batter is all used up. This quantity of batter will make 1 loaf tin, with a little batter left over. I used it up in a ramekin.
After all the layers are cooked, turn the grill part off, and the oven part on again. You may have to let the oven cool a bit. Cover the tin with foil, and then bake the whole bebinca for 5 minutes at 300 F. Take out of the oven, and let it go completely cold. The cake will shrink a bit from the sides. Slide a knife around the edges of the bebinca, and gently invert out on to a plate. Eat as much as you can, and try to avoid the heart attack :-)
Some Cooking Notes:
- Make sure that the oven shelf is around 1/2 length lower than the middle of the oven, especially if your grill gets very hot.
- Don't worry if the layers go quite dark on top, just adds to the taste.
- Add a lot of ghee between layers, I didn't add as much and the layers split a bit.
- Make sure you grease the bottom of the pan very well, otherwise it will stick... not a major hassle, but still...
- Keep a sharp eye on the layers as they cook. I think our ovens are hotter than Indian ones, so it takes less time to cook the layers.
- Don't worry if the layers puff up a bit, they will settle down when the bebinca is baking. Pressing the ghee on top of them will settle them down and the remaining ghee will make sure they stick together.
- Make the first layer a little thicker than the subsequent ones - maybe 2 cups of batter, instead of 1 and increase the cooking time a little bit too. It will look like an omelette, but that's fine :-) The rest of the layers should be thinner, as they will puff up while cooking.
- Put in the fridge to store, it will set the bebinca nice and hard. Take out an hour before serving.
Das, Arti (2011) 'A Culinary History: An interview with Fatima da Silva Gracia' The NavHind Times: http://www.navhindtimes.in/ilive/culinary-history


Yum yum yum Mich! Mouth watering Bebinca is ready! Hats off to you for having made it! 3 hours is a lot of time to slave over in a kitchen and the heat in Mumbai discourages me to even think about it! Thanks for the detailed instructions, you've made it so much more simpler for those who will probably try it for the first time!
ReplyDeleteFantastic. Simply gorgeous photos and the food looks to die for (in my case, given my blood pressure, probably literally, but what a way to go). Lovely stuff.
ReplyDeleteI dreamt of your blog last night! Of taking all the recipes and editing them into a book - I woke up and thought "what the hell am I doing?" - but it shows how good it is!
What a fabulous recipe! wonderful flavors that I would NEVER have been able to put together - I feel like I go on vacation when I visit your blog! thanks so much, I have become a follower!
ReplyDeleteMary
Perfectly made Bebinca!!
ReplyDeletePrathima Rao
Prats Corner
I've read about bebinca before, but I've certainly never had the nerve to try making it. It sounds so good. Maybe I'll try when I'm feeling strong and less fat. Well done for having the courage and stamina.
ReplyDeleteI remeber eating this whilst in Goa years ago and only the other day I was trying to recall the name. thanks for reminding me with your fab cake
ReplyDeleteThis is one of my favorite Goan sweets and I totally agree with you about Tessa's book, I have it too and I can't imagine how I managed before I got it. I've never tried making bebinca at home. I think yours turned out great, irrespective of what anyone else may tell you!
ReplyDeleteWow, I love that layered look to your dessert.
ReplyDeleteNever heard of or seen a dessert like this, but I definitely trust your review... and will now keep my eyes peeled. Like you, I would probably have to taste it first to motivate me into making it. But, I never buy anything I can make; however, I always buy tastes!
ReplyDelete:)
Valerie
Wow! You have opened my eyes to a new dessert. It looks fantastic.
ReplyDeletewow, I am impressed. Often thought of preparing this dish. Have heard loads about it. Will try yours soon. Thanx for the recipe..!
ReplyDeleteBebinca Recipe is a very tasty and delicious. I fond new varieties of Dessert recipes and these are very easy to make st home.
ReplyDeleteLoved the detailing...planning to make it fr new yr...ll giv u feedback fr sure.. :)
ReplyDeleteReply
ReplyDeleteMy name is Violet. I found your beautiful recipe for Bibique. I'm certainly going to make it but not just yet. I will keep you posted when I actually make it. I need to know the author of the book "Tessa's Book" that Trisha 5 June 2011 spoke about. Is it a cook book? Thanks.
That looks amazing, Michelle! In Germany you can get a cake that uses the same idea of baking thin layers as you add them. It's called Baumkuchen (tree cake) since it looks like the layers in a tree's rings. But the German one is much more 'cakey', though tons of work, too. I've never tackled it, but it's on my food bucket list. Kudos to you! From the photo your bebinca looks like it would have that wonderful dense and chewy texture that I love in rice-based Asian cakes, like mochi - the sugar and butter between the layers must make it divine!
ReplyDeleteBelieve me, this is to die for. An old colleague's wife made it for me today and as small an amount as it was i managed to share it with my family. I'd forgotten the name, so thanks for sharing. And if I ever feel energetic, I'll attempt it. I'm sure there won't be any complaints from my family :)
ReplyDeleteMade this last night. didnt have any ghee so i had to use coconut oil instead...and it worked great! I'm goan and my family is very picky...but we loved it!! i had to scale back the recipe a bit as i only had a 400 ml can of coconut milk but it turned out awesome. i got about 6 layers( in a 8 or 9 inch round cake pan). Thanks! this is an easy recipe and i think i will make it again soon!
ReplyDeleteIs there anyone in Edmonton who makes this Bebinca at home and sells it?
ReplyDelete